 Better Homes and Gardens
When the kids ask for a new pet, consider the critter in question’s grass-nibbling potential. Guinea pigs are absolute lawn-trimming machines – if you can control their movement. Build them a pen-on-wheels, move it every few days and they’ll mow your entire lawn. Here’s the hardest part to work out – you’ll need one piggy per 20sq.m of lawn. It’s a weekend gardening chore crossed off your list!
Gather your supplies:
• Frame sides – 90 x 35mm H3 treated pine (2)
• Frame ends – 90 x 35mm H3 treated pine (2)
• Inside frame ends – 90 x 35mm H3 treated pine (2)
• Cover sides – 19mm exterior plywood (2)
• Cover top – 19mm exterior ply n Cover brace – 140 x 45mm H3 treated pine
• Handle arms – 64 x 19mm dressed pine (2)
• Handle – 30mm dia. Tasmanian oak dowel
Note: Lengths of materials will vary according to cage size. Dimensions given are material section sizes only.
You’ll also need:
Power saw; guinea pig cage; power drill; wood screws, various sizes; 100mm galvanised batten screws; bolt cutters; metal file; old mower wheels (4); old mower parts
Here’s how…
Step 1
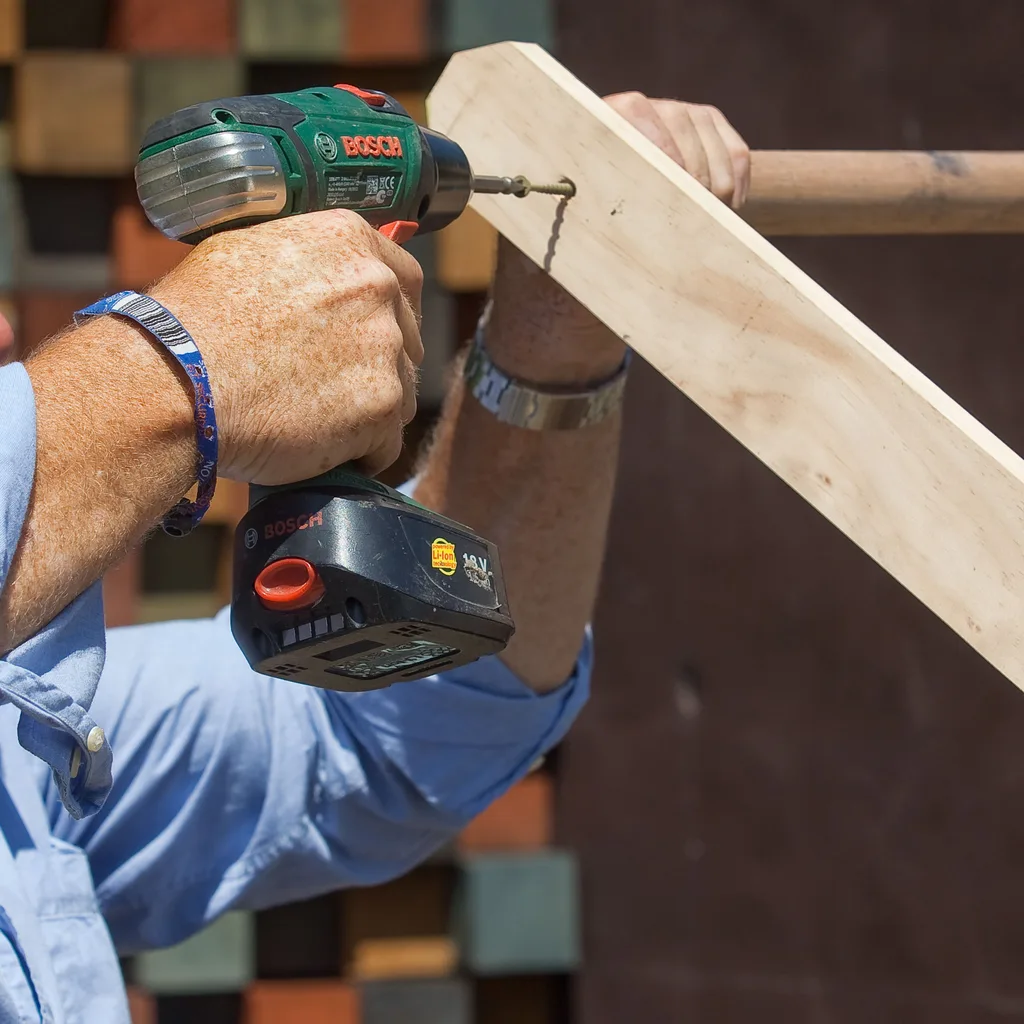
Use power saw to cut frame sides to length of cage, and frame ends to width of cage plus 70mm (the combined thickness of frame sides). Put frame sides and ends against bottom sides of cage so frame ends overlap frame sides. Predrill and screw through ends into sides.
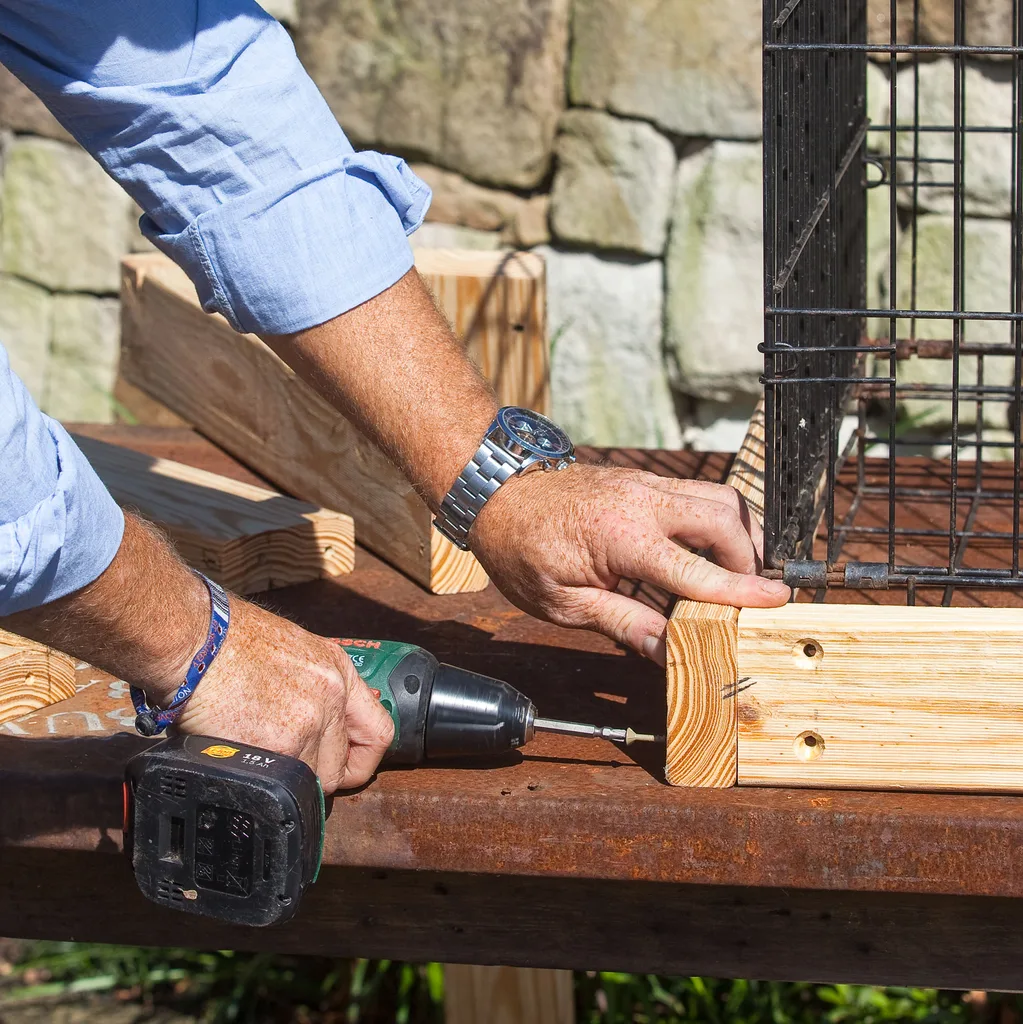
Step 2
Cut inside frame ends to match width of inside the cage, and put in position. Predrill and screw through frame sides into inside frame ends using 100mm batten screws. Repeat for opposite side.
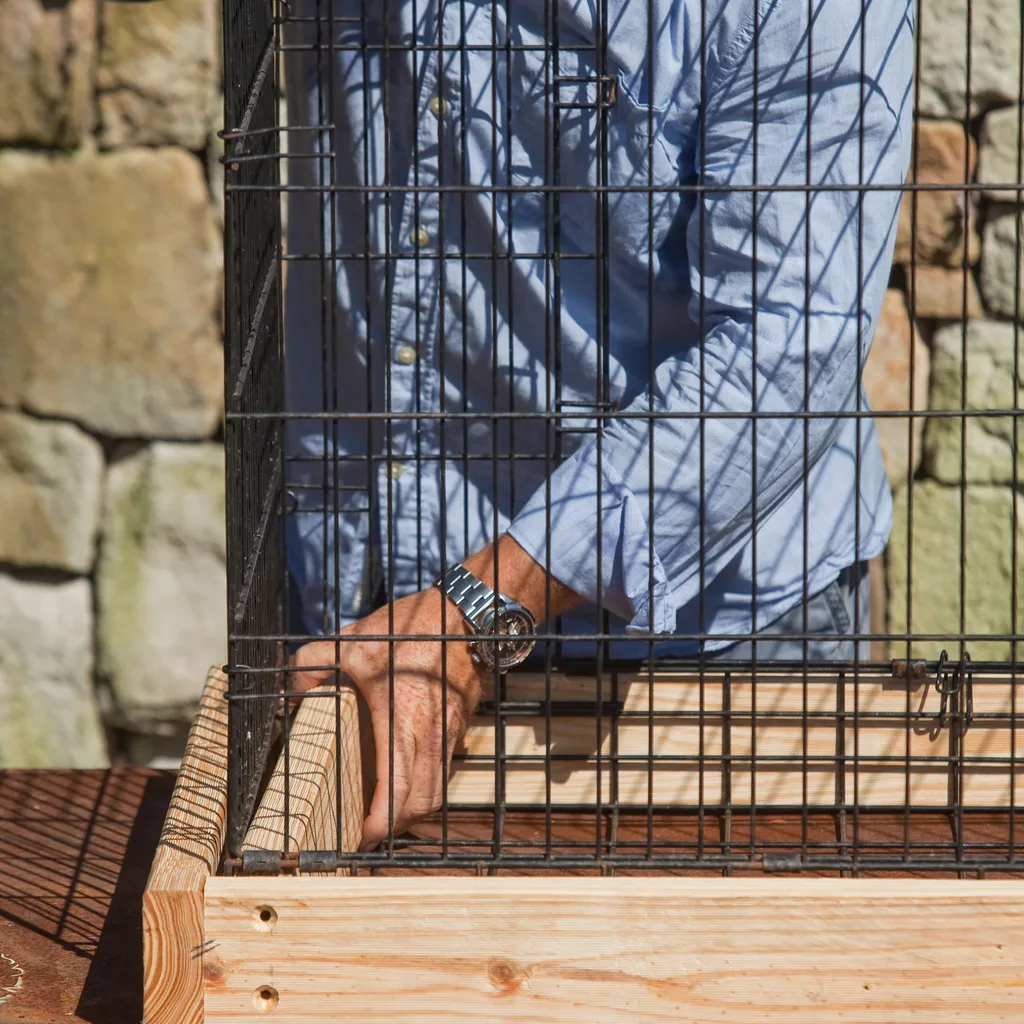
Step 3
Use bolt cutters to cut out cage bottom. Use a metal file to round and remove any sharp edges that could hurt guinea pigs.
Step 4
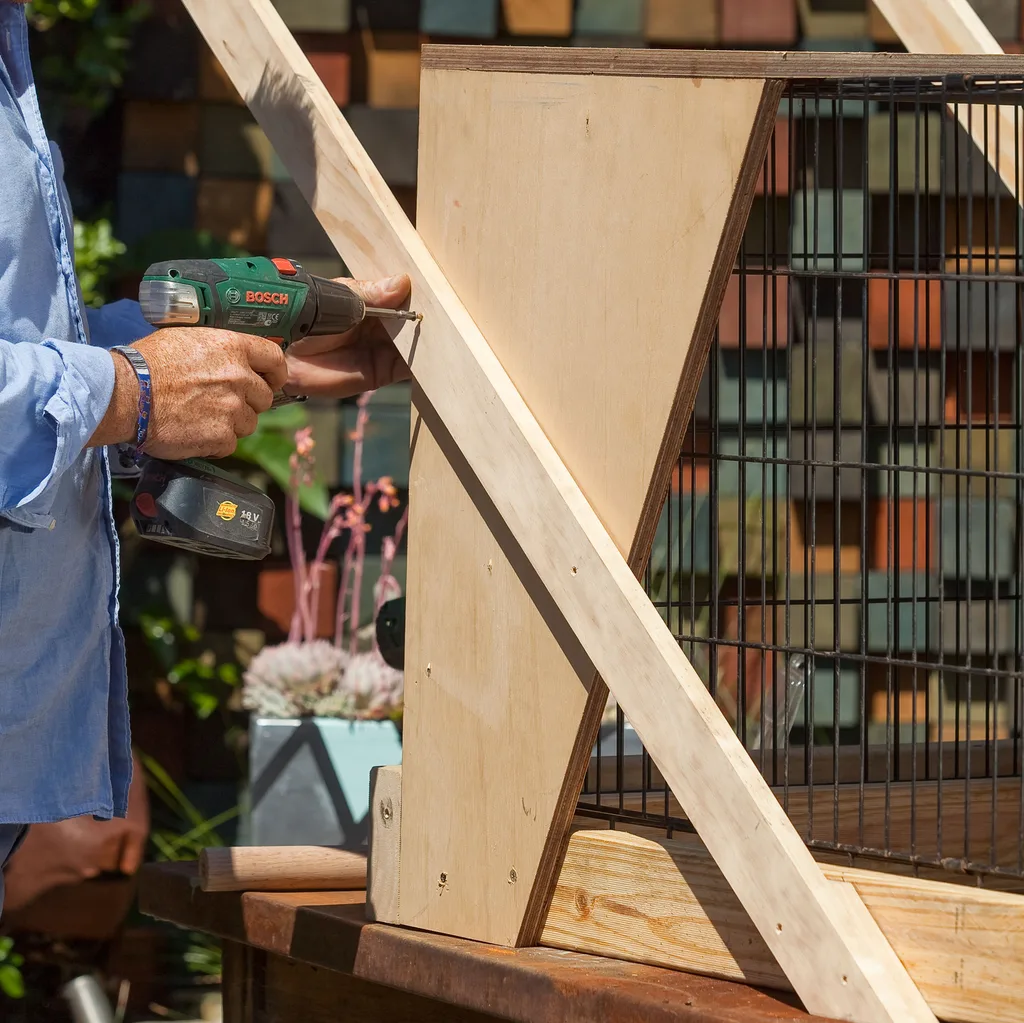
Cut cover side to height of cage. To create angled shape, measuring from 1 long edge, mark points 120mm from edge at bottom and 350mm at top. Draw a straight line between these points and cut along with power saw. Repeat to create other cover side.
Step 5
Cut cover top to width of cage plus 108mm (the combined thickness of all cover and frame sides). Butt top edge of cover side into cover top flush with 1 end. Predrill and screw through cover top into side to secure. Repeat to attach to other cover side.
Step 6
Cut cover brace to width of cover top. Put brace against bottom corner of cover side. Make end of brace flush with outside face of both cover sides and screw through brace into sides.
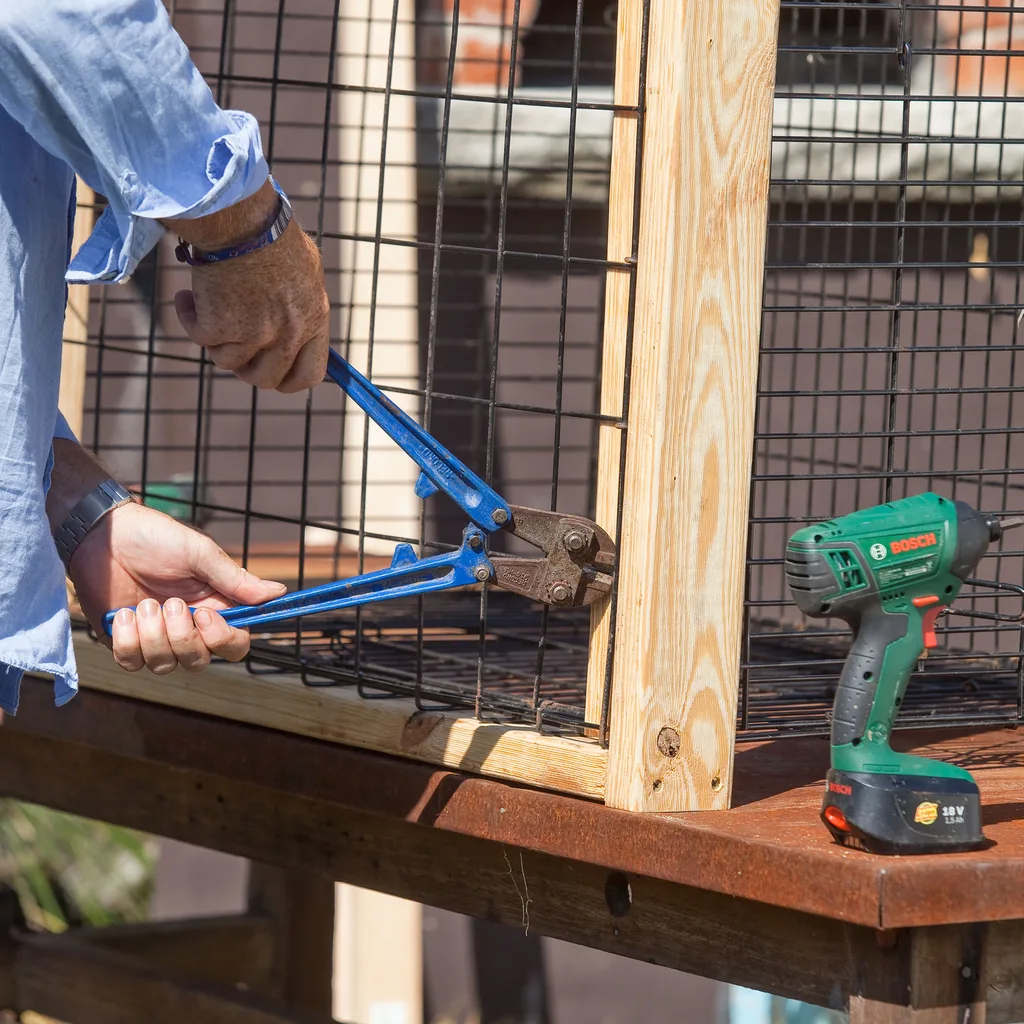
Step 7
Put assembled cover over 1 end of cage so cover brace is hard against frame end. Predrill and screw through cover brace into frame end and through bottom of cover side into frame side.
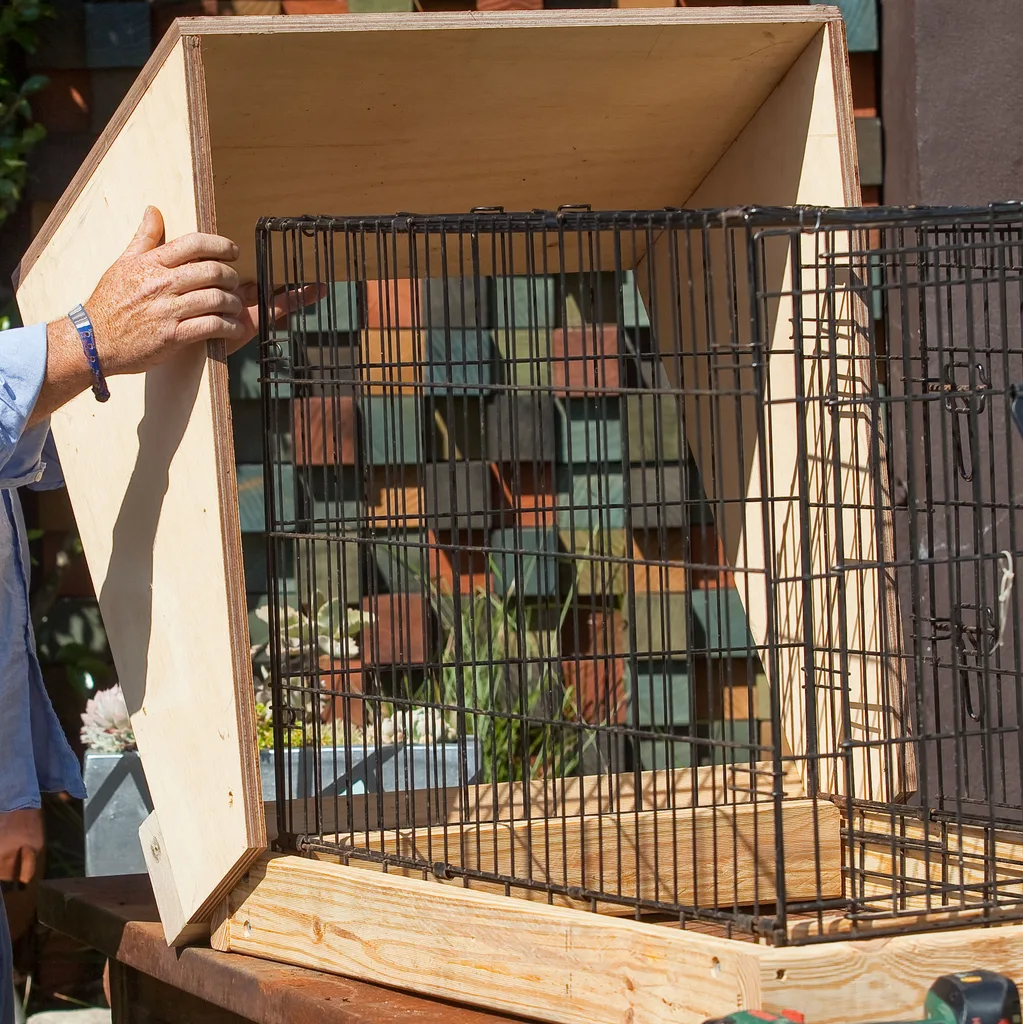
Step 8
Cut corners off 1 handle arm on 1 end to round. With cage on its side, put handle arm on cover side on an angle so uncut end runs past frame side about 2⁄3 of the way along cage and rounded end runs past cover side. It should sit 1m off the ground when cage is upright.
To cut off excess handle arm, mark line of frame side’s bottom edge on handle arm. On cover side, mark where handle arm sits. Remove handle arm and cut along angled line on handle arm. Repeat with other handle arm.
Step 9
Put handle arm back on cover side so it meets marks made in Step 8. Predrill and screw through handle arm into cover side. Use offcut of handle arm to create a block to fill gap between handle arm and frame side. Screw through handle arm and block into frame side. Repeat with other handle arm.
Step 10
Cut handle to width of cover top. Put between handle arms, 100mm from rounded end. Predrill and screw through handle arm into handle to secure. Repeat for other end of handle.
Step 11
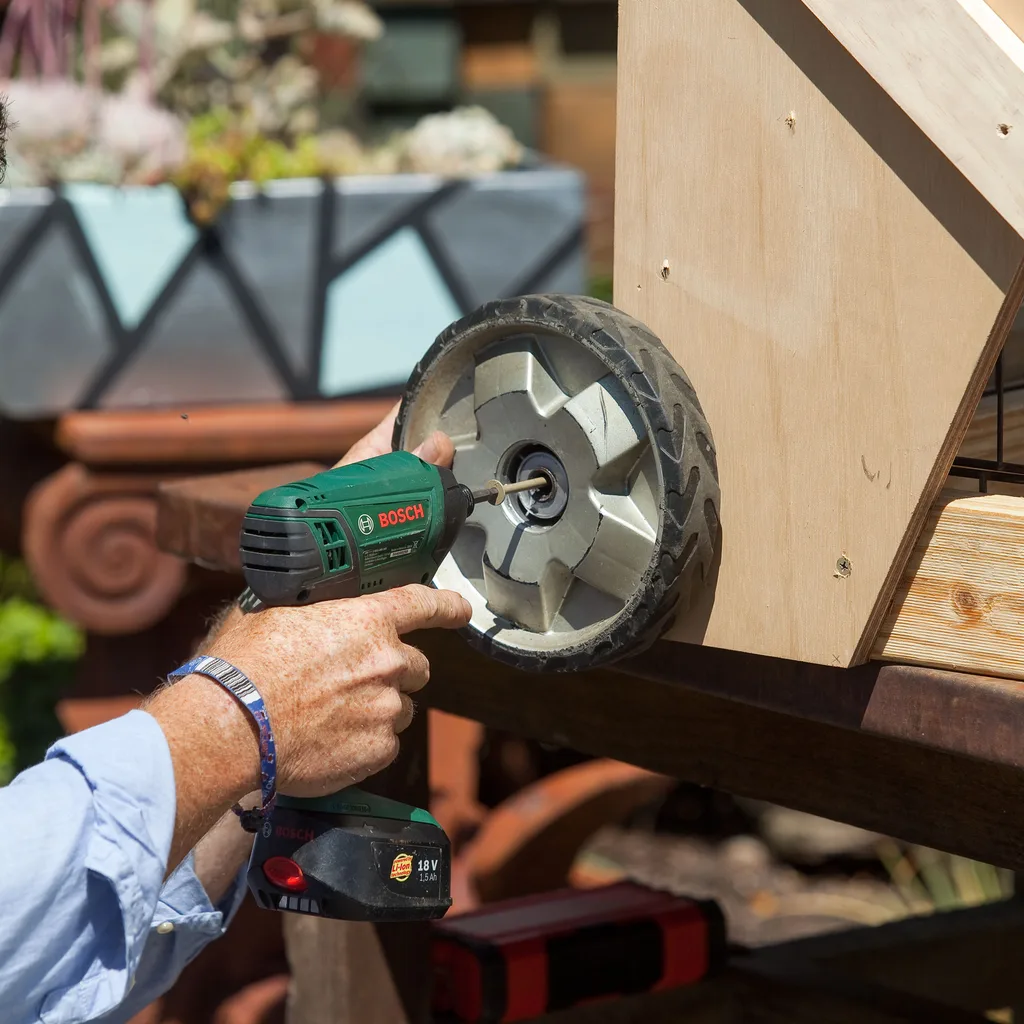
Put mower wheel against cage so bottom of wheel sits 25mm below bottom of frame. Screw through wheel’s axle hole into bottom of frame with 100mm batten screw. Don’t over-tighten screw so wheel can turn. Repeat with remaining wheels.
Step 12
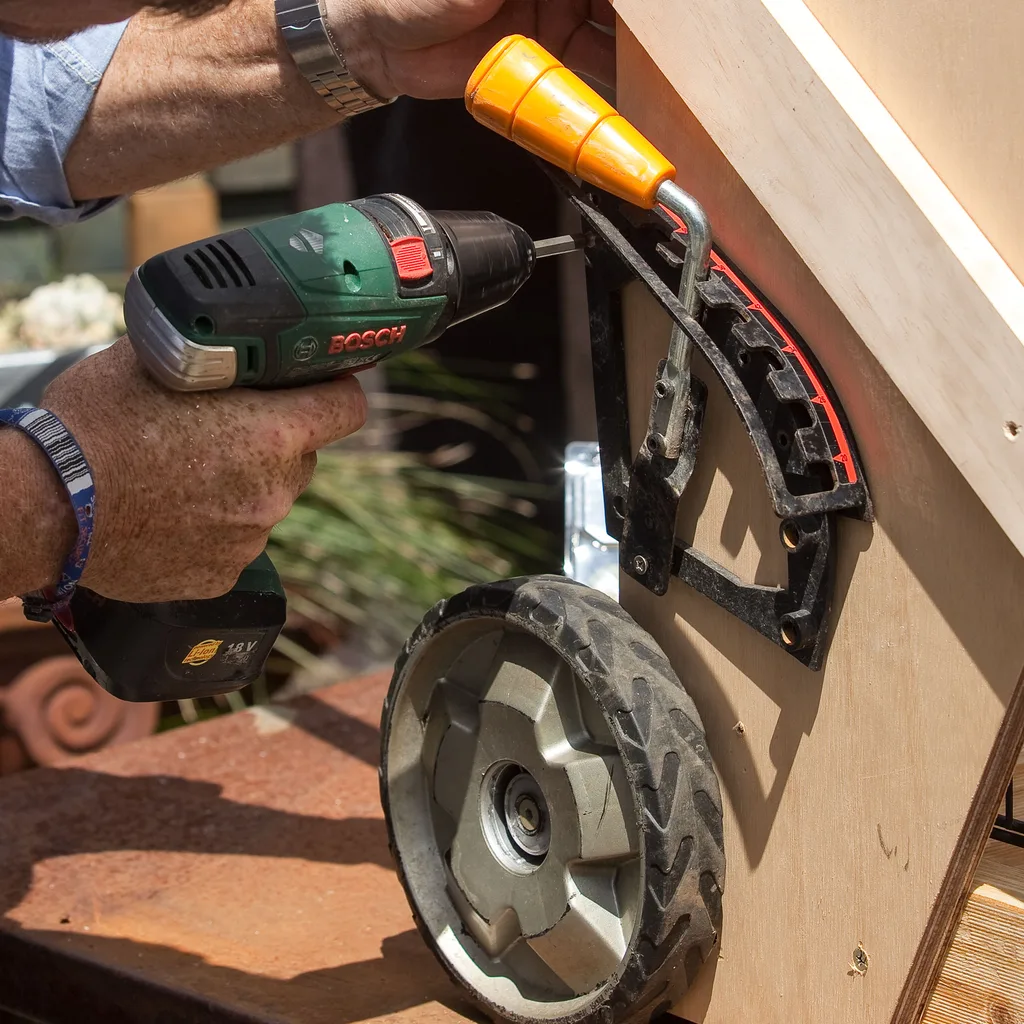
Screw mower parts to cover sides and top to give cage the mower look.
Related stories

Native ad body.

Native ad body.


Native ad body.


