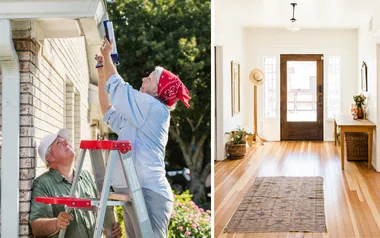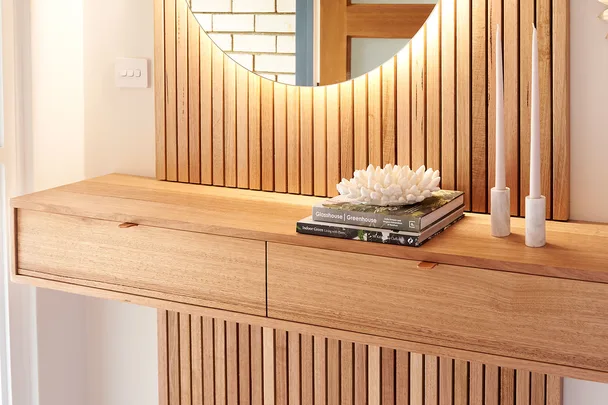
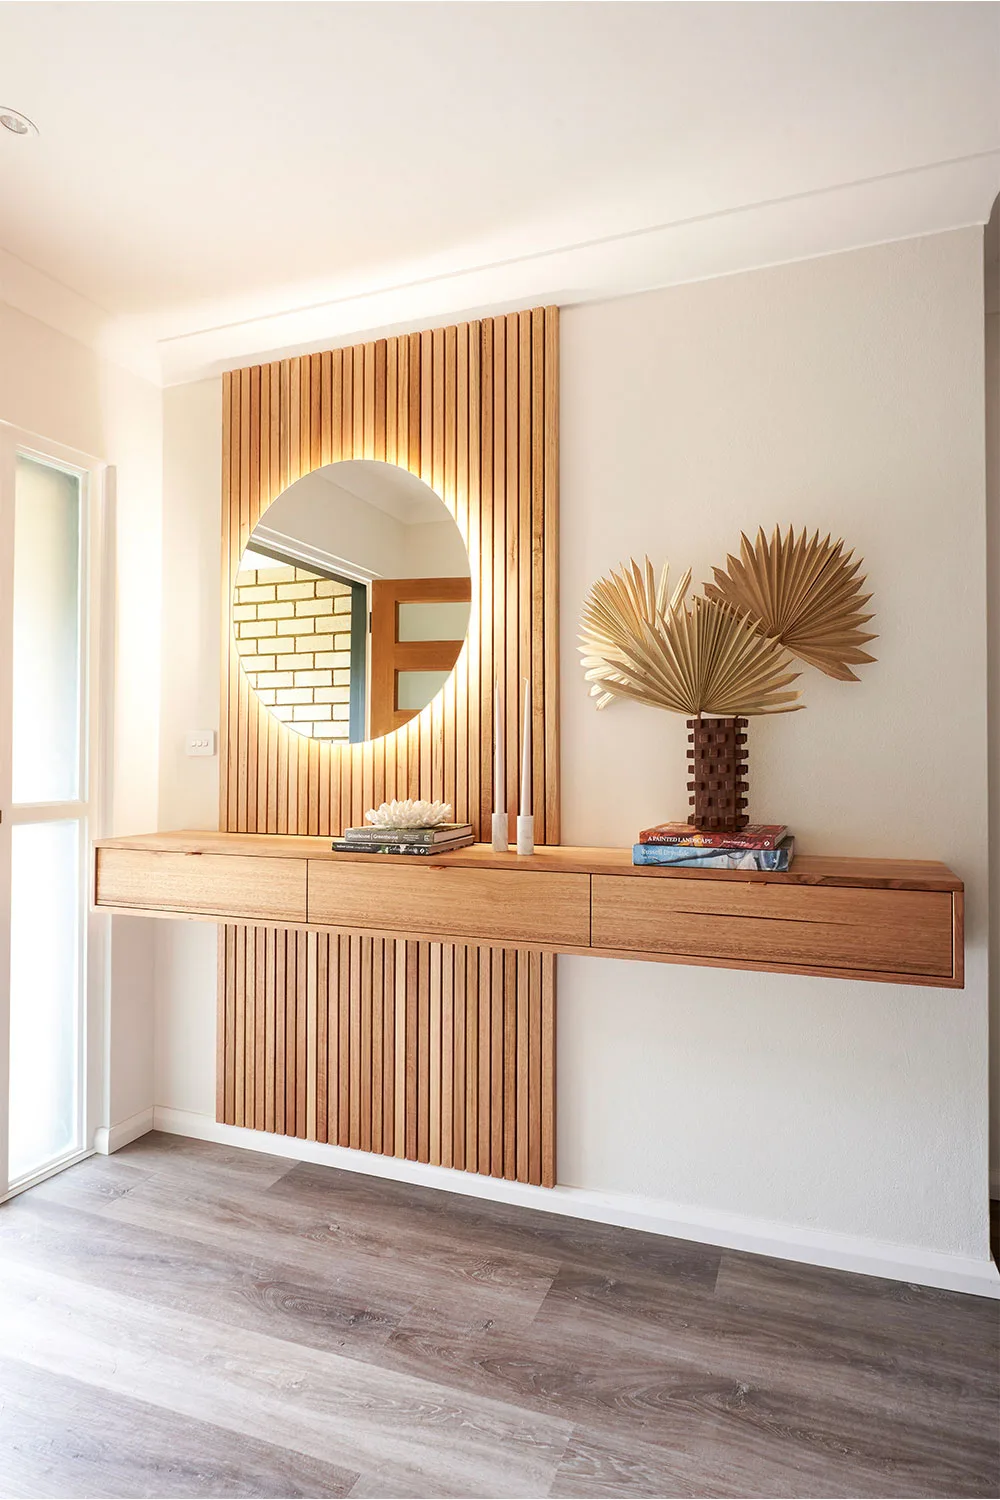
If finding the right furniture combination to jazz up your front entrance is a challenge, skip the search and head to the hardware store. That’s where you can find everything you need to create an eye-catching sideboard and timber wall feature, complete with a backlit mirror.
WATCH: Adam’s DIY guide to a stunning floating sideboard
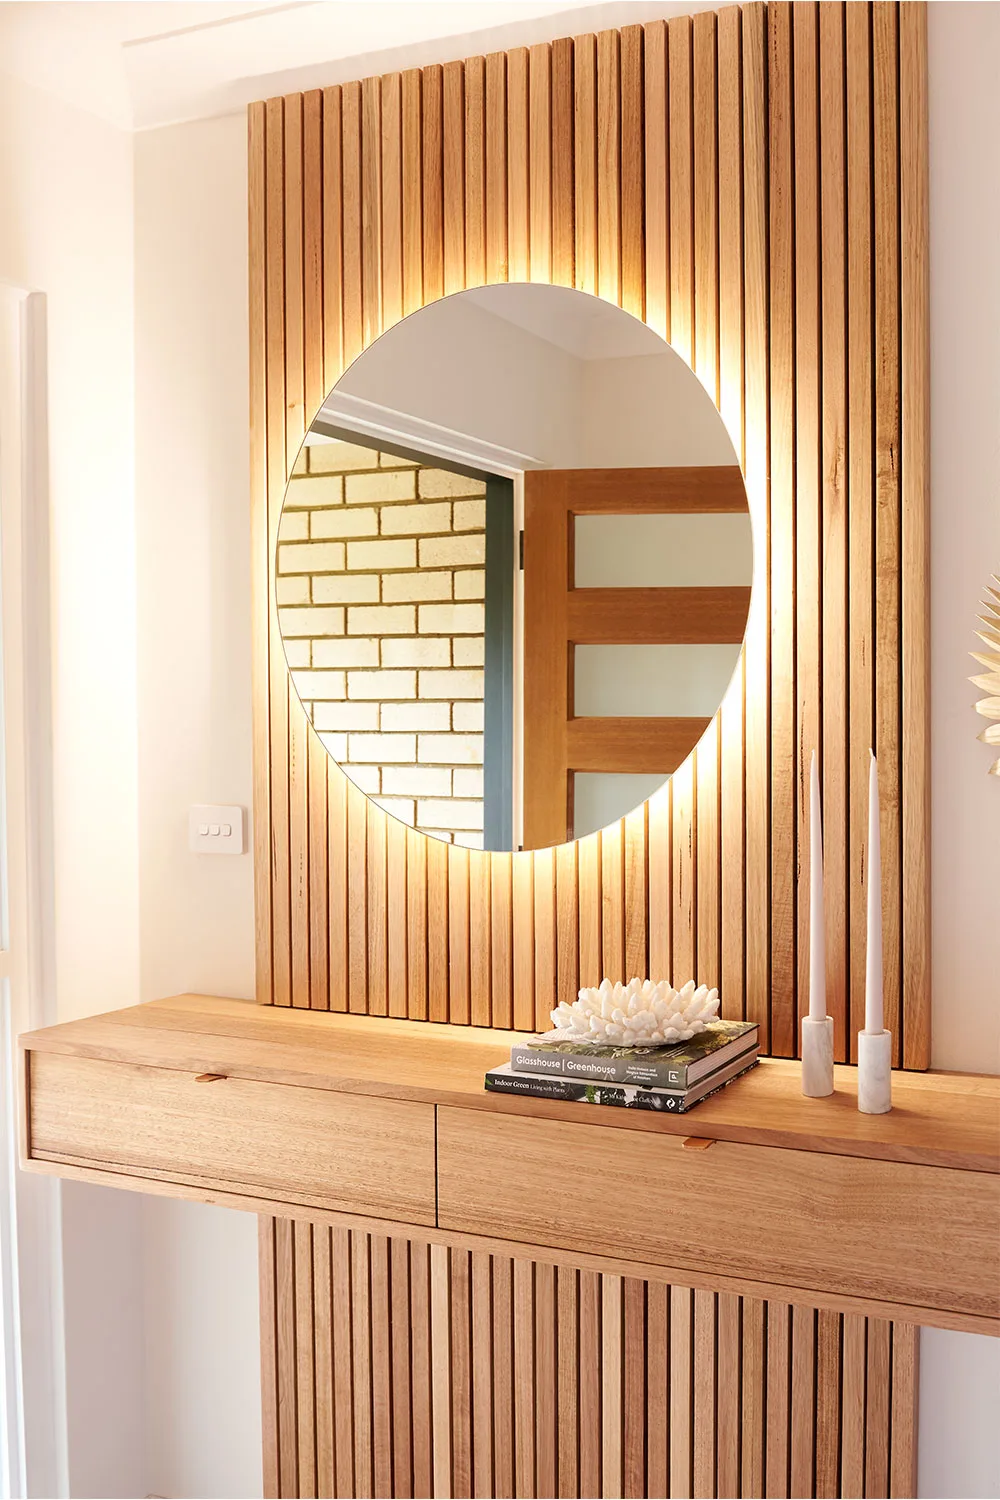
First impressions count
Create an authentic sense of welcome by adding the natural warmth of timber to your entryway. The long sideboard also gives you plenty of room to make a statement with your signature style.
Your step-by-step guide
Gather your supplies
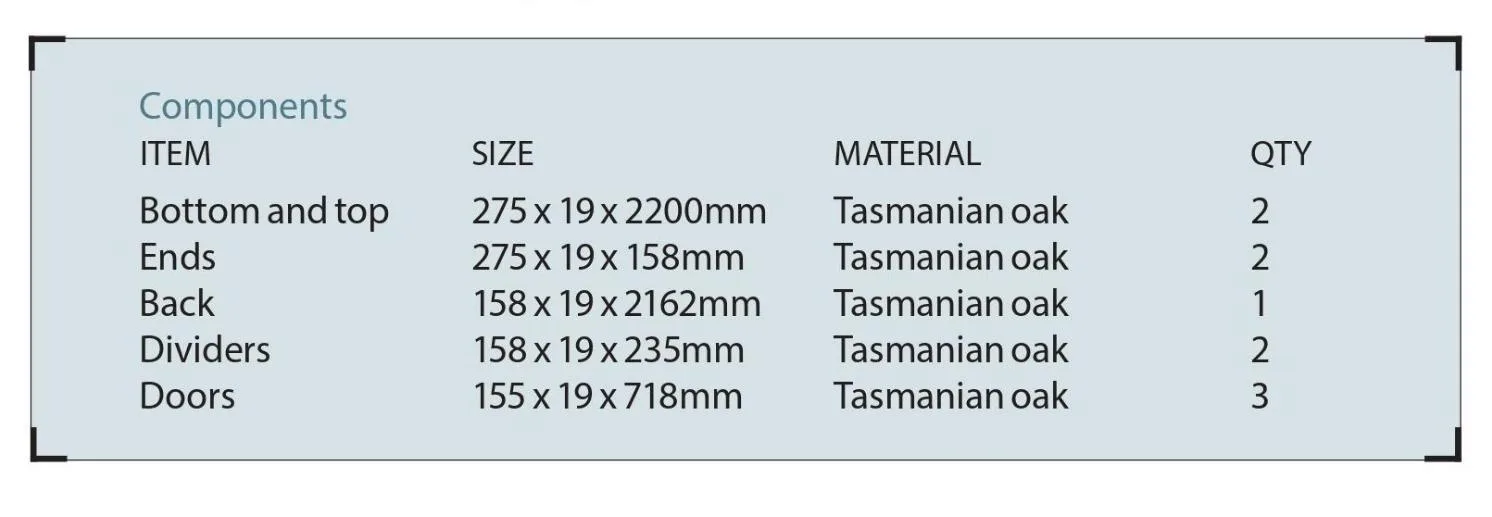
- 185 x 19mm x 2.4m Tasmanian oak (4)
- 90 x 19mm x 2.4m Tasmanian oak (2)
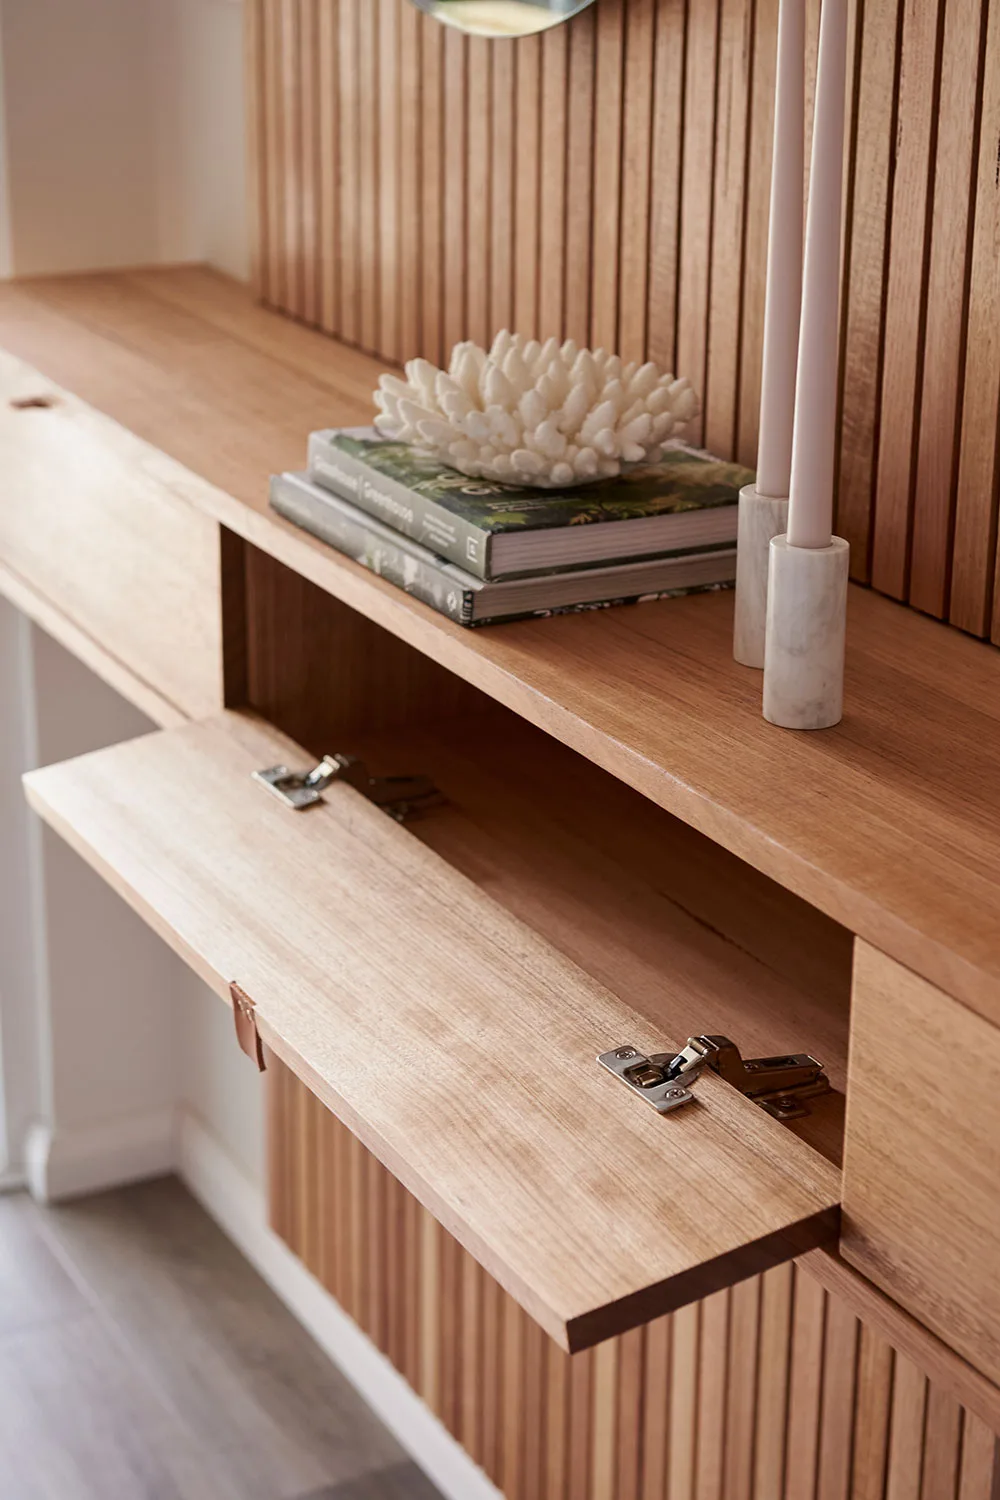
- Concealed inset hinges (6)
- 30mm-wide faux leather strip
You’ll also need
- Measuring tape
- Pencil
- Square
- Clamps
- Drill
- 4 and 8mm drill bits
- Long 4mm drill bit
- Drill collar
- PVA glue
- 100 and 50mm screws
- Mitre saw
- Circular saw with fence attachment
- Sander
- Pocket hole kit
- Fine-toothed handsaw
- Hammer
- Chisel
- 35mm Forstner bit
- Staining pad
- Danish oil
- Screwdrivers
- 18mm brass screws
For you to note
All components are joined using PVA glue, in addition to screws or nails. Remove excess using a damp cloth.
Here’s how
Step 1
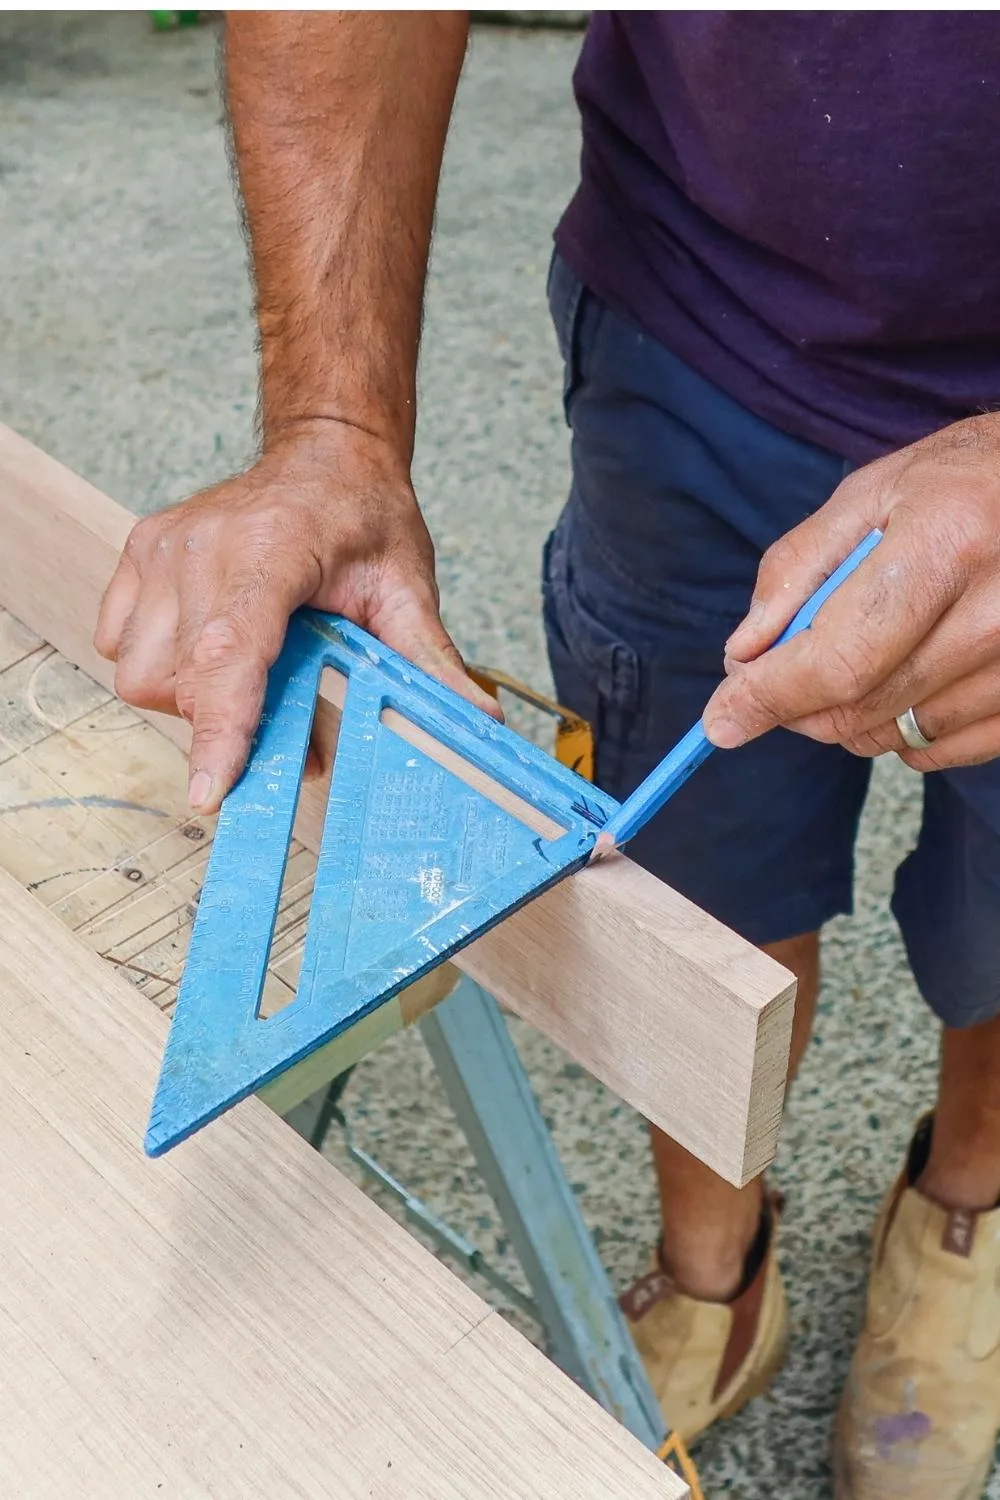
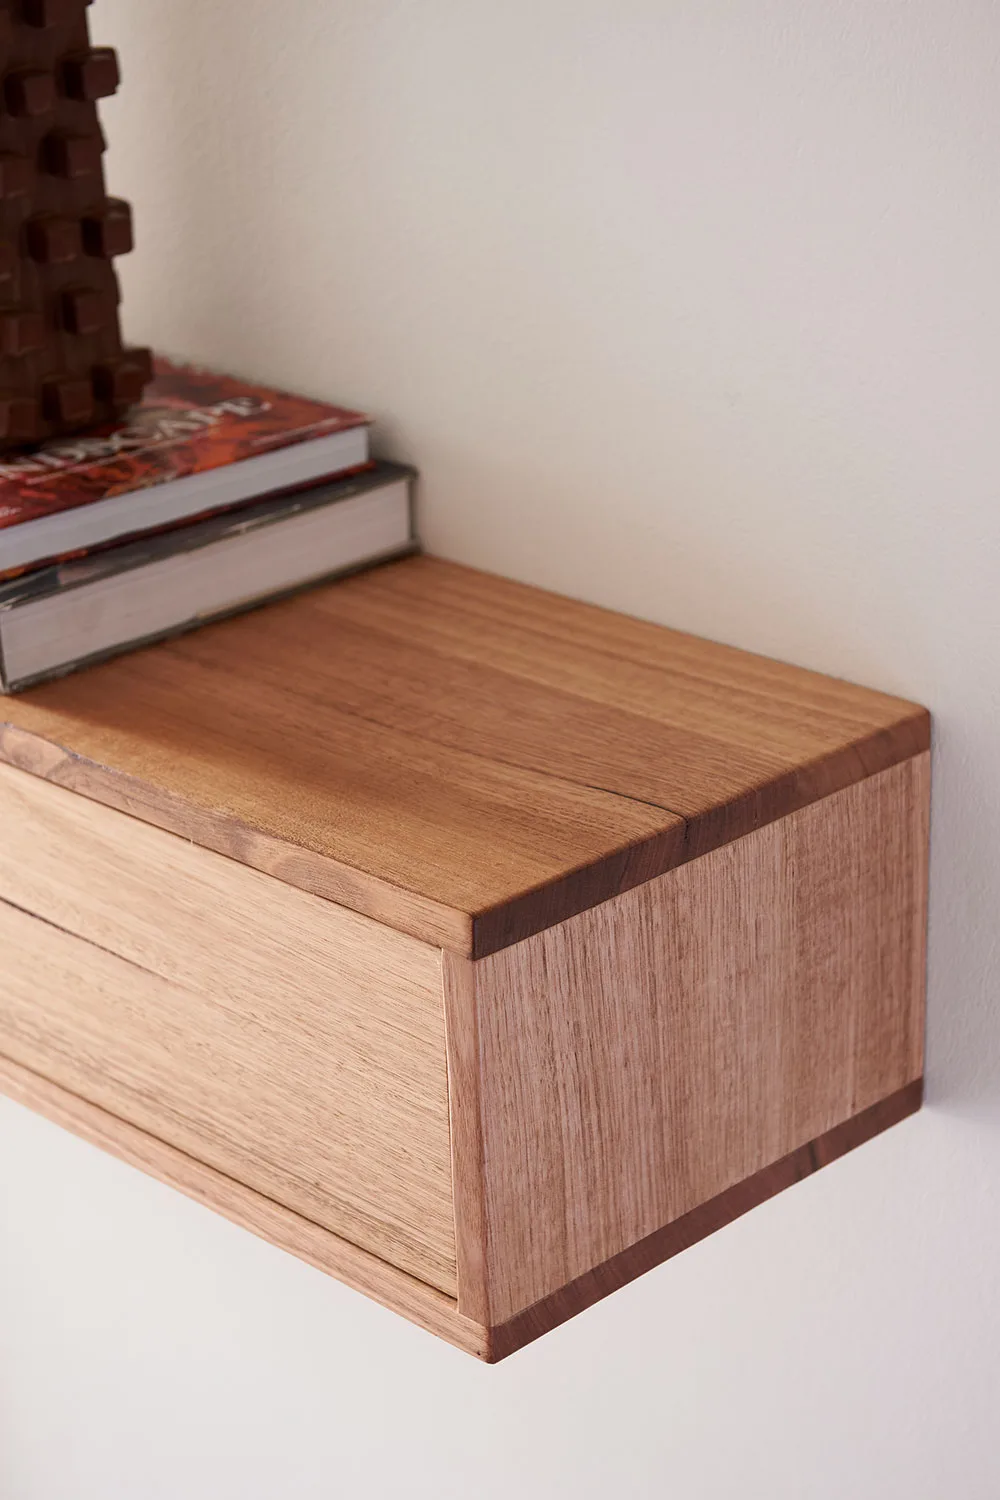
To make wide timbers for top, bottom and ends, you’ll need to join 2 lengths each of 185 and 90mm wide oak together using screws. To start, lay full length boards together and mark where you will cut to create components. On these, mark for screws across where boards meet. For top and bottom, they are 60mm from each cut line, in the middle, then halfway between these points. On ends they are 40mm from cutting lines. Use a square to transfer marks to outside long edge of narrow boards.
Step 2
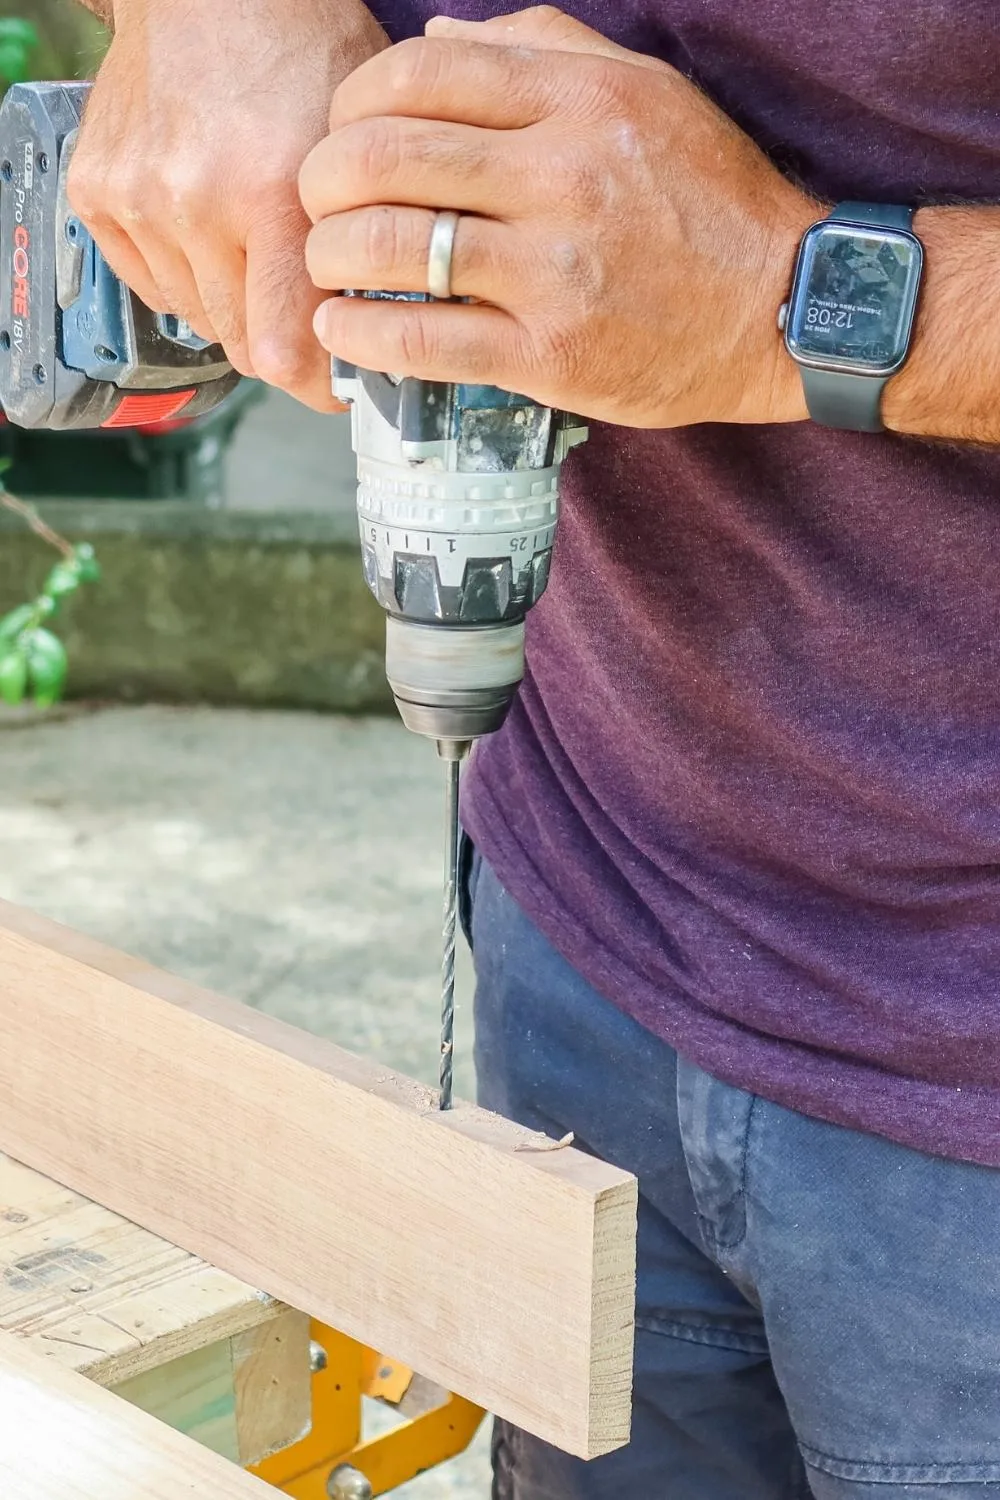
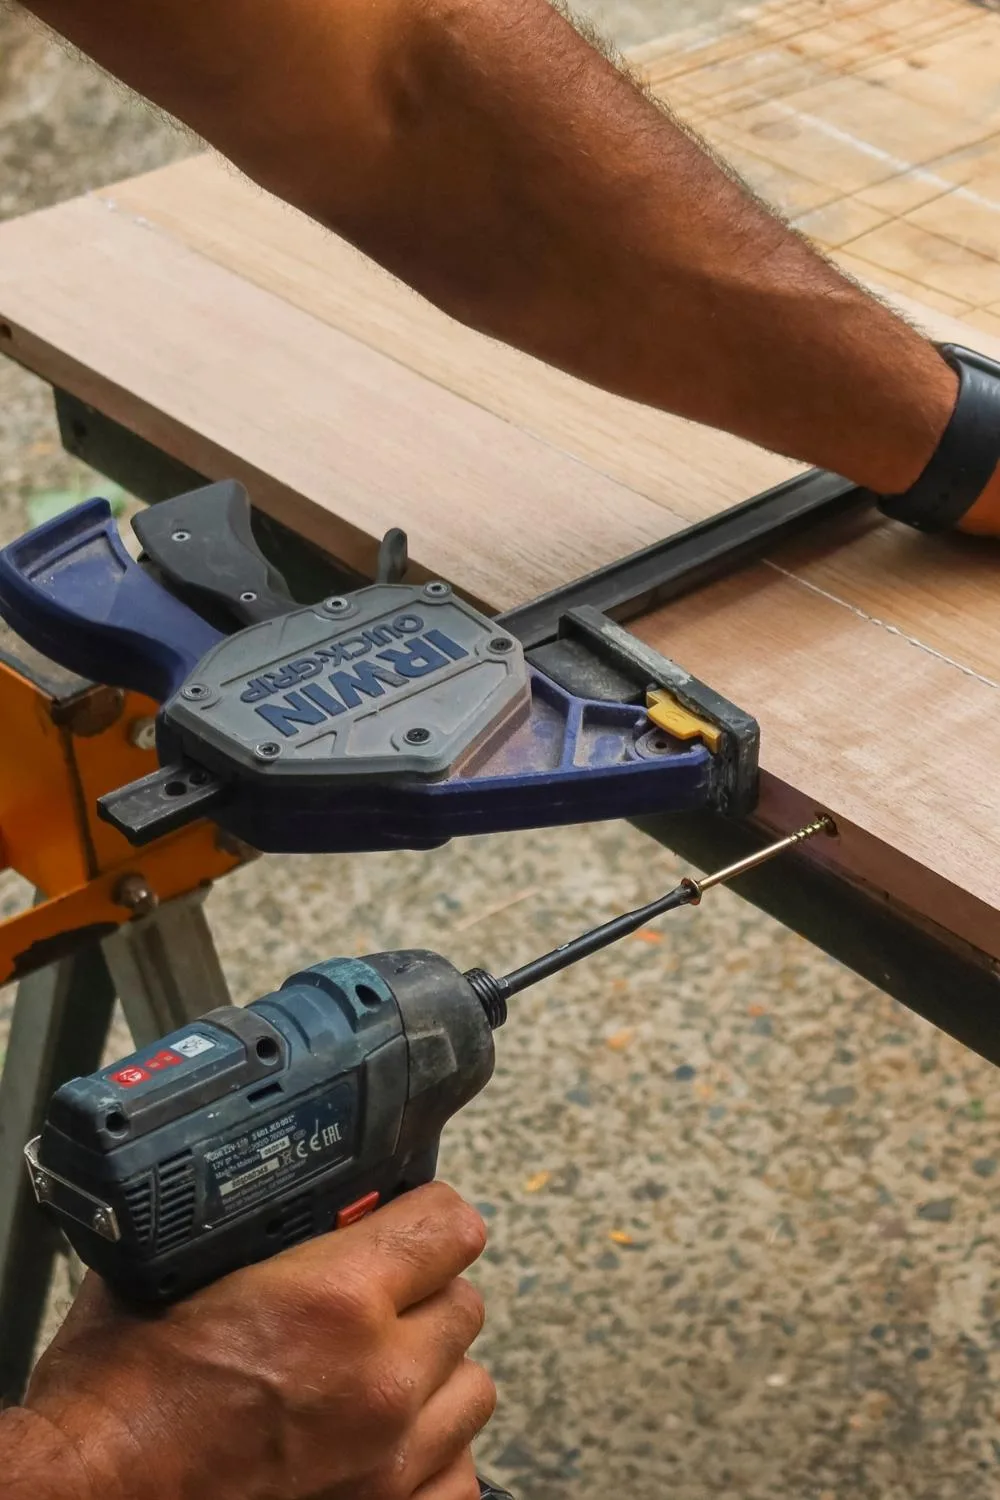
Clamp narrow boards to your bench on the edge. At each marked point, drill through centre of the edge with a 4mm drill bit, as deep as you can. Try to keep the bit as vertical as you can. Switch to long 4mm bit and drill even further into boards.
Step 3
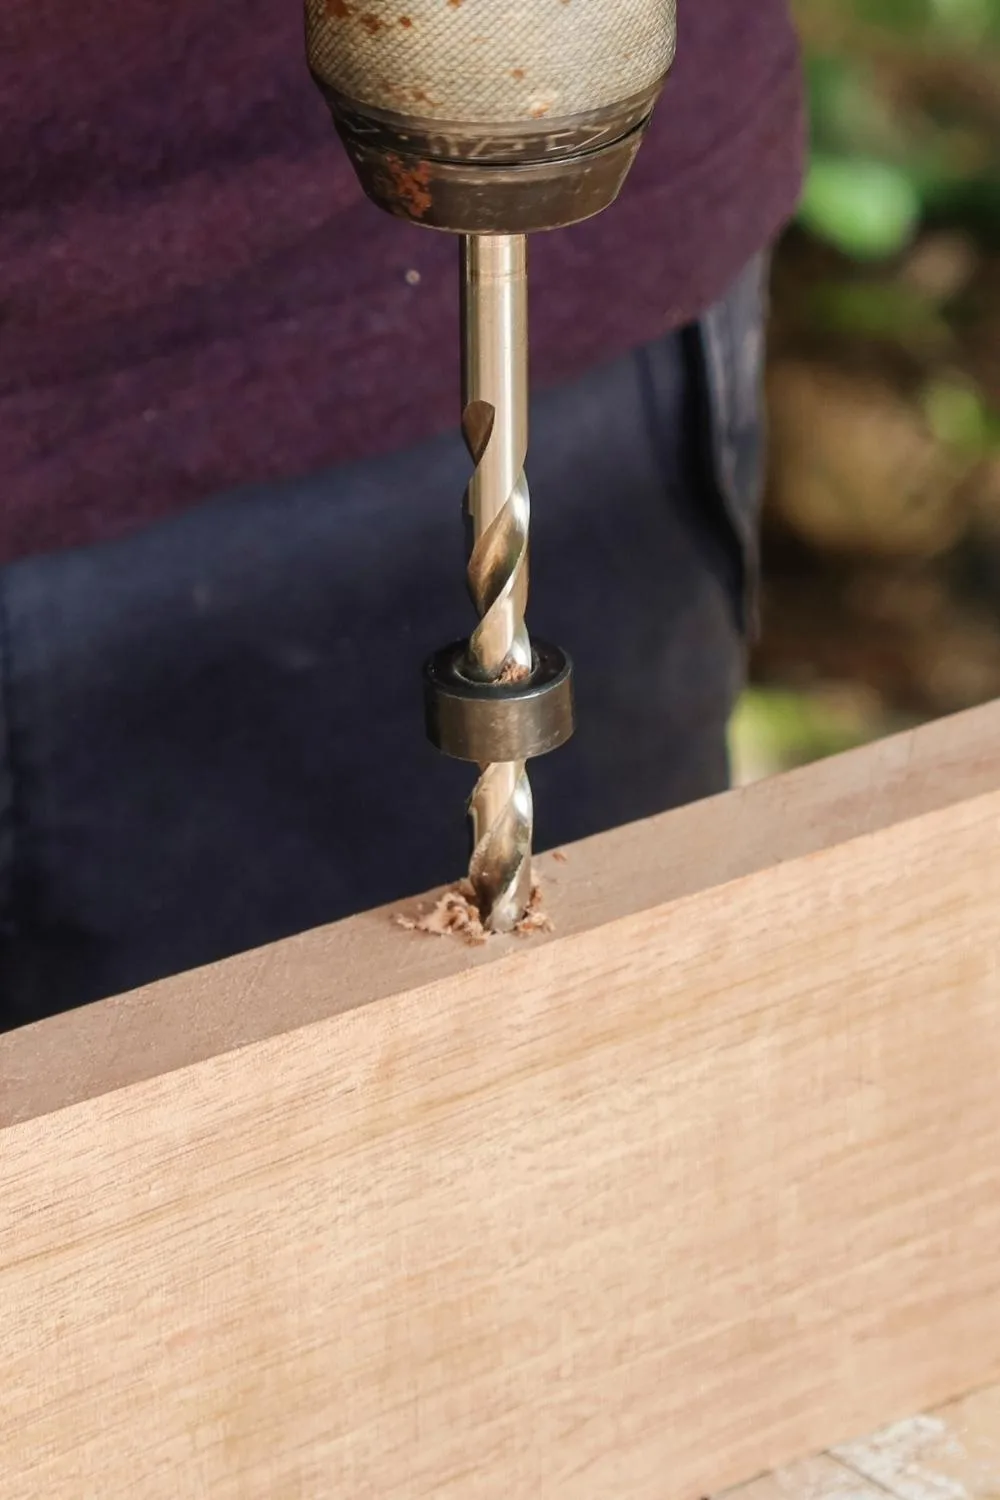
Attach drill collar to 8mm drill bit 30mm from the end. Use this at each drilled hole to countersink edge for screws.
Step 4
Spread glue along edges of 90mm timber lengths that haven’t been countersunk and bring together with wider boards. Clamp, then predrill through holes already drilled using long bit. Screw together using 100mm screws. Leave glue to dry.
Step 5
Use mitre saw to cut joined boards into top, bottom and ends. Also cut remaining lengths of 185mm oak to width using circular saw with fence attachment, and then to length for back, doors and dividers.
Step 6
Use sander to smooth faces and cut edges of all components.
Step 7
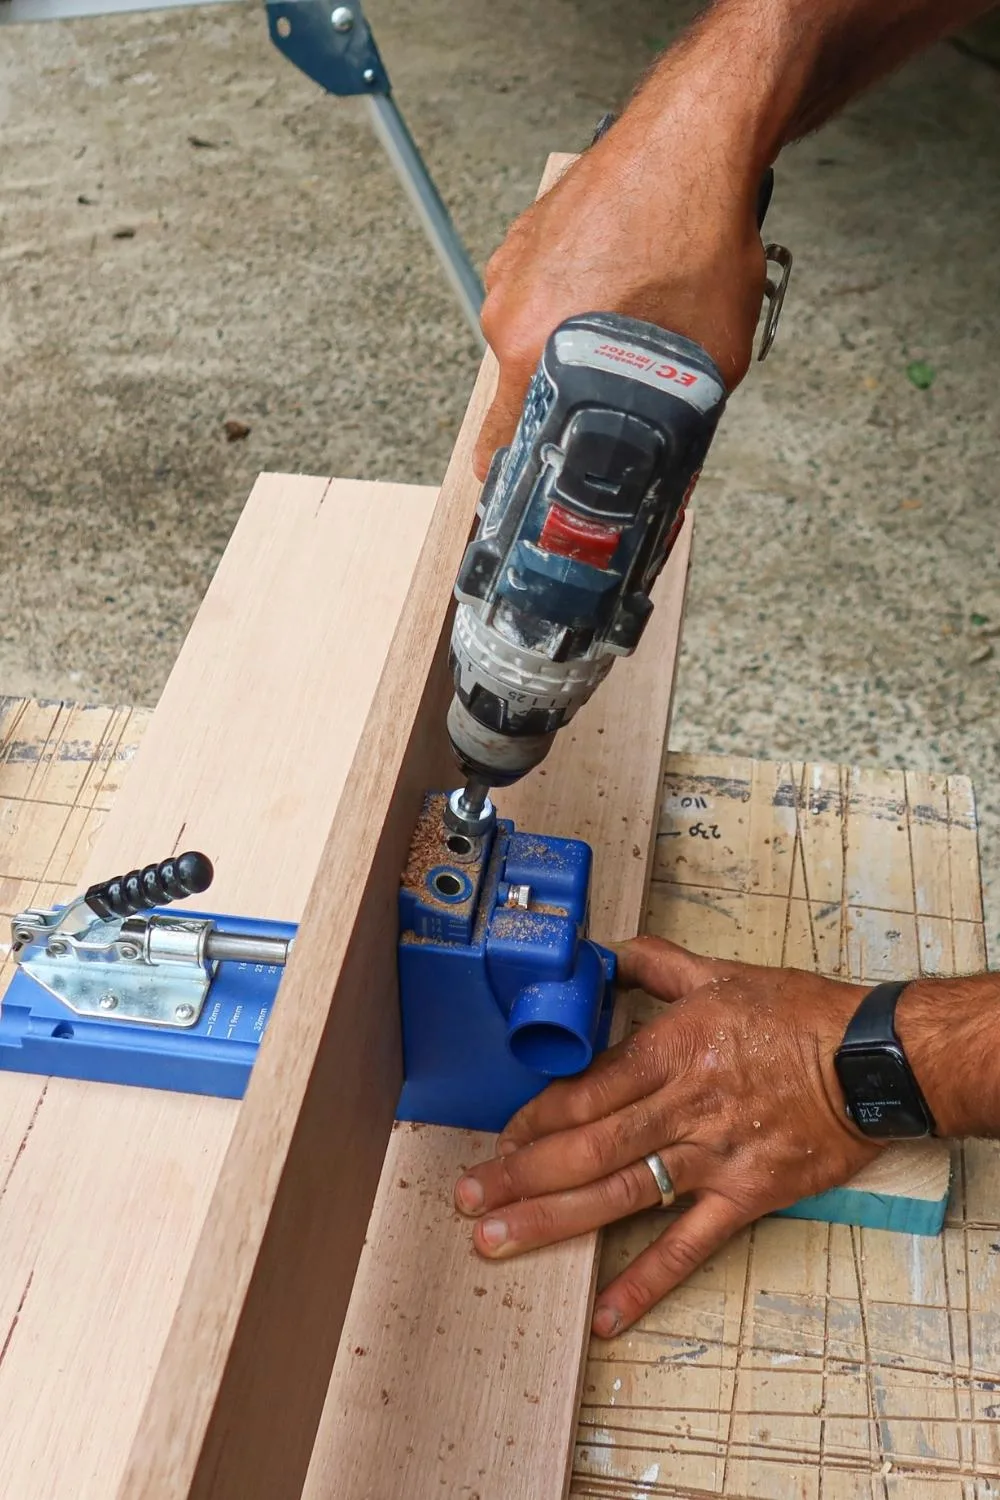
Use square to mark back for pocket holes. Make marks 100mm from each end and 400mm apart. Use pocket hole jig and drill bit from kit to drill pocket holes for screws along both long edges of back and in the centre of each end.
Step 8

Butt back into ends and screw through pocket holes using screws from the jig kit.
Step 9

Sit back and end assembly on bottom and screw together through pocket holes in the back.
Step 10
Attach dividers to unit so they’re evenly spaced, predrilling then screwing through the back and bottom using 50mm screws.
Step 11
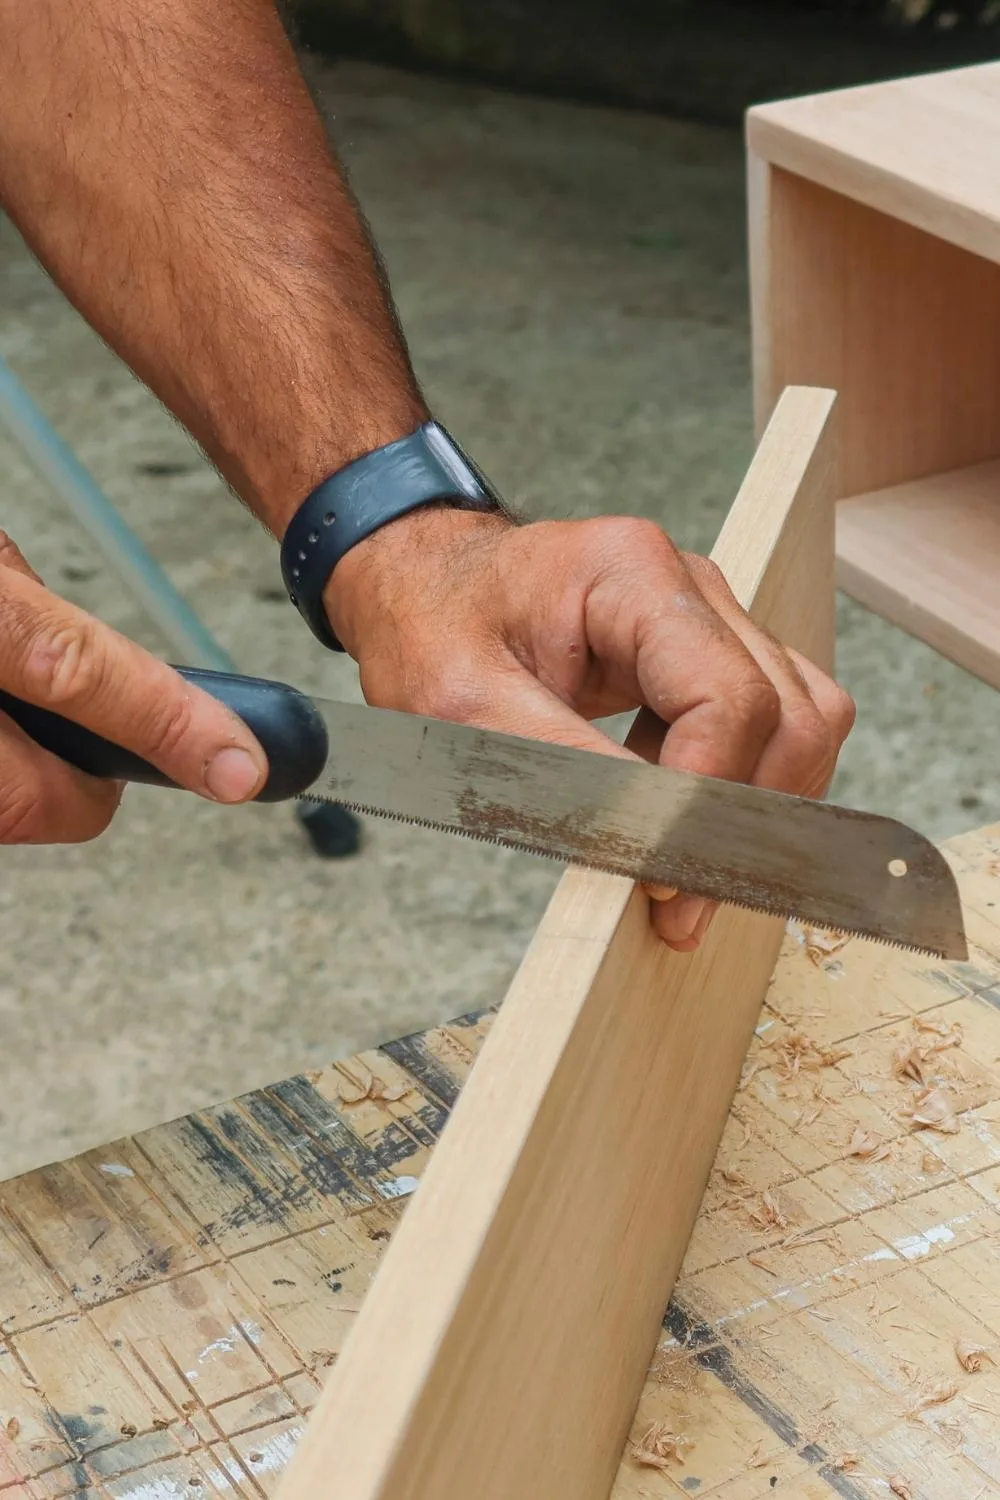
Mark top edge of doors for a 30mm wide and 4mm deep housing for leather handles. Cut along outside edges of housing using fine-toothed handsaw.
Step 12
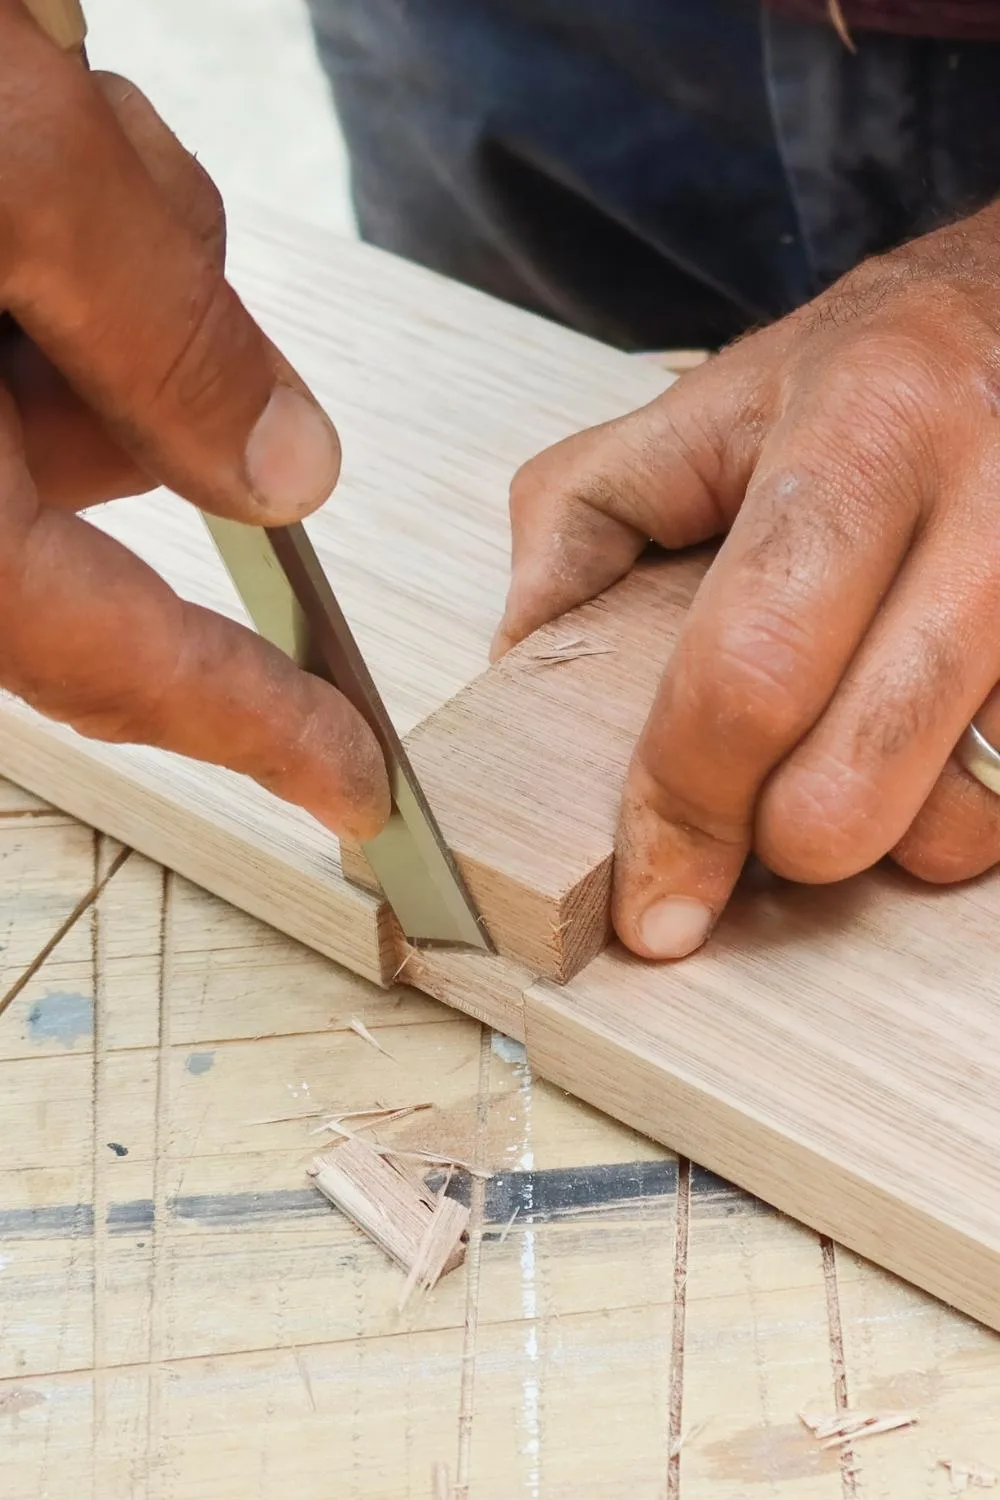
Use a hammer and sharp chisel to cut timber along bottom of housing on both sides of the doors, then use chisel to remove all waste timber. Use a block as a guide for the chisel so the bottom of the housing is flat.
Step 13

Mark doors for hinge holes. Make hinges 135mm from each end and 20mm from one long edge. Drill holes using a 35mm Forstner bit.
Step 14
Hold each door in position against the edge of the bottom so gaps to ends and between them are equal. Mark centre of hinge holes on the bottom, then centre the hinge plates on this mark with screws 60mm from the edge. Predrill through them for screws. This is easier to do now rather than waiting until assembly.
Step 15
Attach top to the unit, screwing through the pocket holes in the back. Clamp front corners to hold in position until glue dries.
Step 16
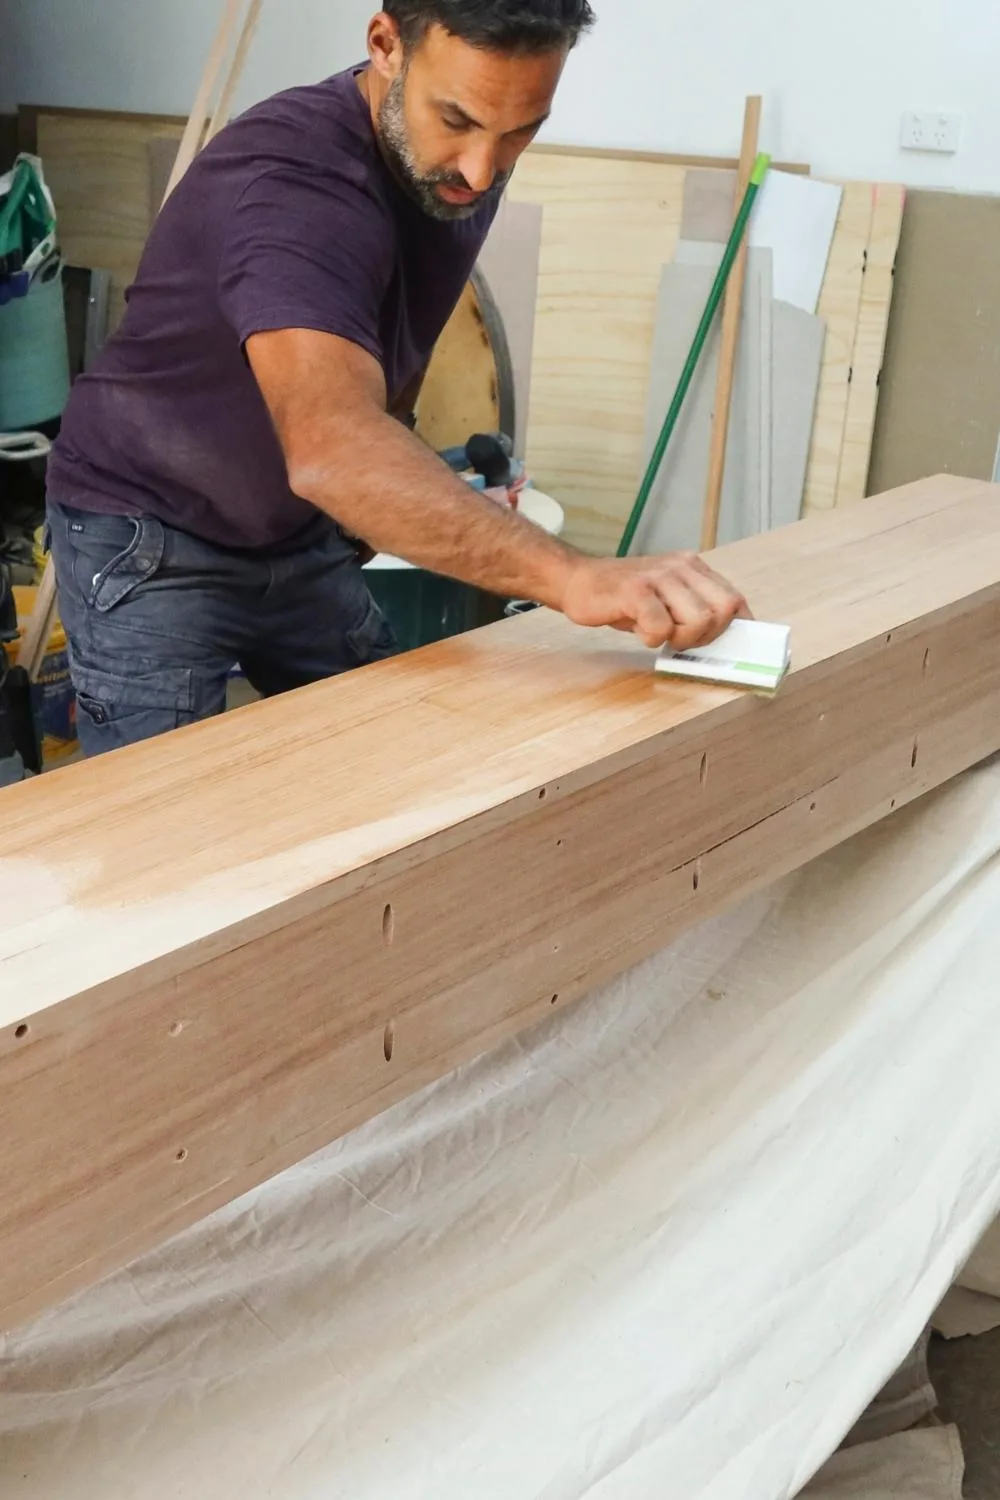
Use a staining pad to apply 2 coats of Danish oil to the entire unit and the doors. Leave to dry and sand lightly after first coat.
Step 17
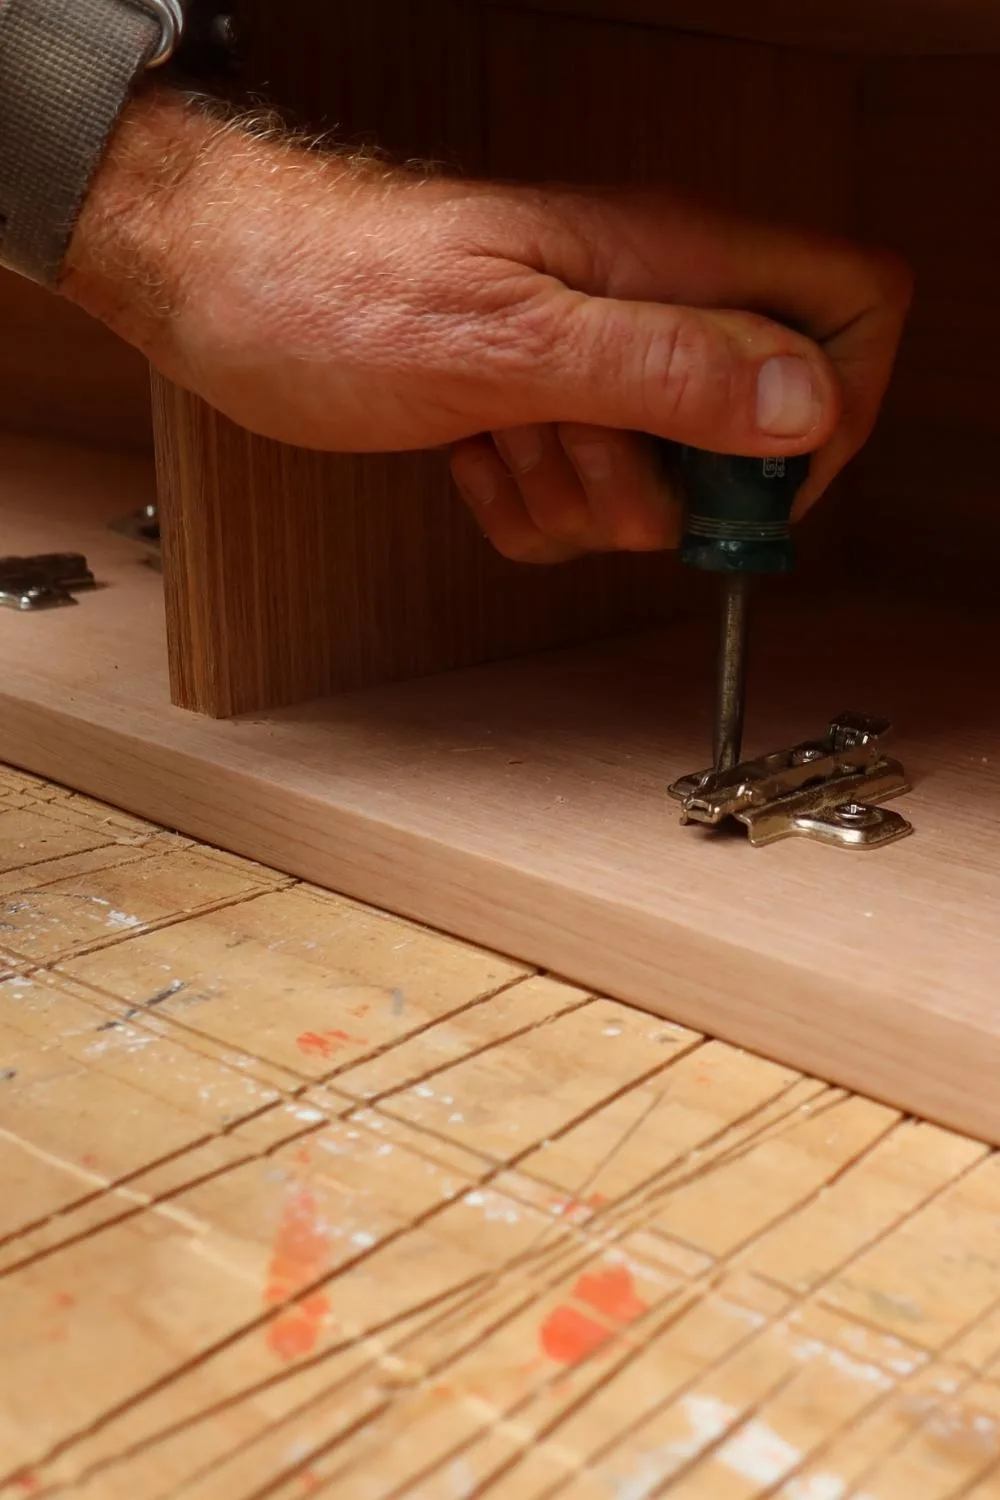
Use short screwdriver to attach hinge blocks to unit. Screw hinges to doors and install on unit.
Step 18
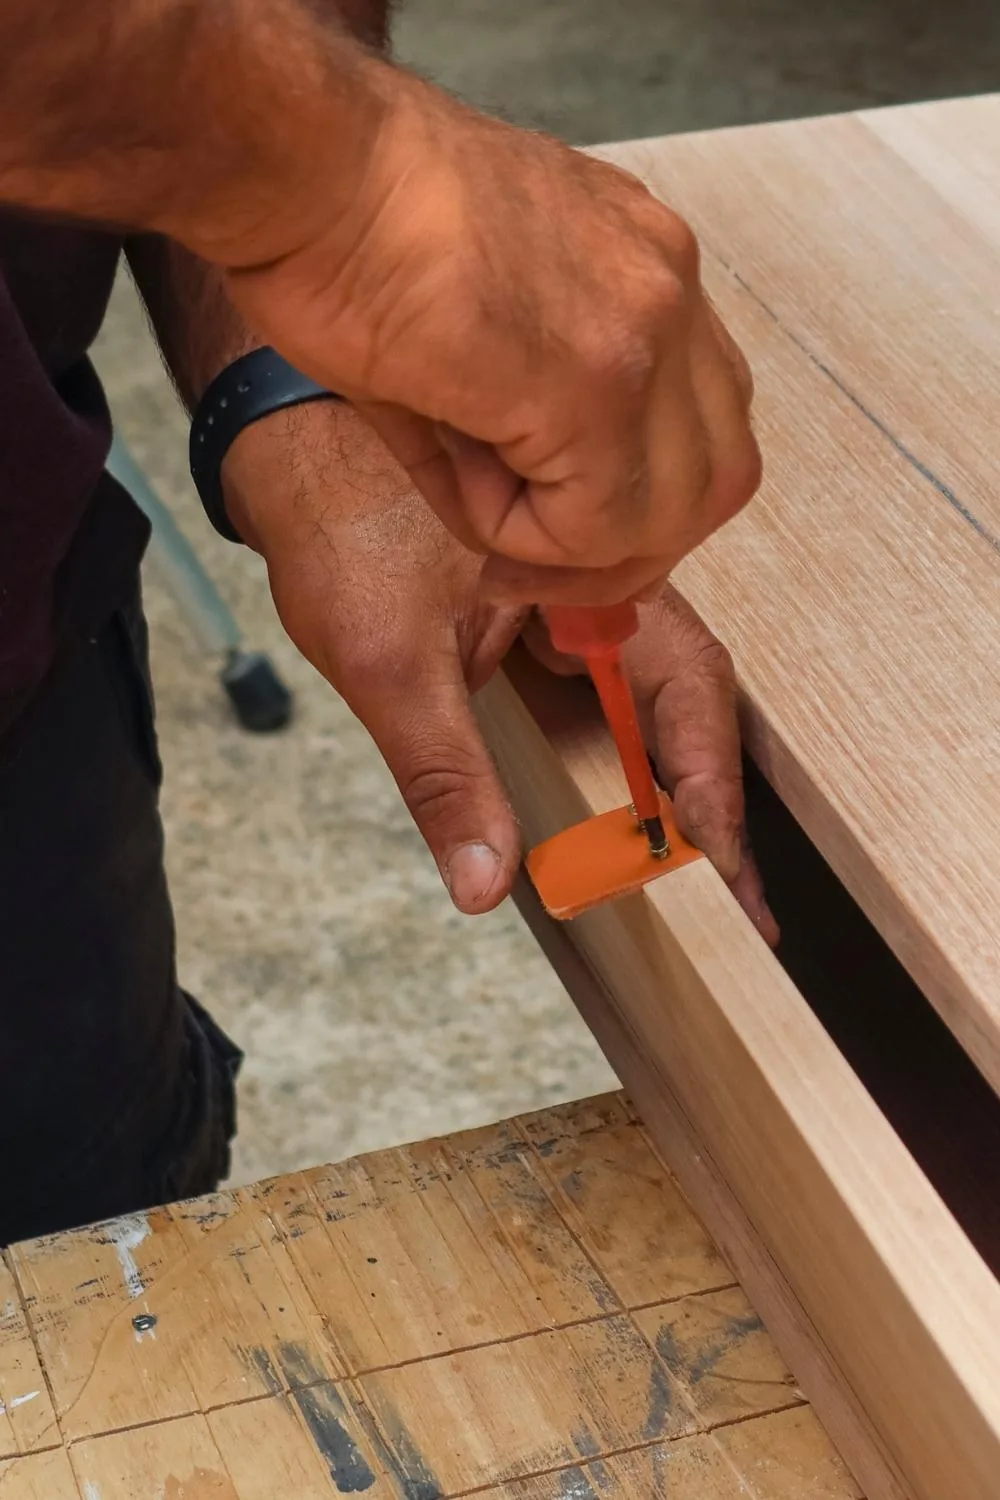
Cut 40mm long strips of leather. Drill holes in leather and into doors. Screw leather to doors using 18mm brass screws.
Step 19
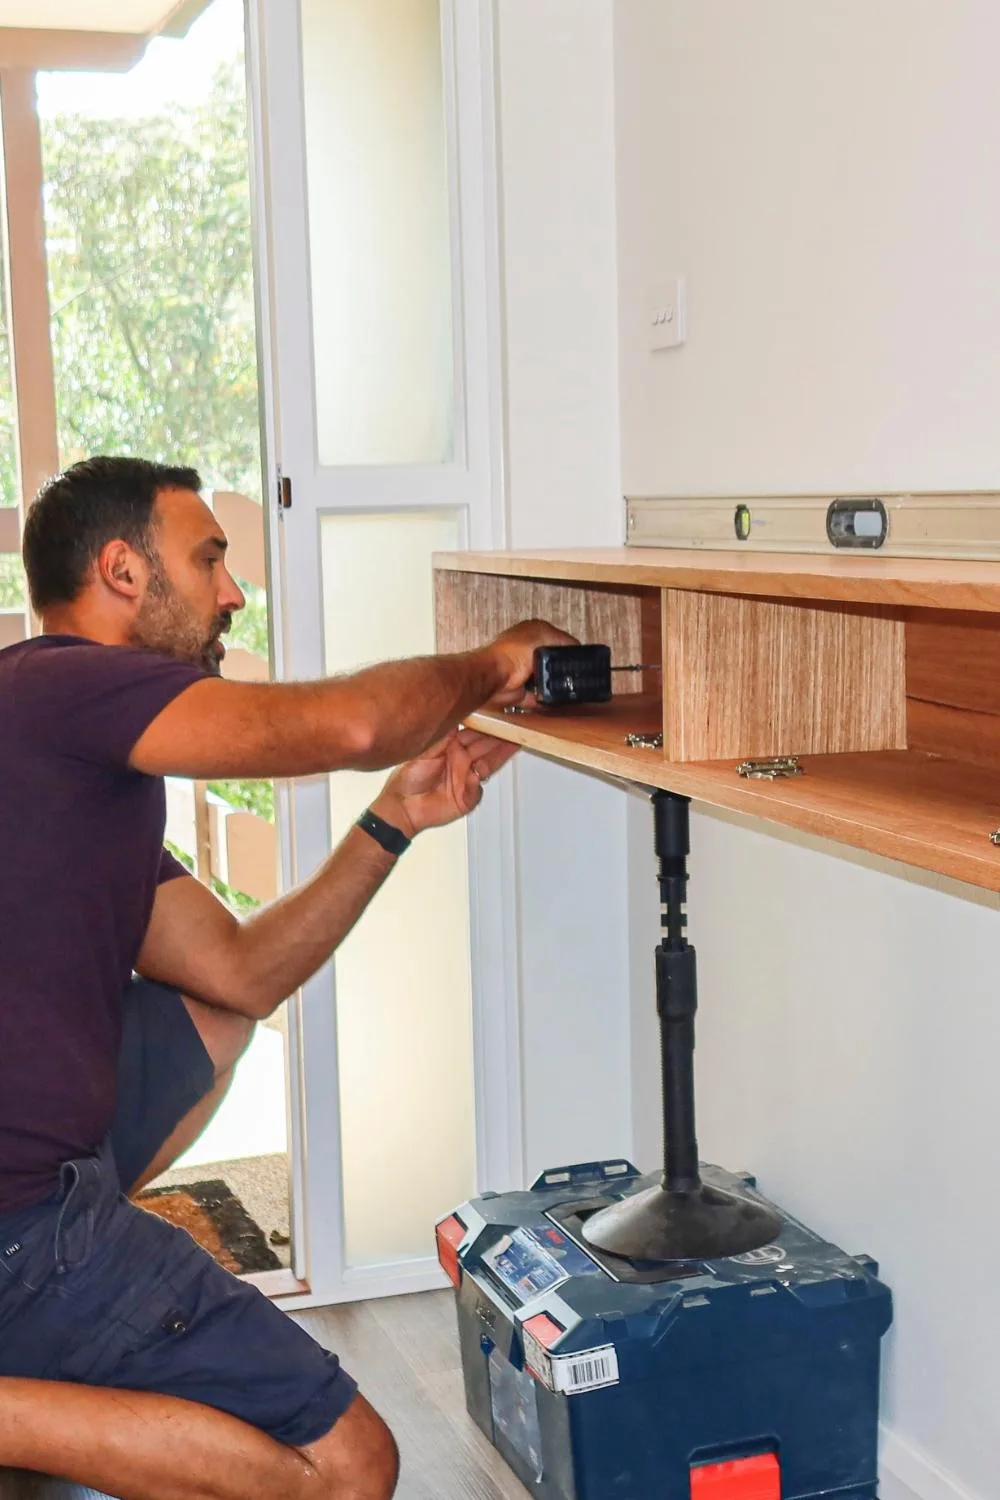
Locate wall studs in wall behind the unit. Temporarily prop under unit so top is sitting 900mm from the floor. Remove doors and predrill through back of unit and into wall studs, then attach using 100mm screws. Reinstall doors.
You might also like:
Before and after: A flatpack laundry transformation
Related stories

Native ad body.

Native ad body.


Native ad body.