Moth orchids (Phalaenopsis) are everywhere right now, and for good reason. Their blooms can last for months with barely any fuss. But that plastic nursery pot they came in? It’s not doing your orchid any favours.
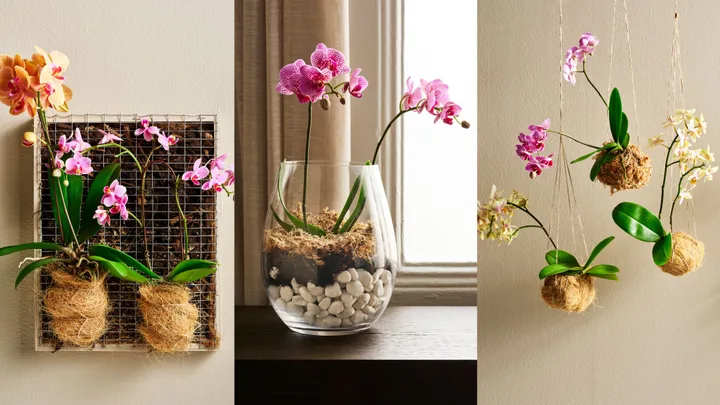
We’ve got three easy ways to give yours a glow-up. Turn it into living wall art with a picture frame, dangle it in a moss kokedama ball, or layer it into a glass vase for a display worthy of the coffee table.
All three take under 20 minutes and use supplies you can grab from the hardware store or florist.
What you’ll need for all 3 projects
- Picture frame – old frame, wire mesh, staple gun
- Kokedama – Sphagnum moss, mesh bag, twine
- Glass vase – Glass vase, pebbles, potting mix
All three projects use the same orchid-prep steps: soak the roots, snip away any black (rotted) ones, so once you’ve done it once, you’ve done it for all three.
How to make a living picture frame
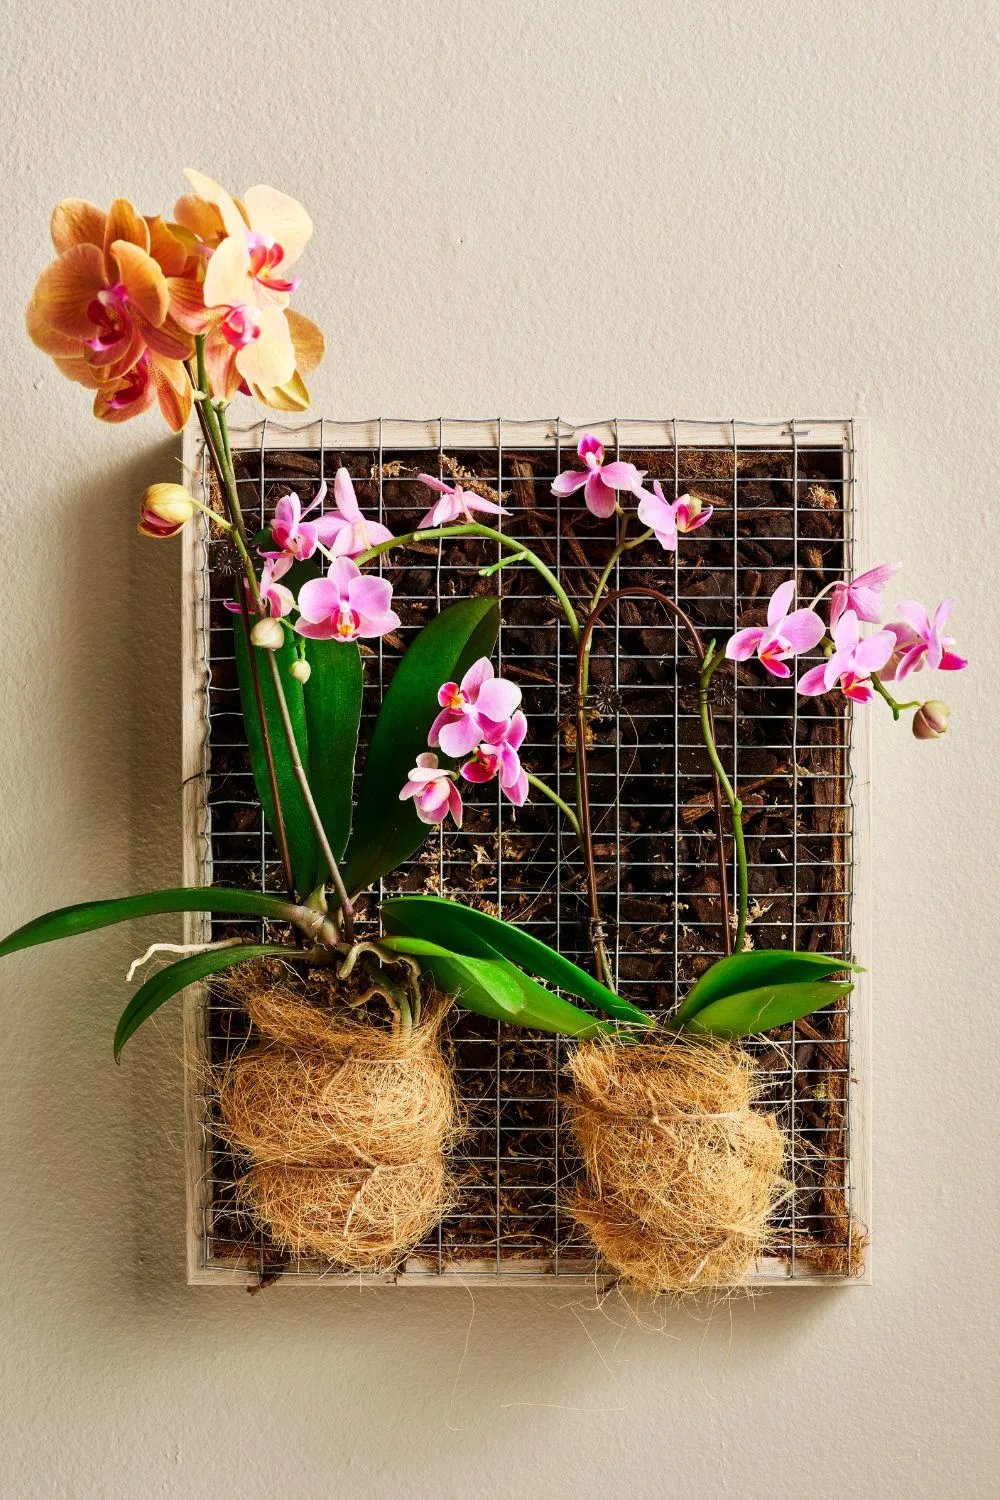
An old picture frame can be upcycled to display the vibrant curves of a moth orchid. A bit of wire mesh makes it a cinch.
Gather your supplies
- Sphagnum moss or coconut coir
- Potted moth orchids
- Old wooden picture frame
- Chicken wire or mesh
- Polypropylene sheet
- Orchid potting mix
- Jute or hemp twine
You’ll also need:
- Bowls of water
- pliers
- pen
- craft knife
- staple gun and snips.
Moth orchids are native to rainforests in tropical Asia where it’s hot and humid. They’re epiphytes, growing on trees rather than in the soil. Their roots draw nutrients and water from the moisture and nutrient-laden atmosphere around them.
- Aspect: Bright, indirect light. Soil: Orchid-specific potting mix.
- Water: Allow the mix to dry out slightly between watering.
- Food: Use orchid specific fertiliser, according to package instructions. Reblooming When flowers drop, trim the stem above a node to encourage new spikes next season.
Step 1
Soak moss in a bowl of water for 10 minutes. Remove orchids from their pots, shake off the potting mix, then soak the roots to wash away any remaining debris.
Step 2
Remove the picture and backing from the frame.
Step 3
Lay wire mesh over the frame’s front and trim to size with pliers.
Step 4
Place a polypropylene sheet over the frame’s back, trace around the frame’s edges and cut to size with a craft knife. (The polypropylene helps prevent mould on your wall.)
Step 5
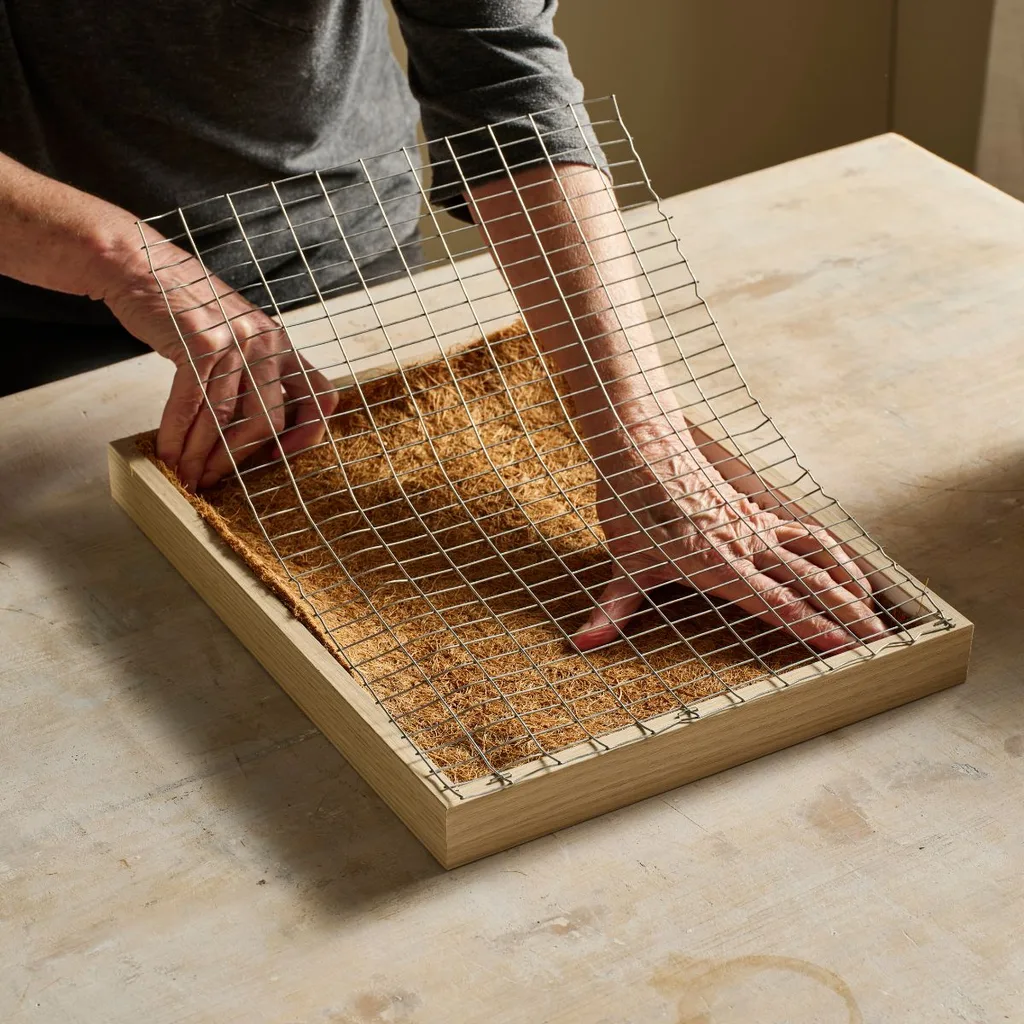
Staple polypropylene to the frame’s back. Staple the wire mesh to the front of the frame, leaving half unstapled.
Step 6
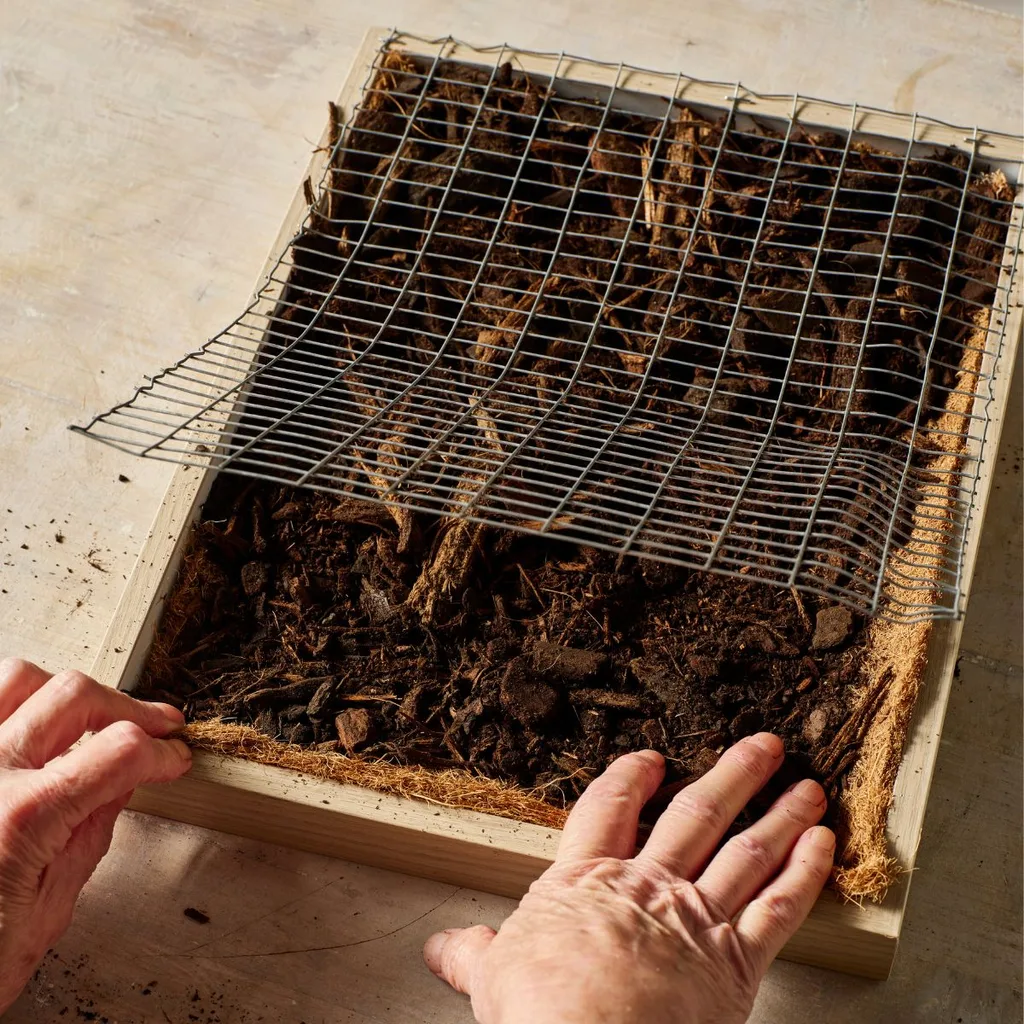
Put a layer of coir over the polypropylene, then add potting mix, tipping the frame upright now and then so it settles evenly.
Step 7
Staple the remaining mesh.
Step 8
Wring water from the moss. Tease it out to make a flat 15?17cm circle, or use coir to do the same.
Step 9
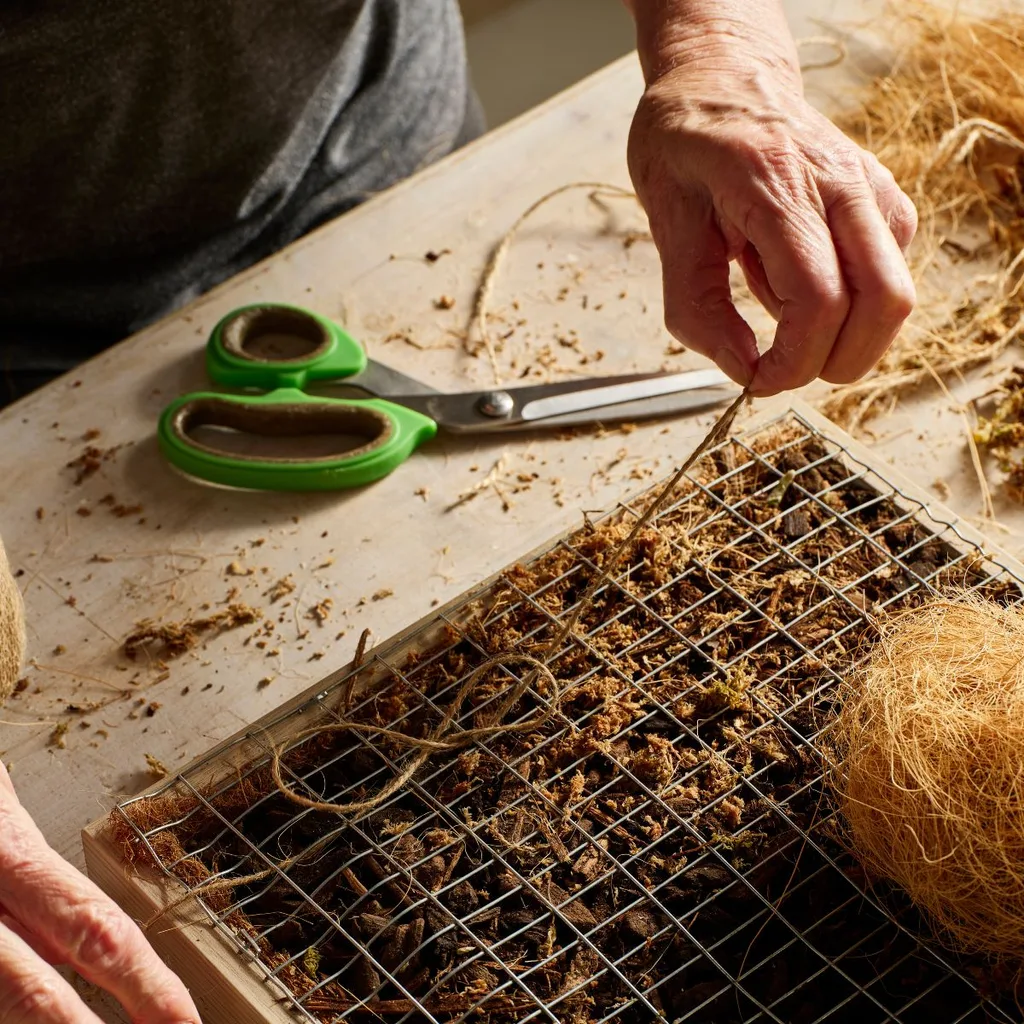
Thread two lengths of twine up and under the mesh where the orchid roots will sit, leaving the ends long enough to wrap around the roots.
Step 10
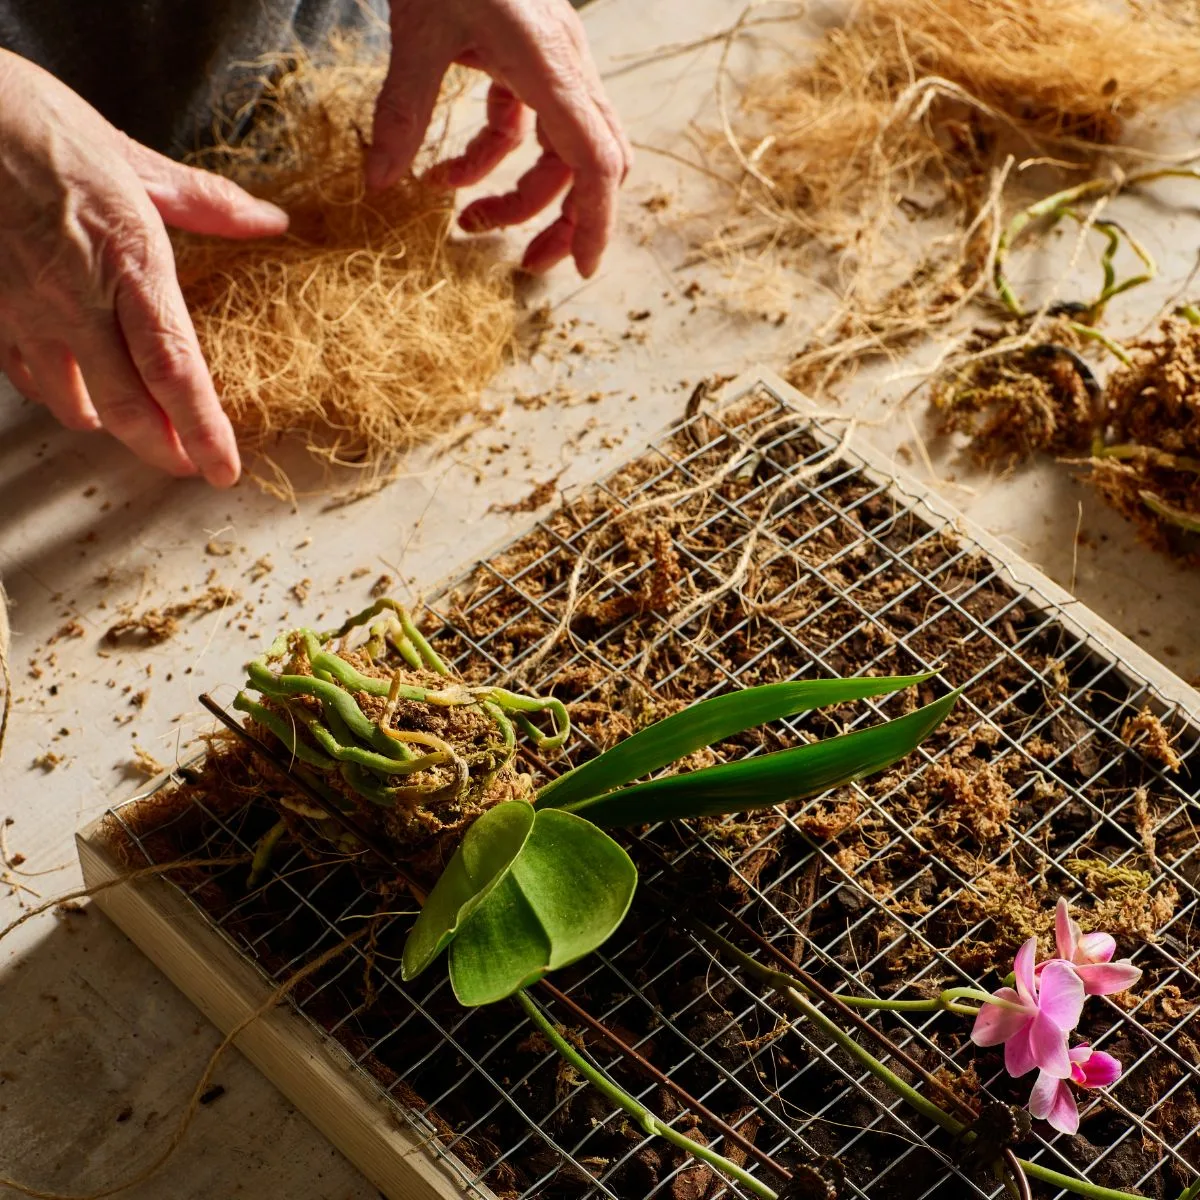
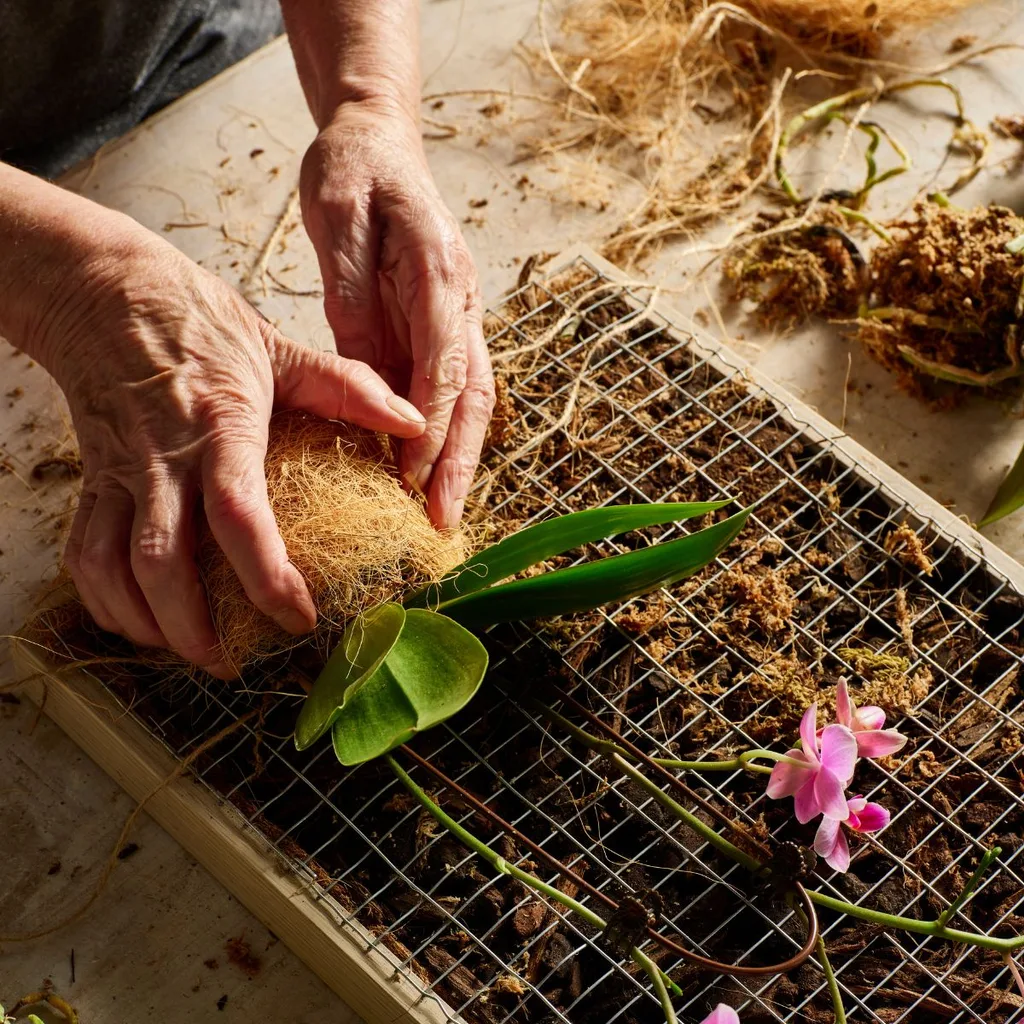
Position orchids on the mesh, wrap moss or coir around the roots, and tie with twine to secure in place.
How to make a kokedama using moth orchids

A couple of little dangling flowers can inject a lot of charm into your home.
Gather your supplies
- Sphagnum moss
- Potted moth orchid
- Small fruit mesh bag
- Orchid potting mix
- Jute/hemp twine
You’ll also need
- Two bowls
- clean snips
TIPS AND HINTS: You can wrap your kokedama with coconut coir instead of using sphagnum moss. But while coconut coir looks neater and lasts longer, it isn’t as good at retaining moisture and needs watering more often. Water the kokedamas when the ball feels light to lift. Soak them in tepid water for about 10 minutes in a sink or bowl. Allow to drain. Add liquid orchid fertiliser to the water every month. This arrangement can last 3-4 years but will need some redoing after that.
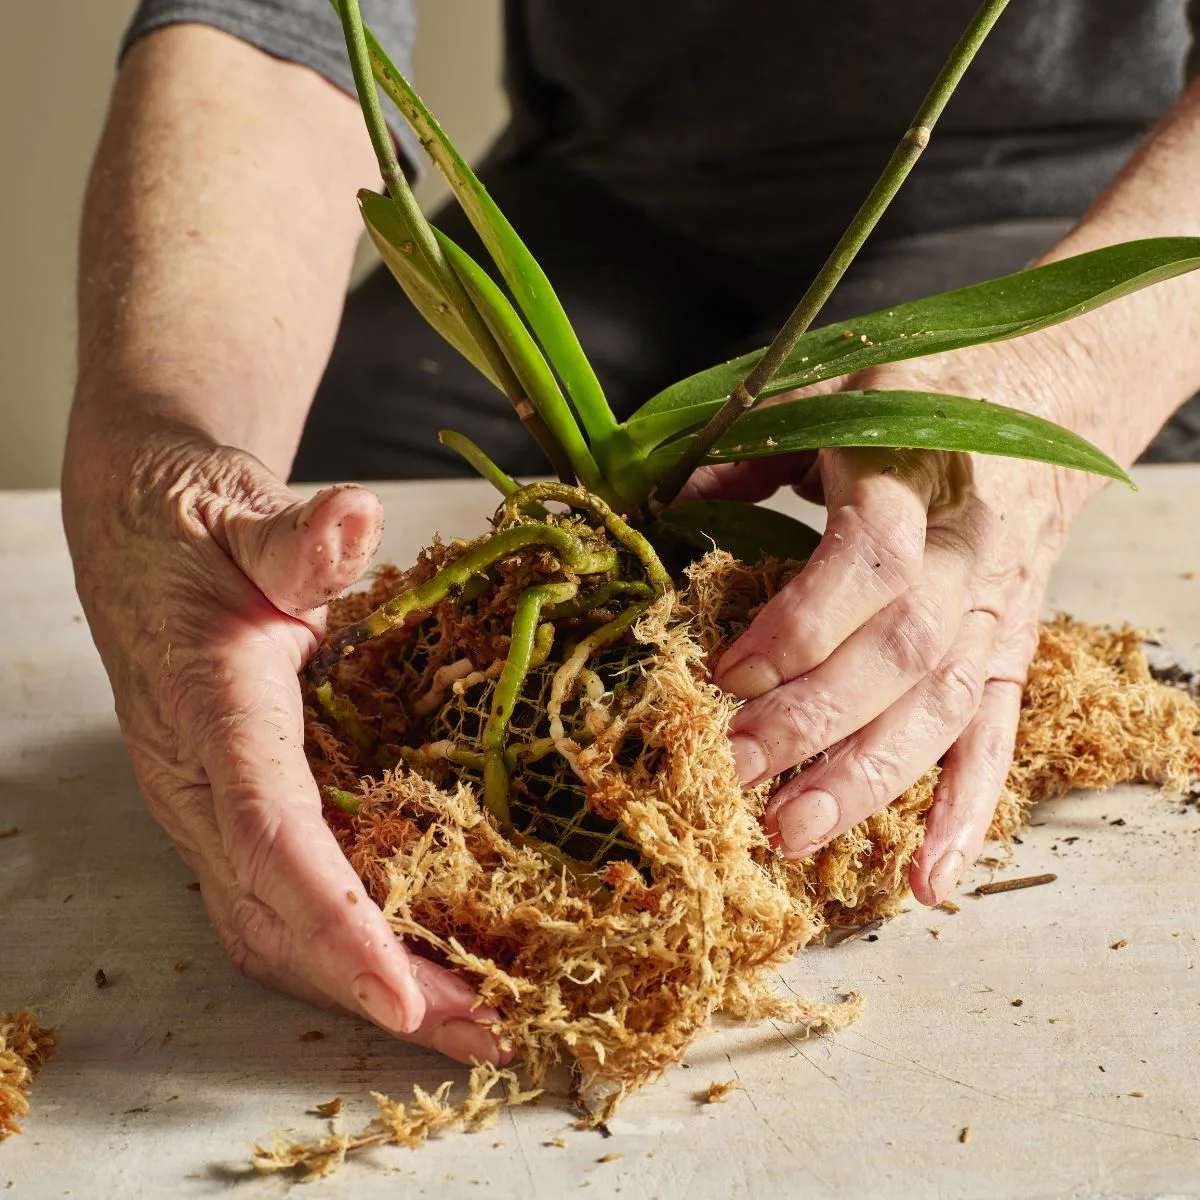
Step 1
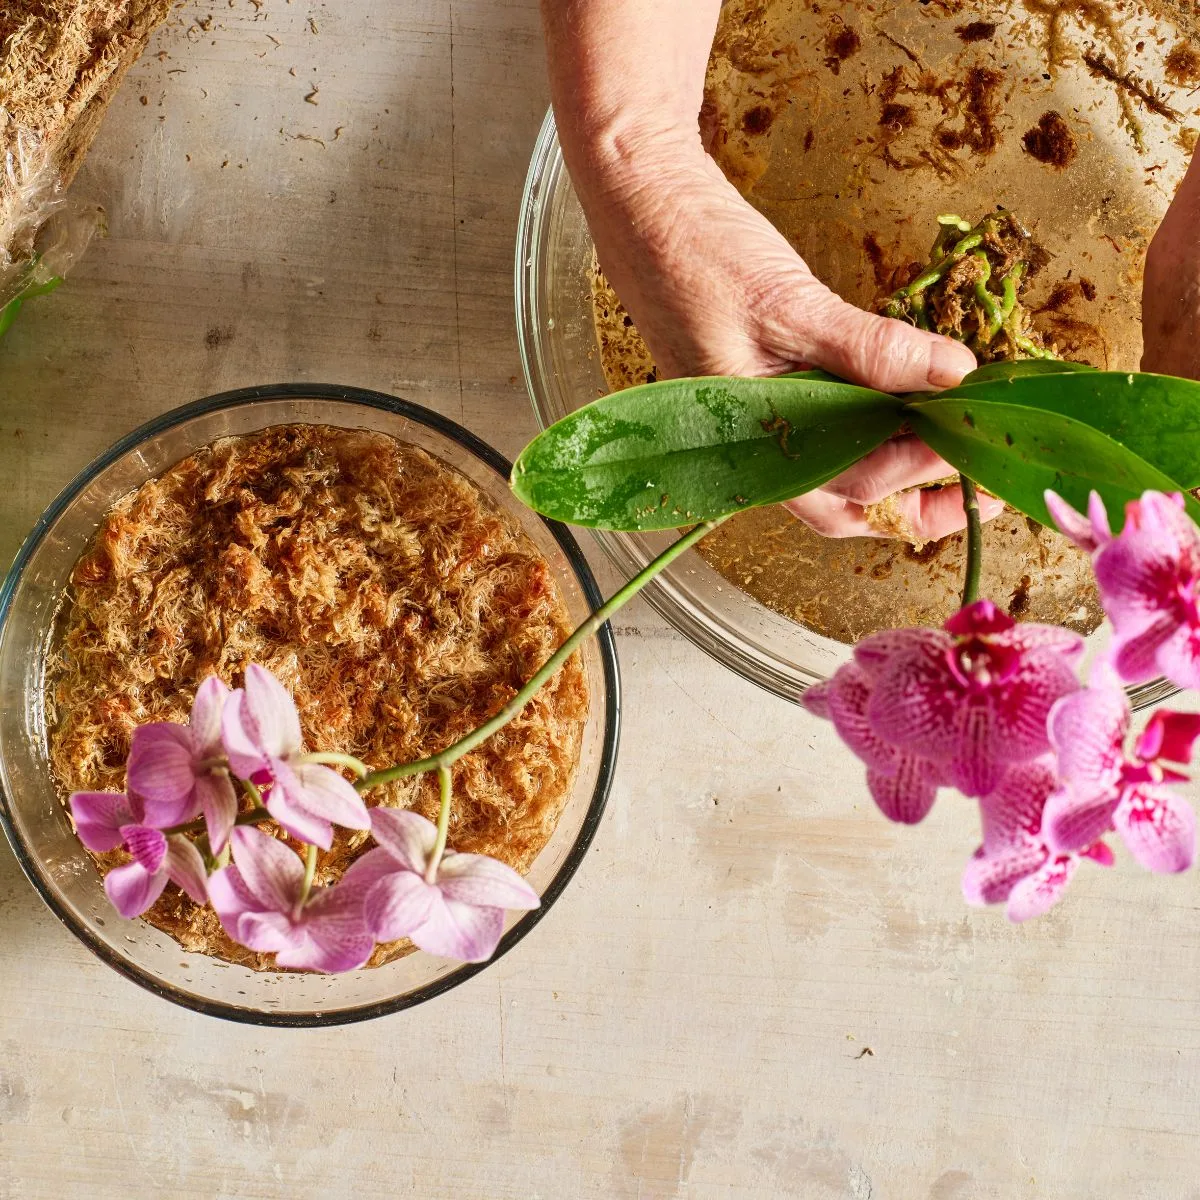
Soak sphagnum moss in a bowl of water for about 10 minutes. Remove the orchid from its growing pot, and shake off the potting mix from its roots. Then soak them in water to remove any remaining debris.
Step 2
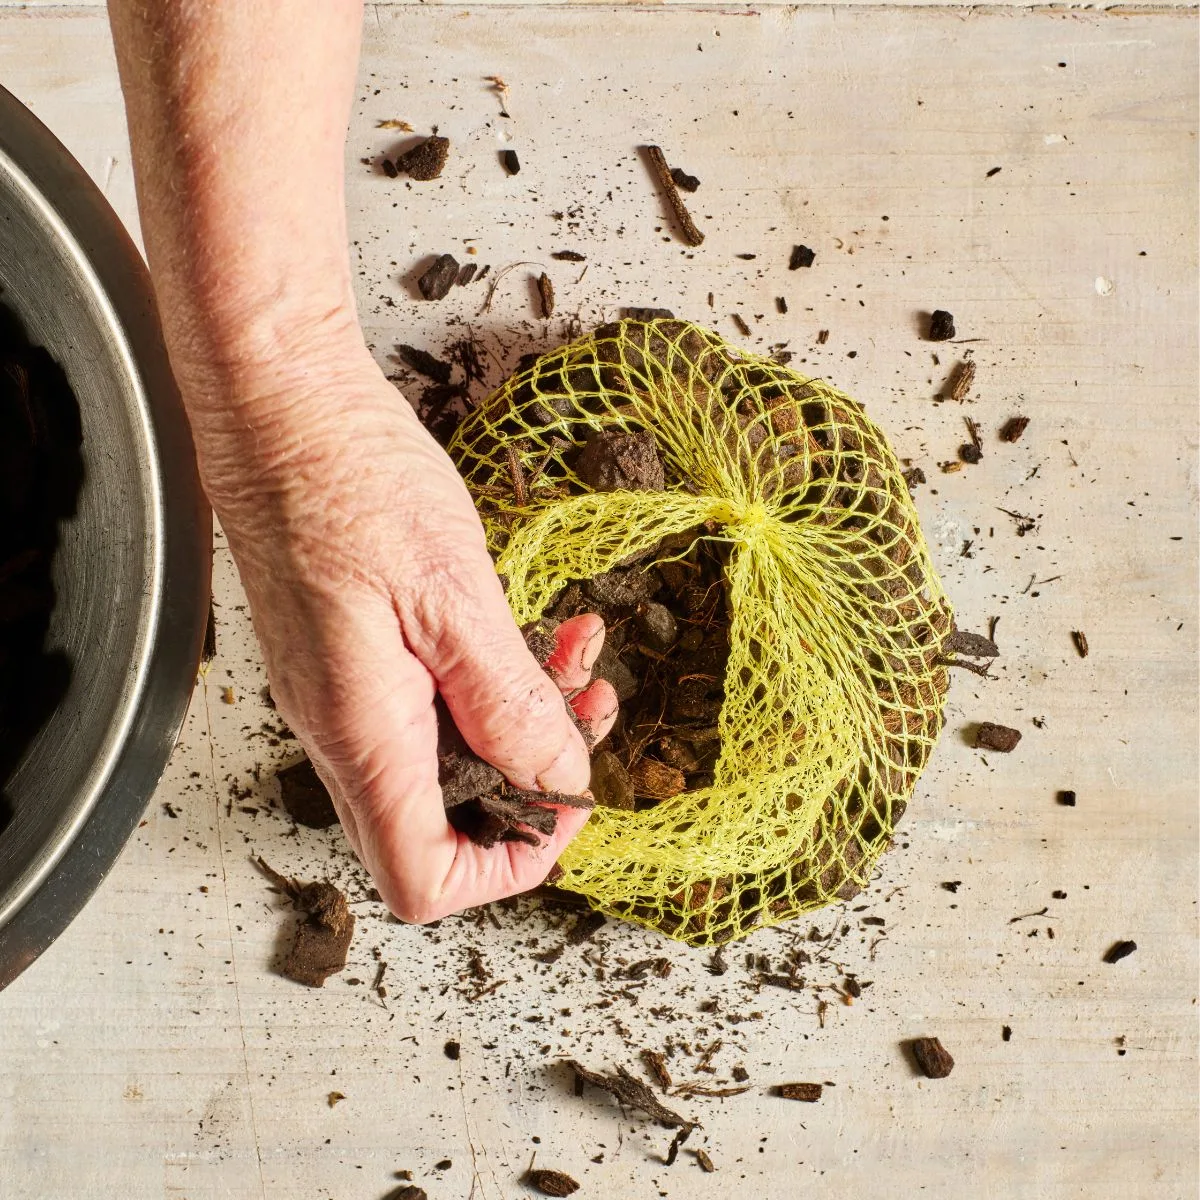
Fill the mesh bag with potting mix, then knot the top to form a ball.
Step 3
Check the orchid roots and snip away any that are black. That means they have rotted and are now useless.
Step 4
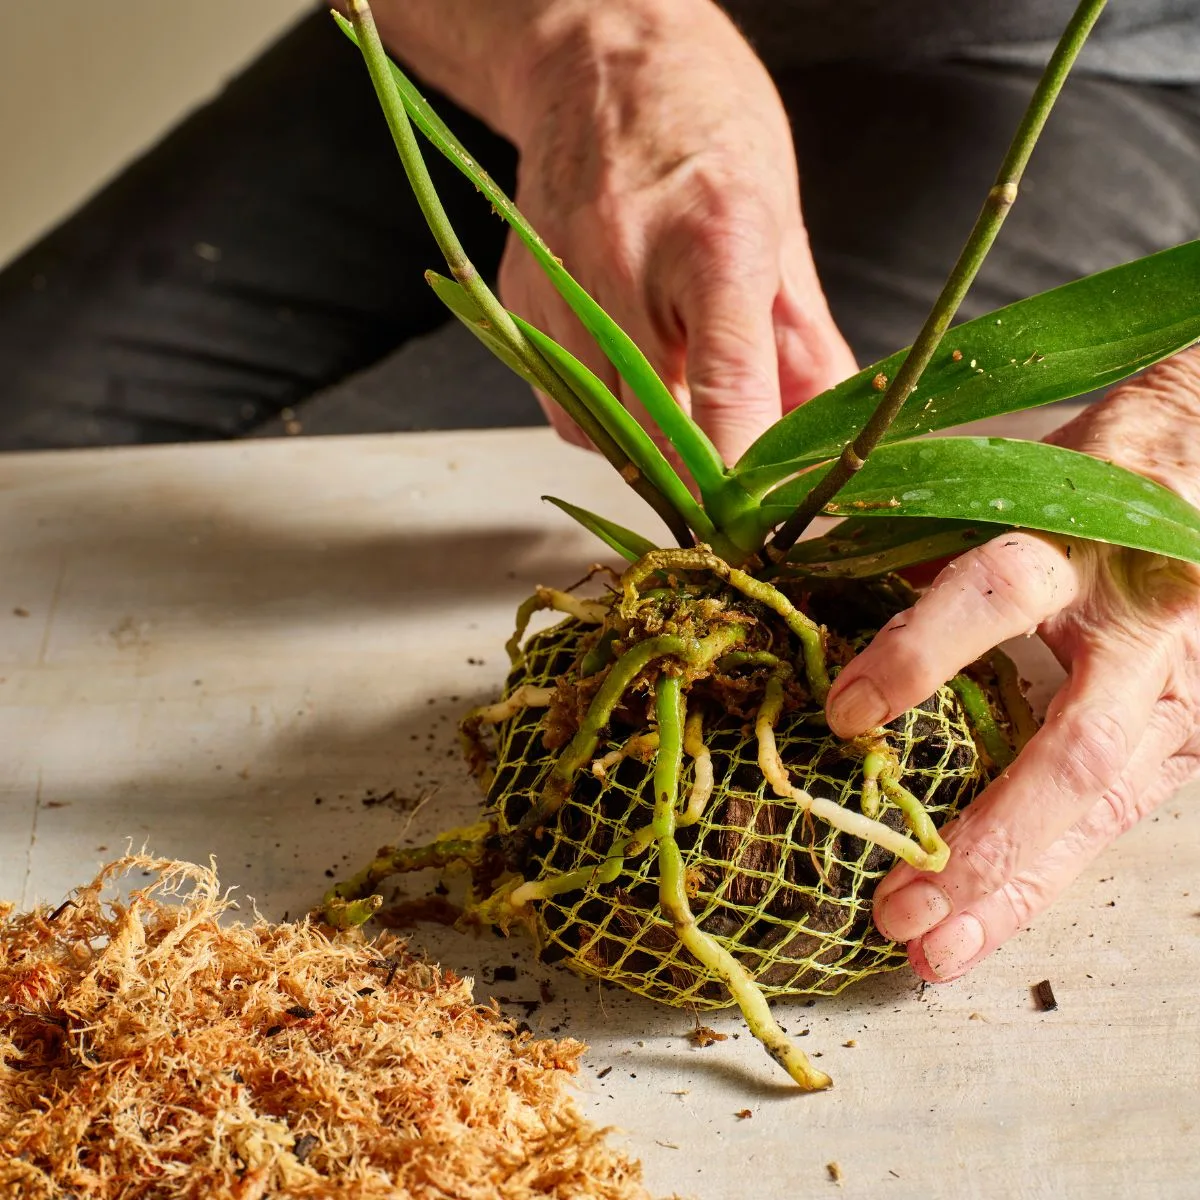
Arrange the orchid roots around the netted ball of orchid mix.
Step 5
Remove moss from the bowl of water and squeeze out the water.
Step 6
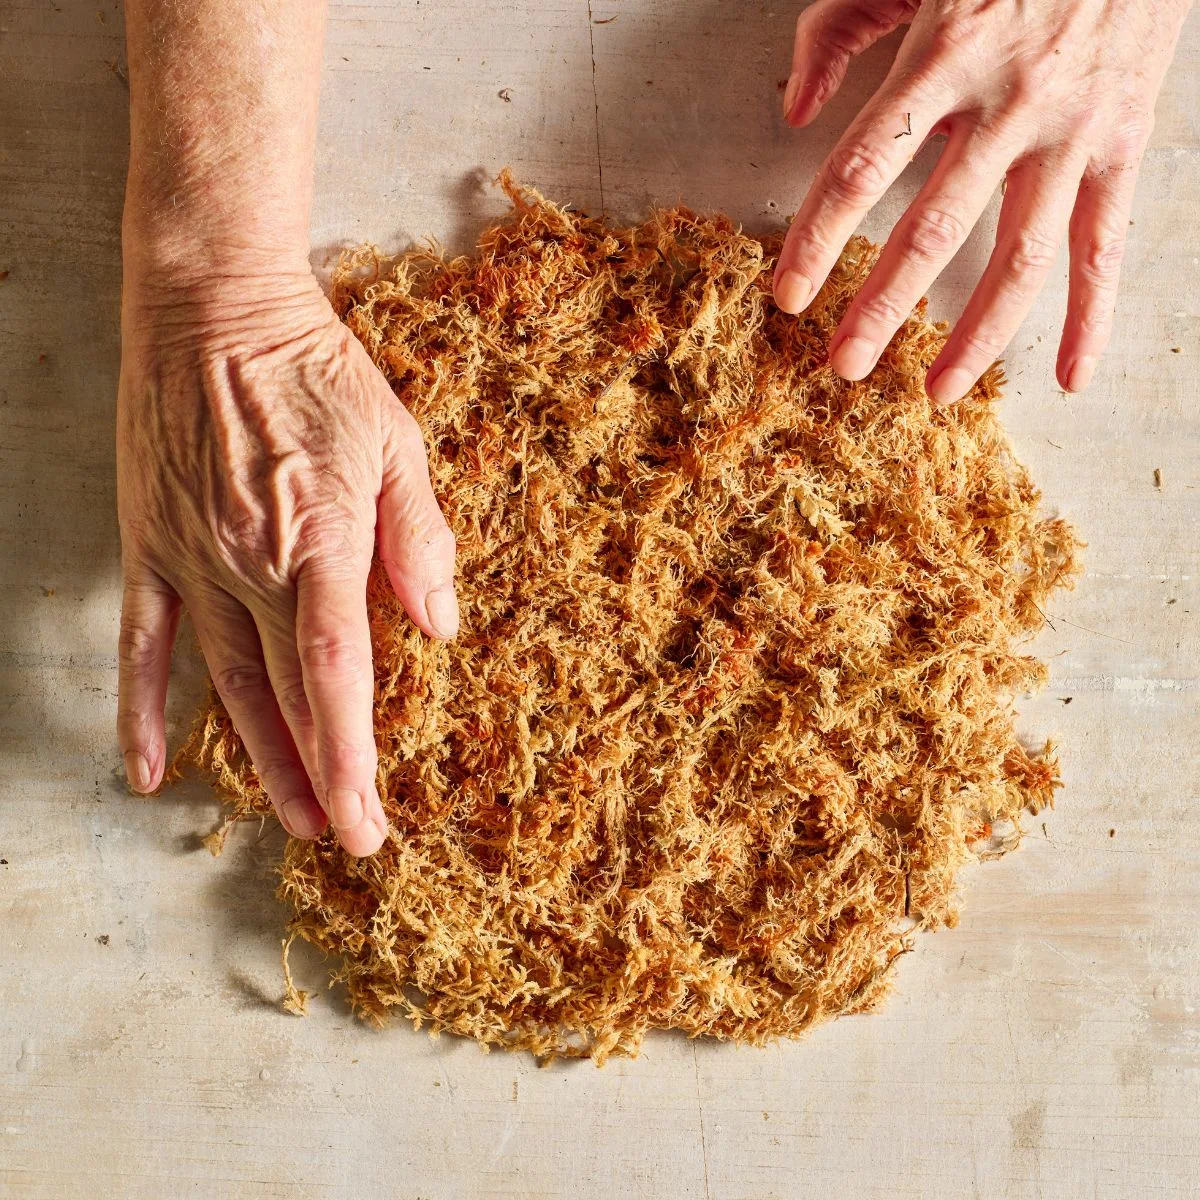
Tease out the moss to create a flat, round shape, 5-10mm thick.
Step 7
Place the orchid on its ball of orchid mix in the centre of the moss.
Step 8
Wrap the moss around the orchid roots, pressing it together to form a ball.
Step 9
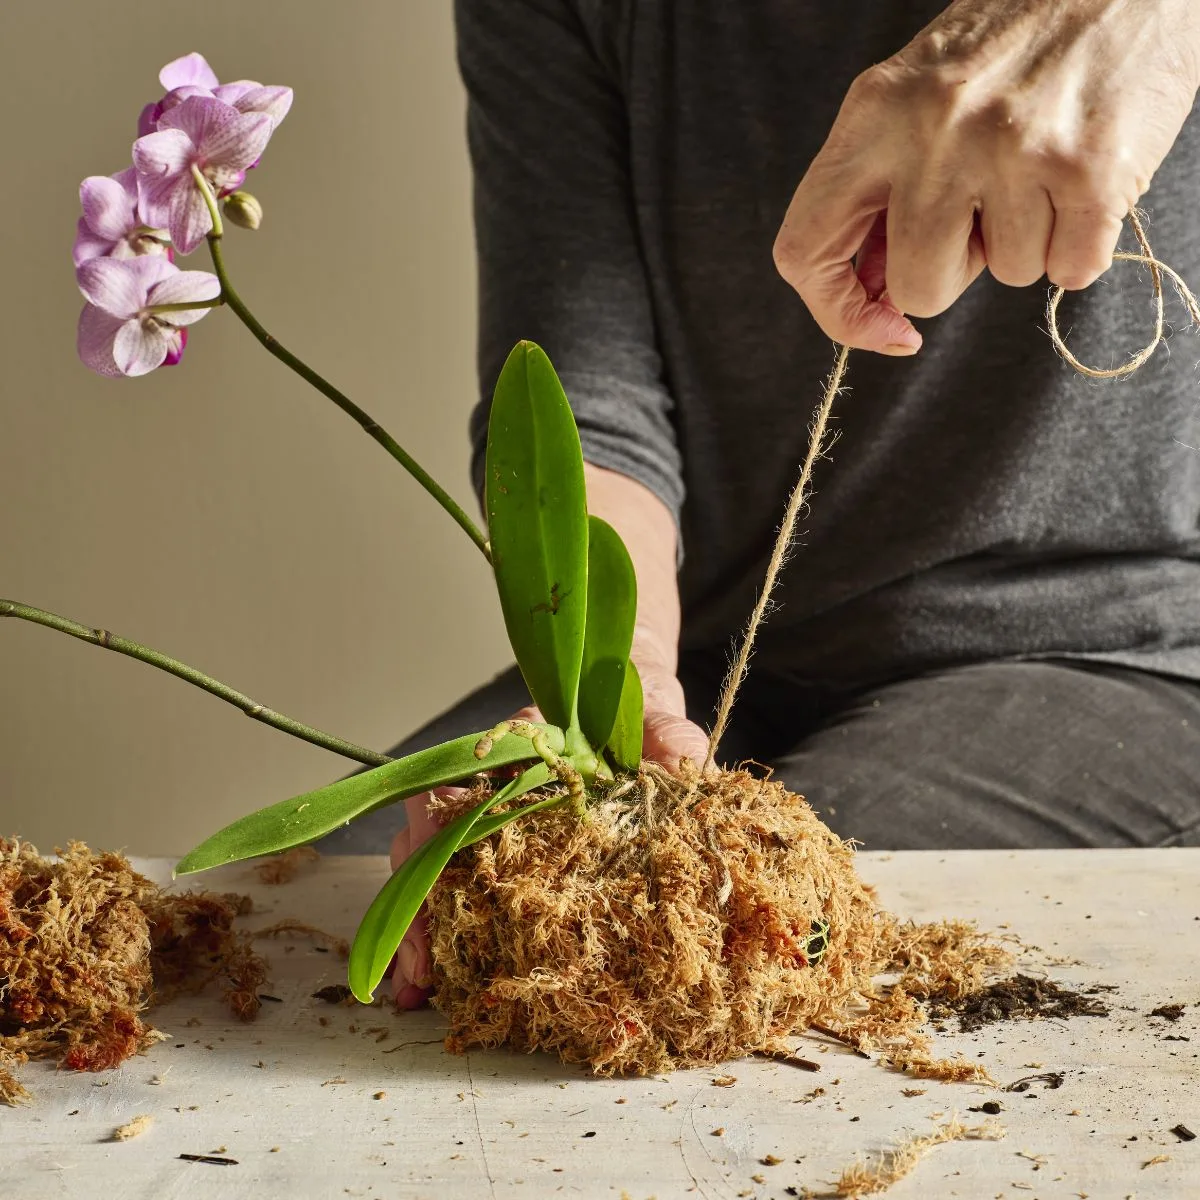
Wrap twine around the moss many times so the moss is securely fixed around the roots, and the ball is tightly packed.
Step 10
Use snips to tidy up any bits? of moss that has escaped the twine wrapping.
Step 11
Knot the twine, then extend it to create a hanging rope. Or cut it at the ball and use other materials, such as ribbon, chain, or thicker rope, to make a hanger to tie to the twine.
How to make an orchid glass vase display
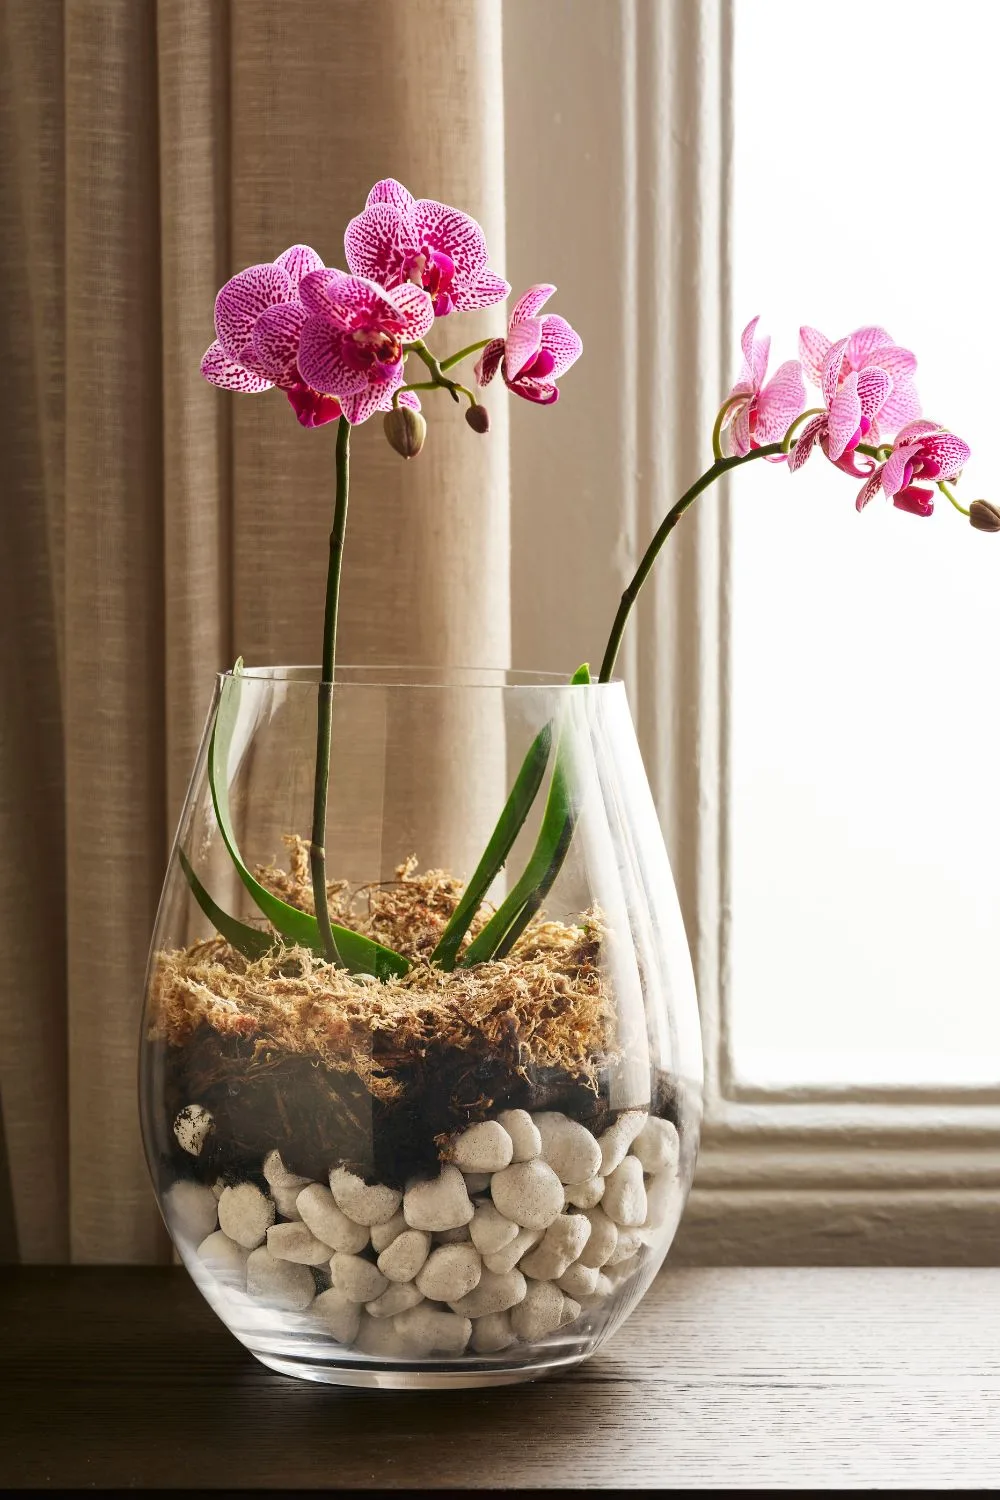
Maximise the visuals with a vase layered with ornamental pebbles, orchid-loving potting mix and a soft layer of sphagnum moss to create a feast for your eyes.
Gather your supplies
- Potted moth orchid
- Sphagnum moss
- Small pebbles
- Orchid potting mix
You’ll also need
- a glass vase
- two bowls
- clean, sharp snips.
Step 1
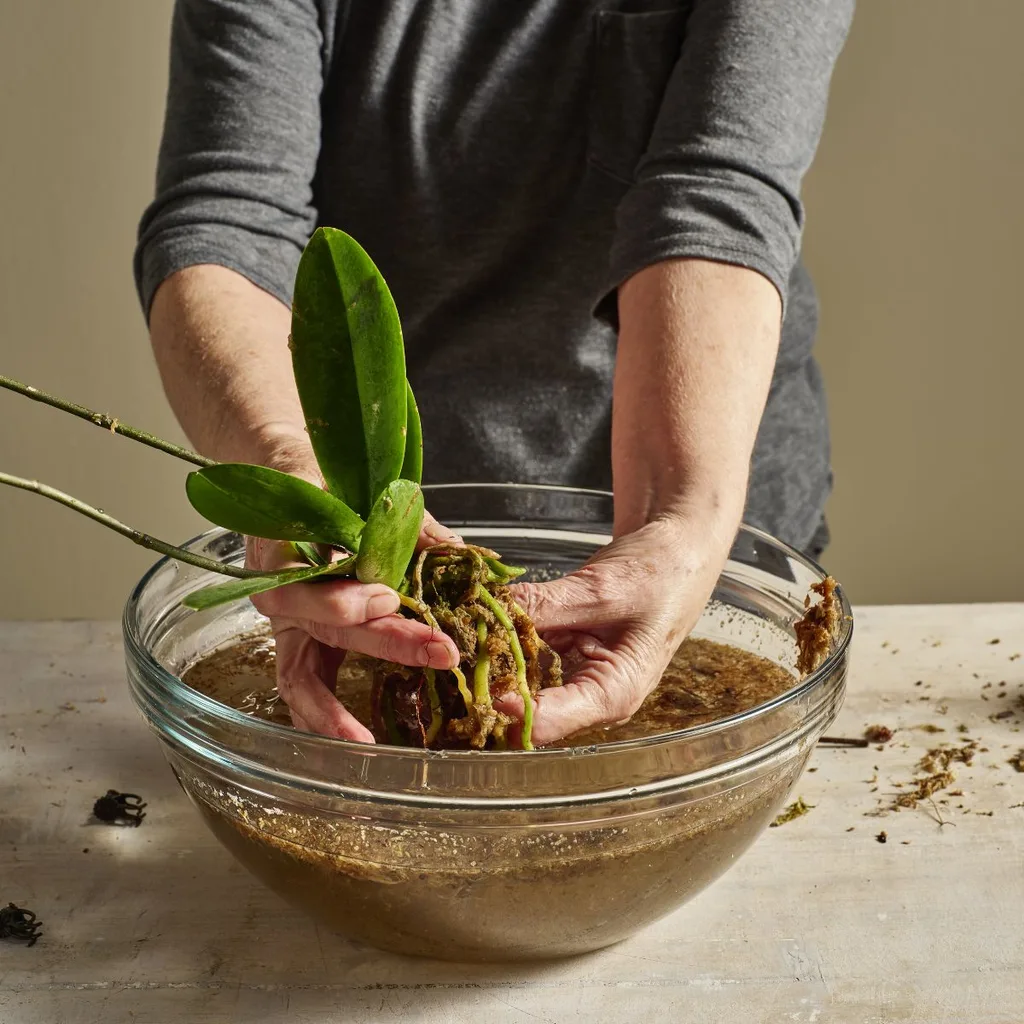
Remove the orchid from its growing pot and shake away the bark. Soak the orchid’s roots in water to remove any remaining debris.
Step 2
Soak the sphagnum moss in a bowl of water for about 10 minutes.
Step 3
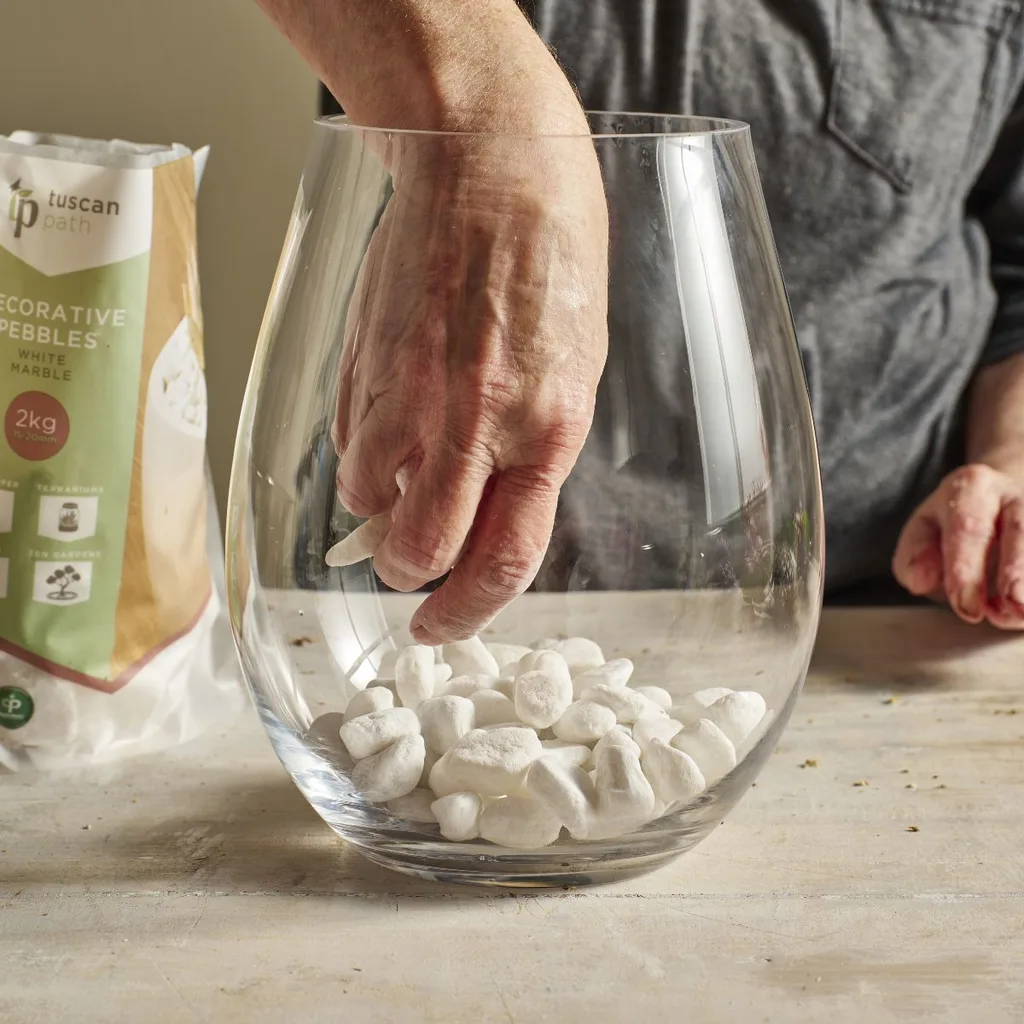
Carefully place pebbles in your glass vase, being sure not to crack the glass.
Step 4
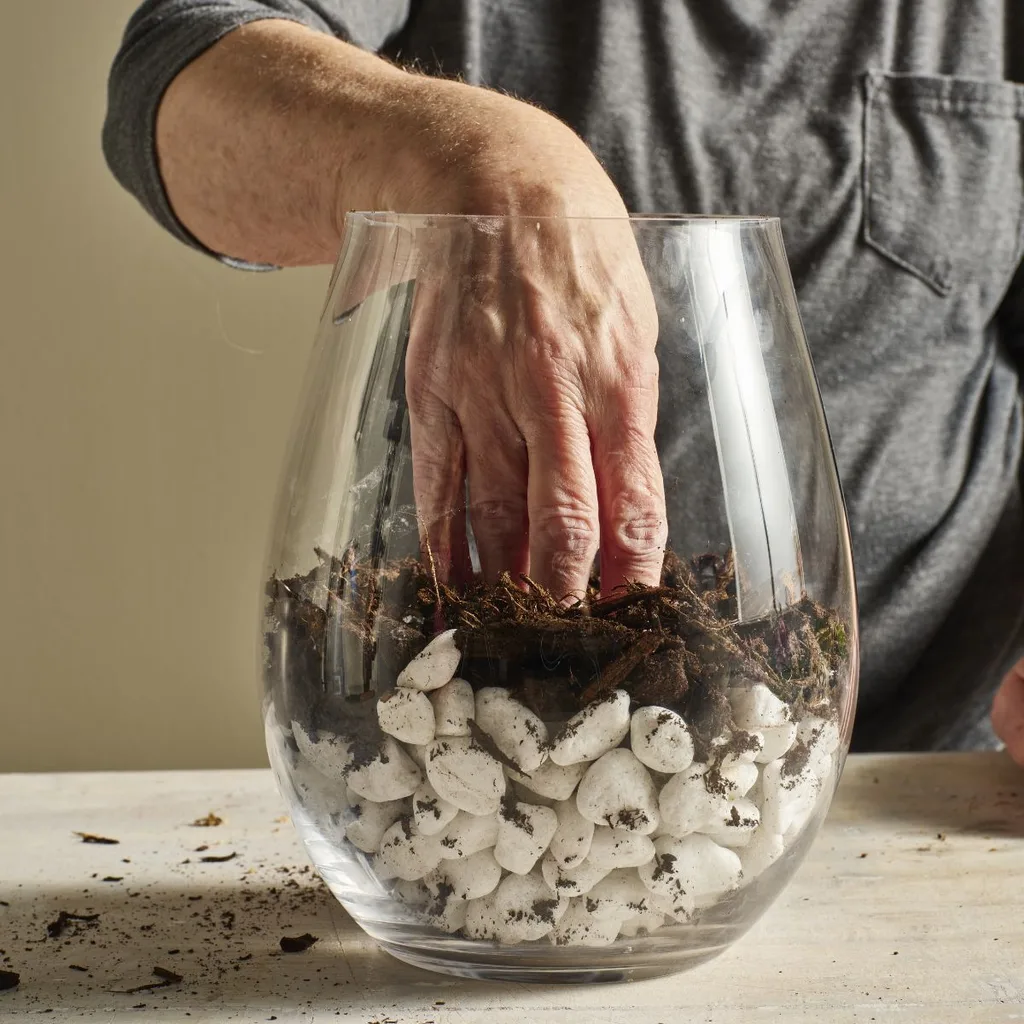
Add a layer of orchid potting mix on top of the pebbles, about 8- 10cm deep.
Step 5
Use your hand to make a cavity in the potting mix.
Step 6
Check roots. Some moth orchids are planted in sphagnum moss. This retains moisture and can cause the roots to rot. Snip away any roots that are black. They’re now useless.
Step 7
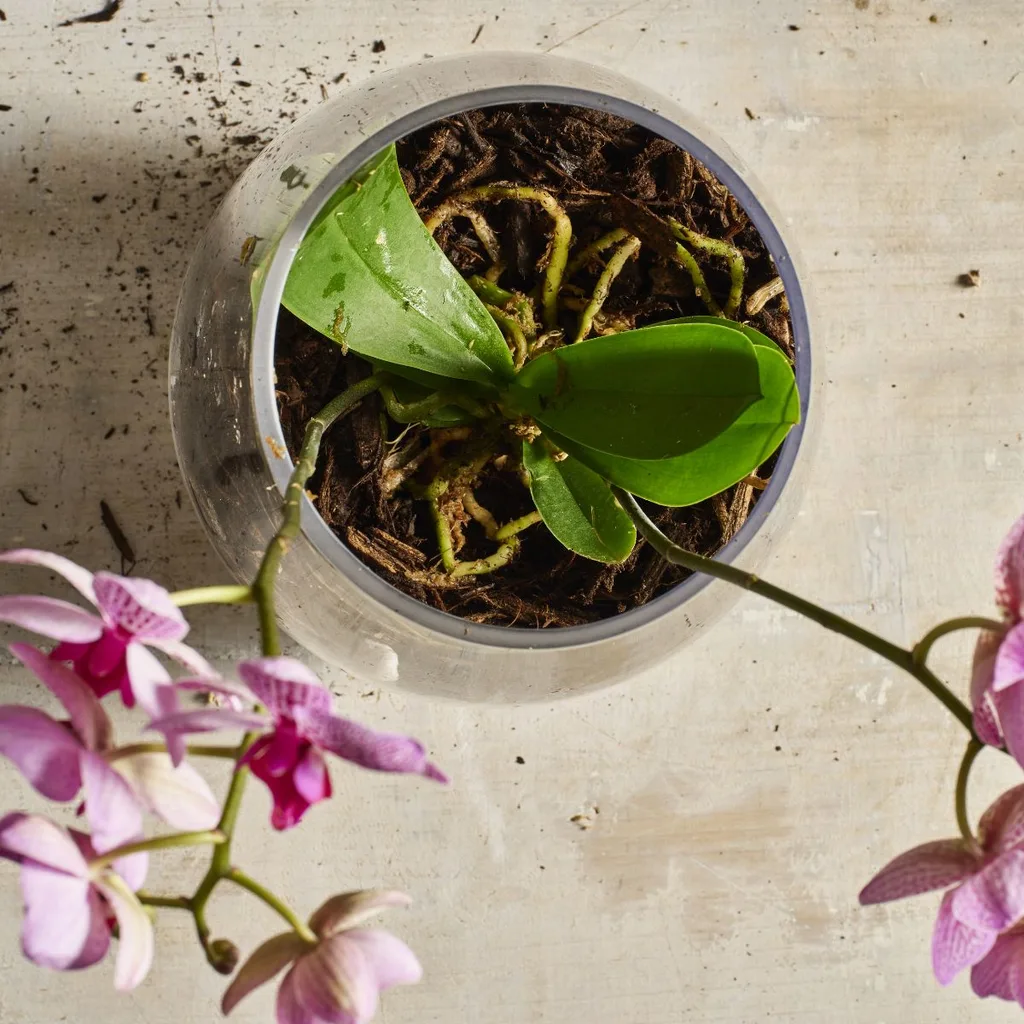
Put your orchid in the cavity, spreading its roots out and up. You can add as many orchids as you want, but ensure there is good airflow around the plants.
Step 8
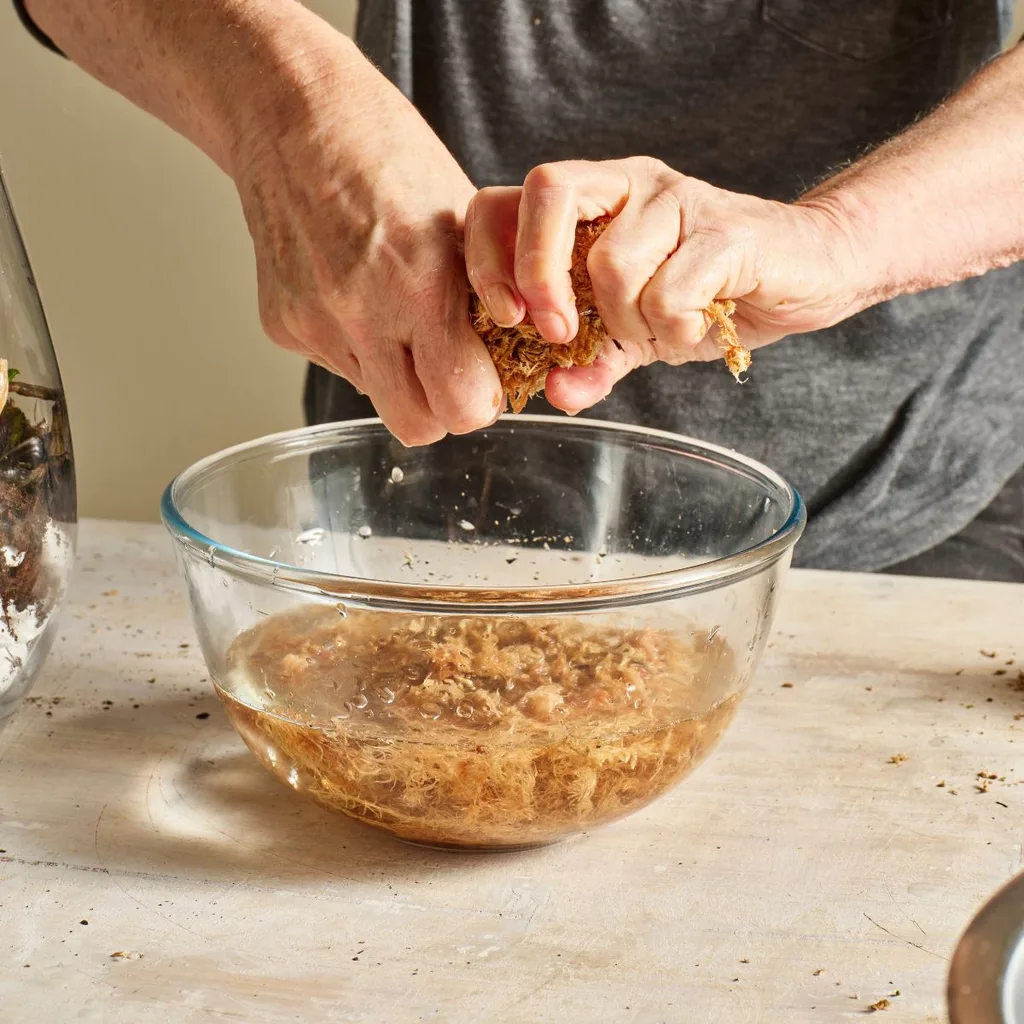
Wring water from the sphagnum moss.
Step 9
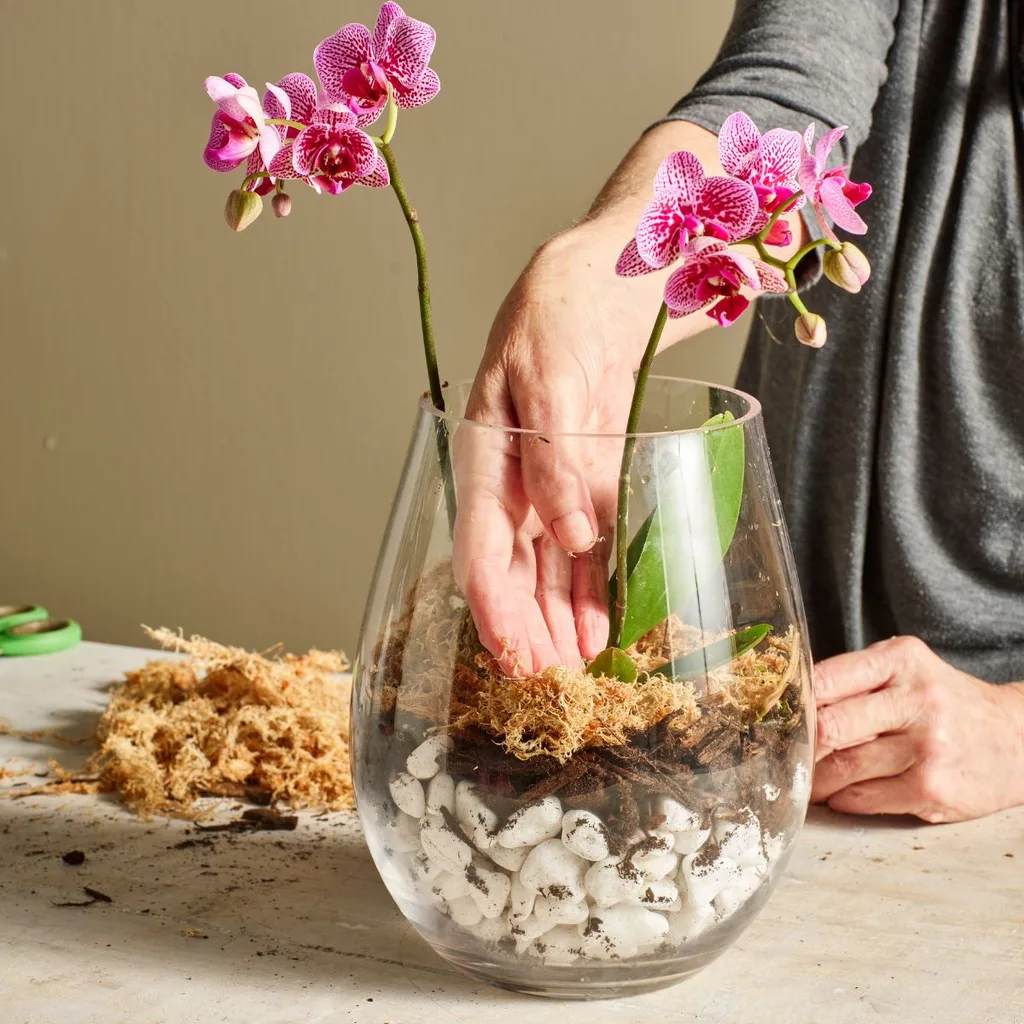
Top the orchid mix with sphagnum moss. If some of the roots are long and adventurous, allow them to sit on top of the moss.
Related stories
Native ad body.
Native ad body.


Native ad body.