Add a little animal magic to your next bash with these wine-bottle holders. Easy and inexpensive to build, they’re definitely a party starter.
Gather your supplies
1220 x 610 x 12mm AA grade plywood
You’ll also need
Pencil; ruler; jigsaw with curve-cutting blade; drill with 10 and 5mm bits; 80, 120 and 180 grit sandpaper; PVA glue; rag; clear polyurethane varnish; paintbrush; leather scraps; 25mm flat head nails; cutting pliers; hammer
For you to note
When using power tools, wear all safety gear required and refer to your product instructions.
Step 1 On plywood, use pencil and ruler to draw a 20mm grid measuring 600 x 600mm. Referring to reindeer and kangaroo grid diagrams, mark where each shape crosses the gridlines, then join these lines following the shape of each part. You’ll need 2 leg pieces for both the reindeer and kangaroo.
Step 2 Insert a curve-cutting blade into your jigsaw, then cut out each of the shapes. In tight corners, use a 10mm bit to drill a starter hole for your jigsaw blade.
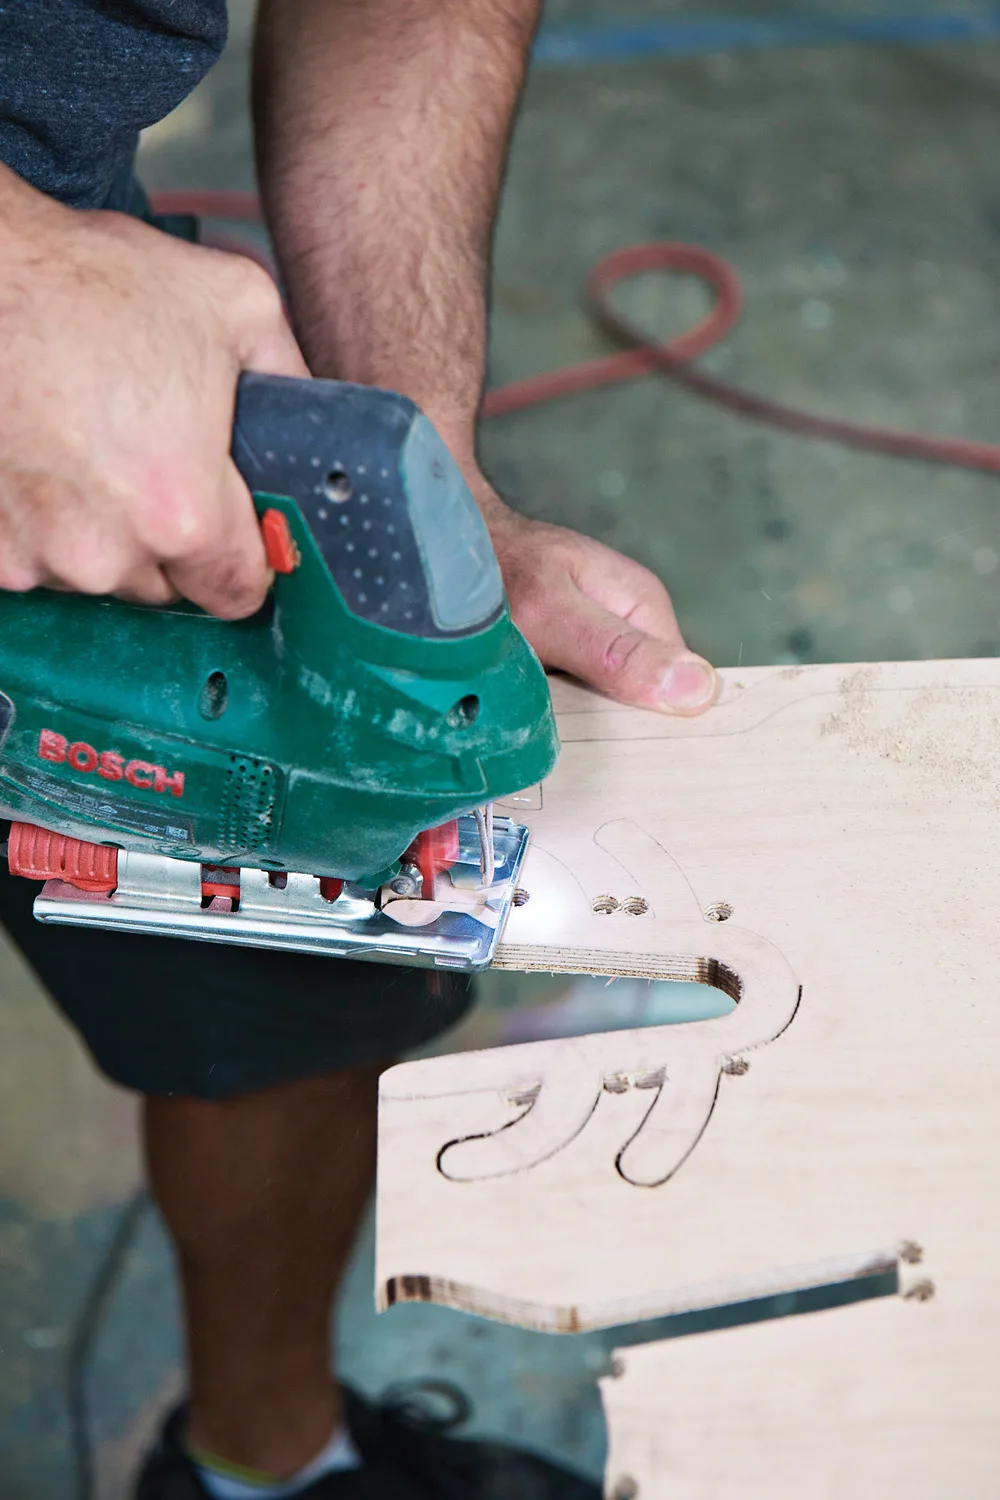
Step 3 Use 80-grit sandpaper to remove cutting marks from edges of all your pieces. Follow with 120-grit sandpaper for a smoother finish.
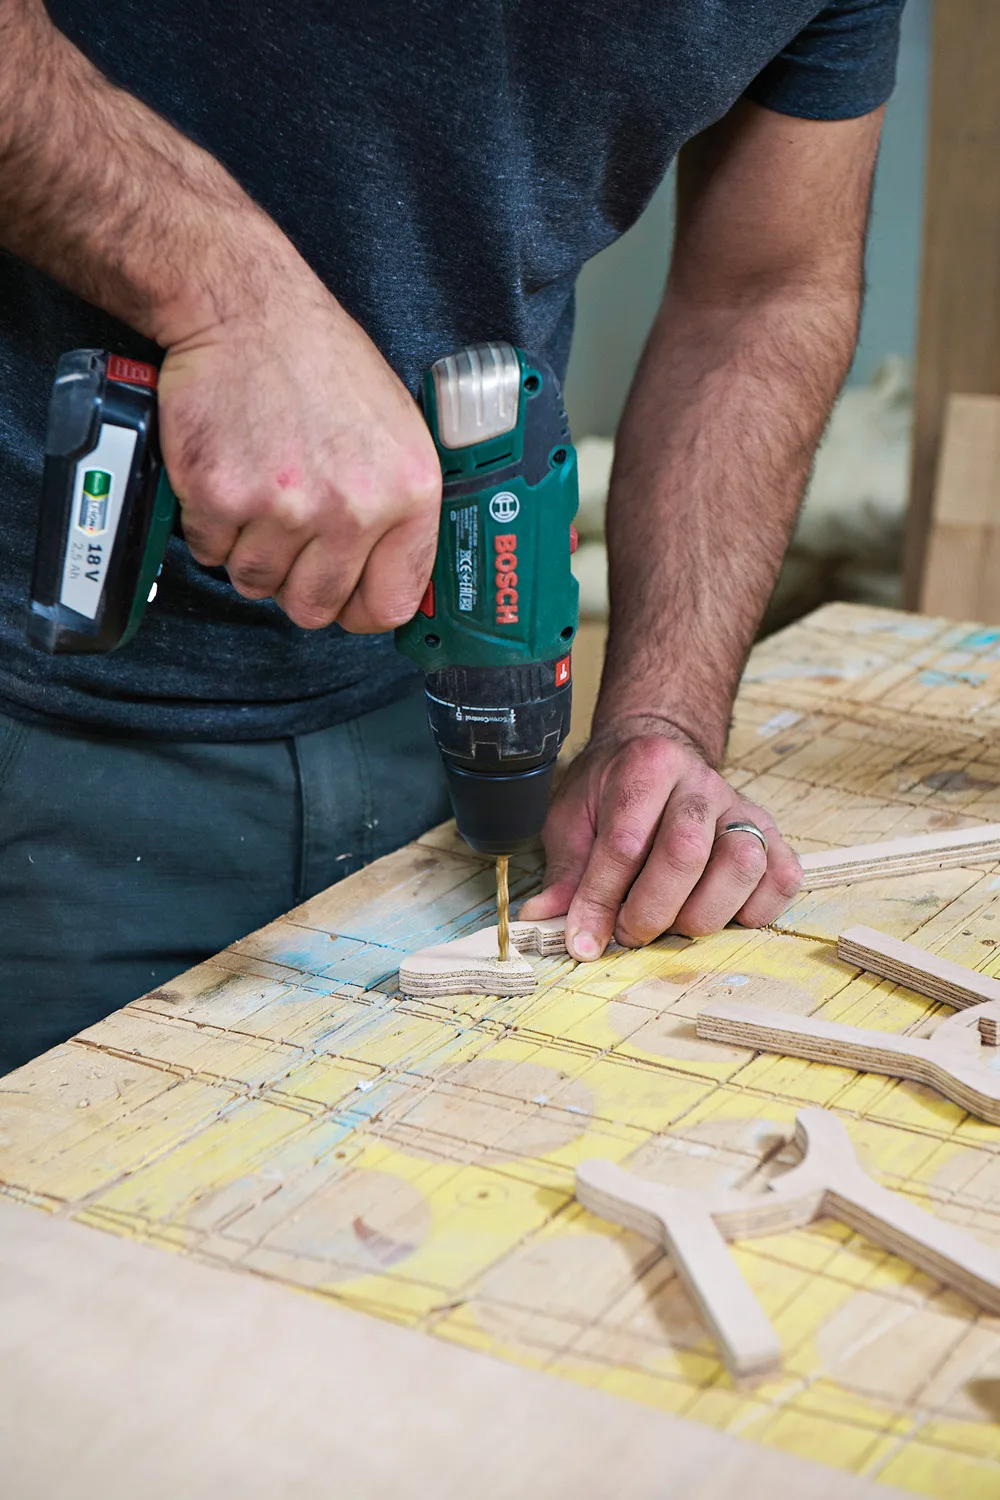
Step 4 On body pieces of reindeer and kangaroo, use a 5mm drill bit to create the eyes. Make the hole about 5mm deep.
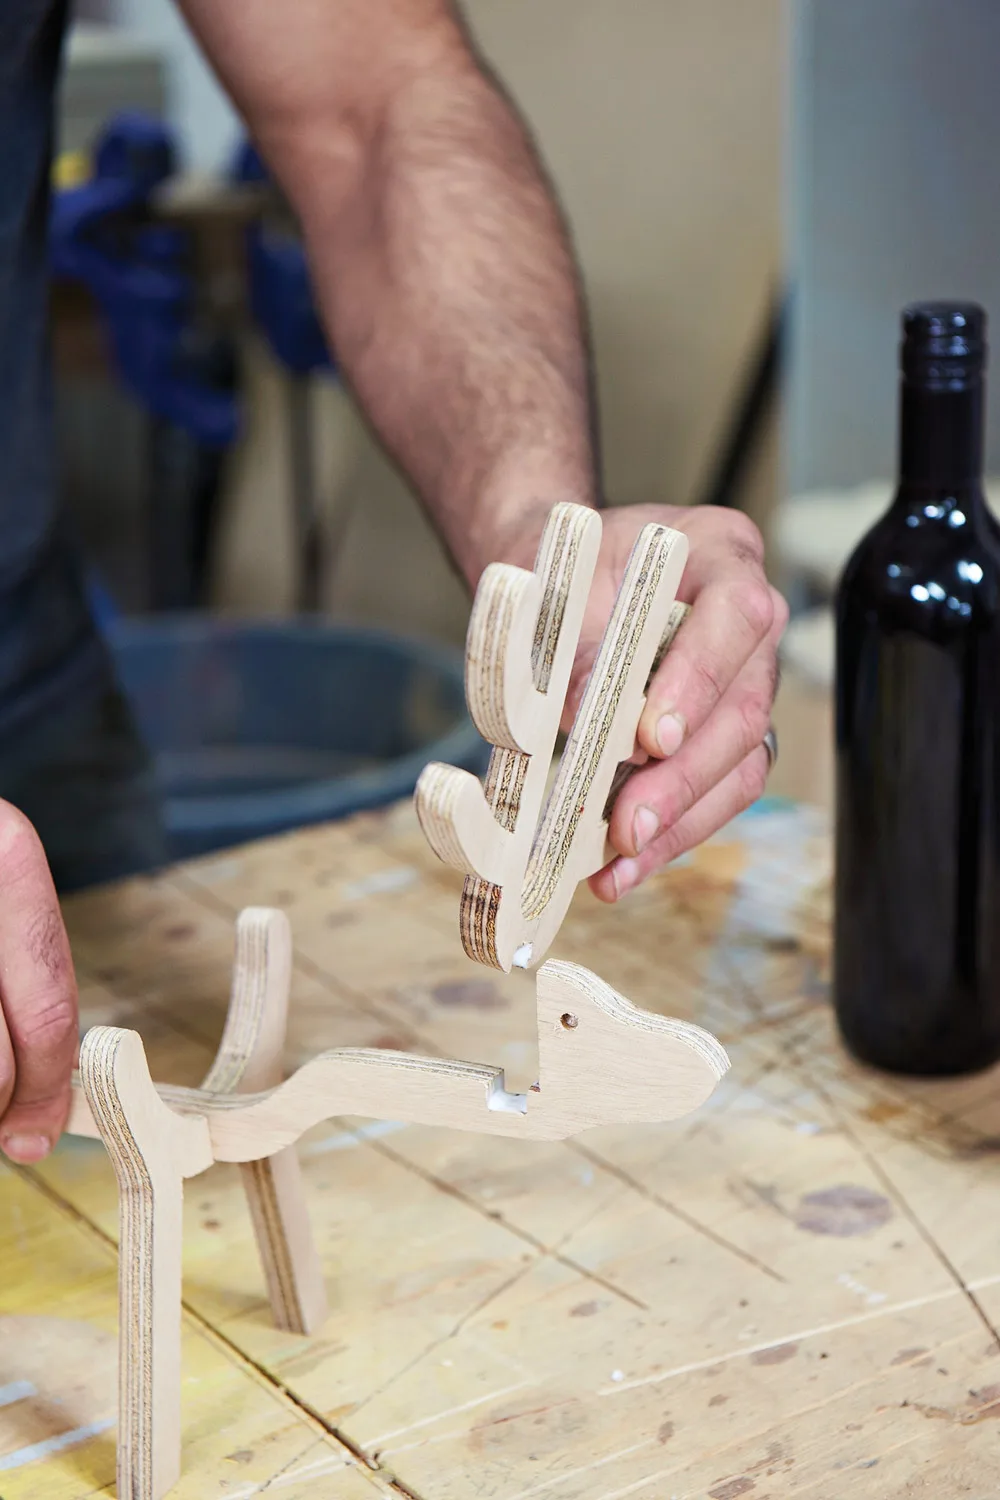
Step 5 To assemble reindeer, spread glue in the notches at the top of legs and in the underside of the body. Join the legs to the body so the notches in each interlock. Slightly splay the legs towards the head and tail of the reindeer. Remove excess glue with
a damp rag.
Step 6 Spread glue in notch at bottom of antlers and in notch in the body just behind the head. Join antlers to body so notches in both interlock. Remove excess glue. Leave for 2 hours for glue to set.
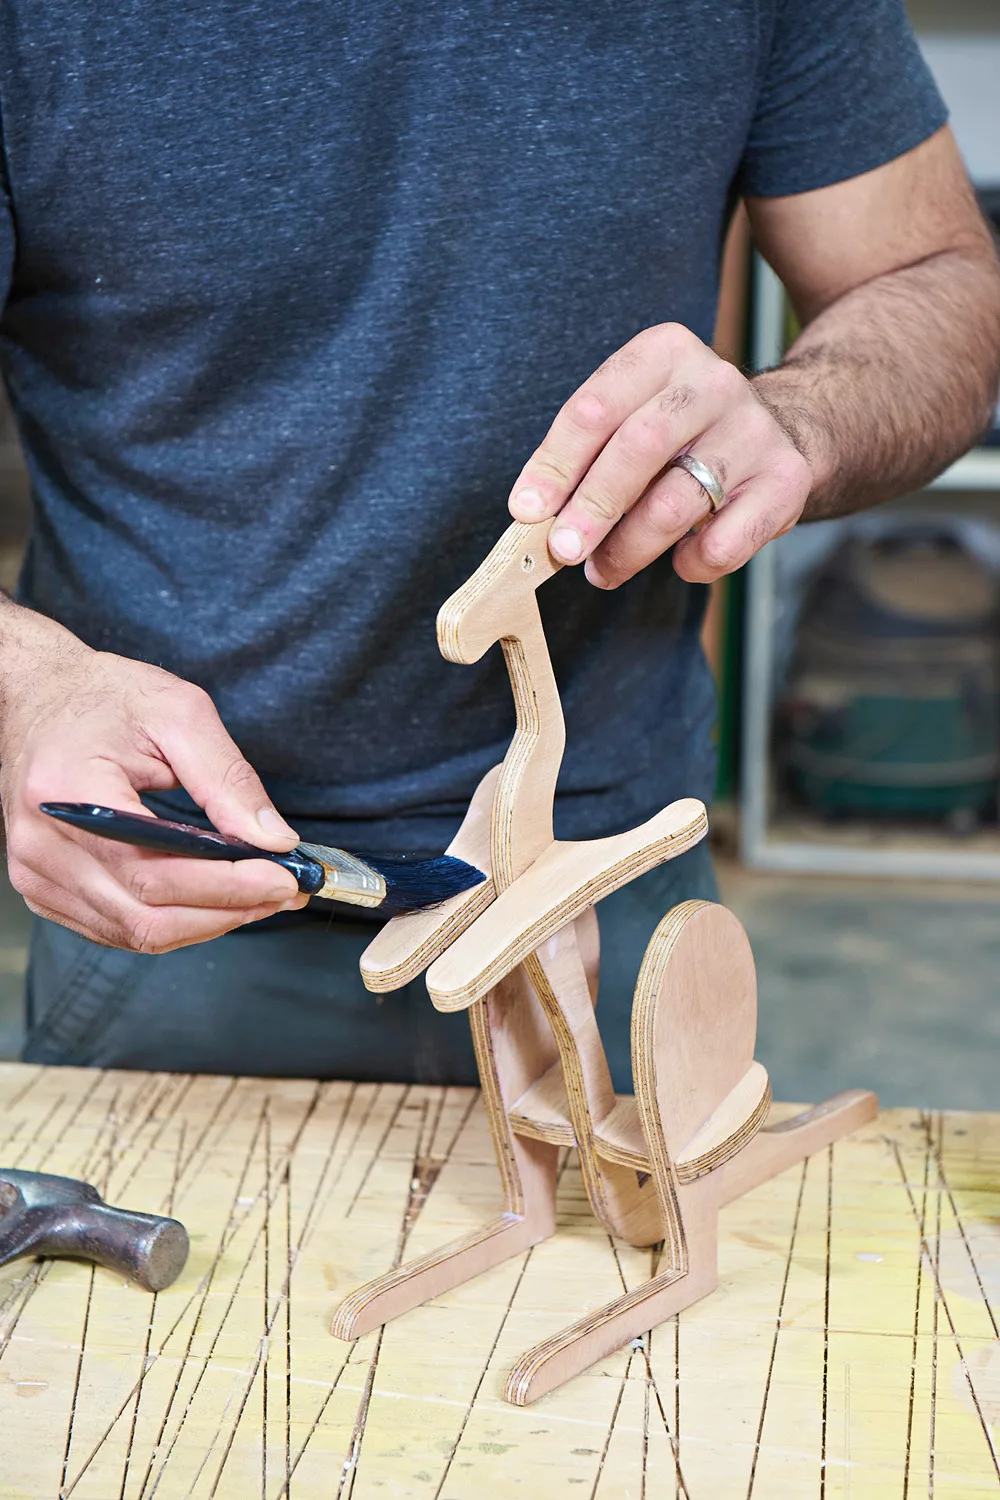
Step 7 To assemble the kangaroo, join the hips to the notch towards the bottom of the body, the arms to the notch towards the top and the legs in the large notches in the hips. Remove excess glue. Insert wine bottle in kangaroo to check that
there is sufficient room between the legs. Leave to dry for 2 hours.
Step 8 Apply 2 coats of clear polyurethane varnish to both wine holders. Allow to dry and lightly sand with 180-grit sandpaper between coats.
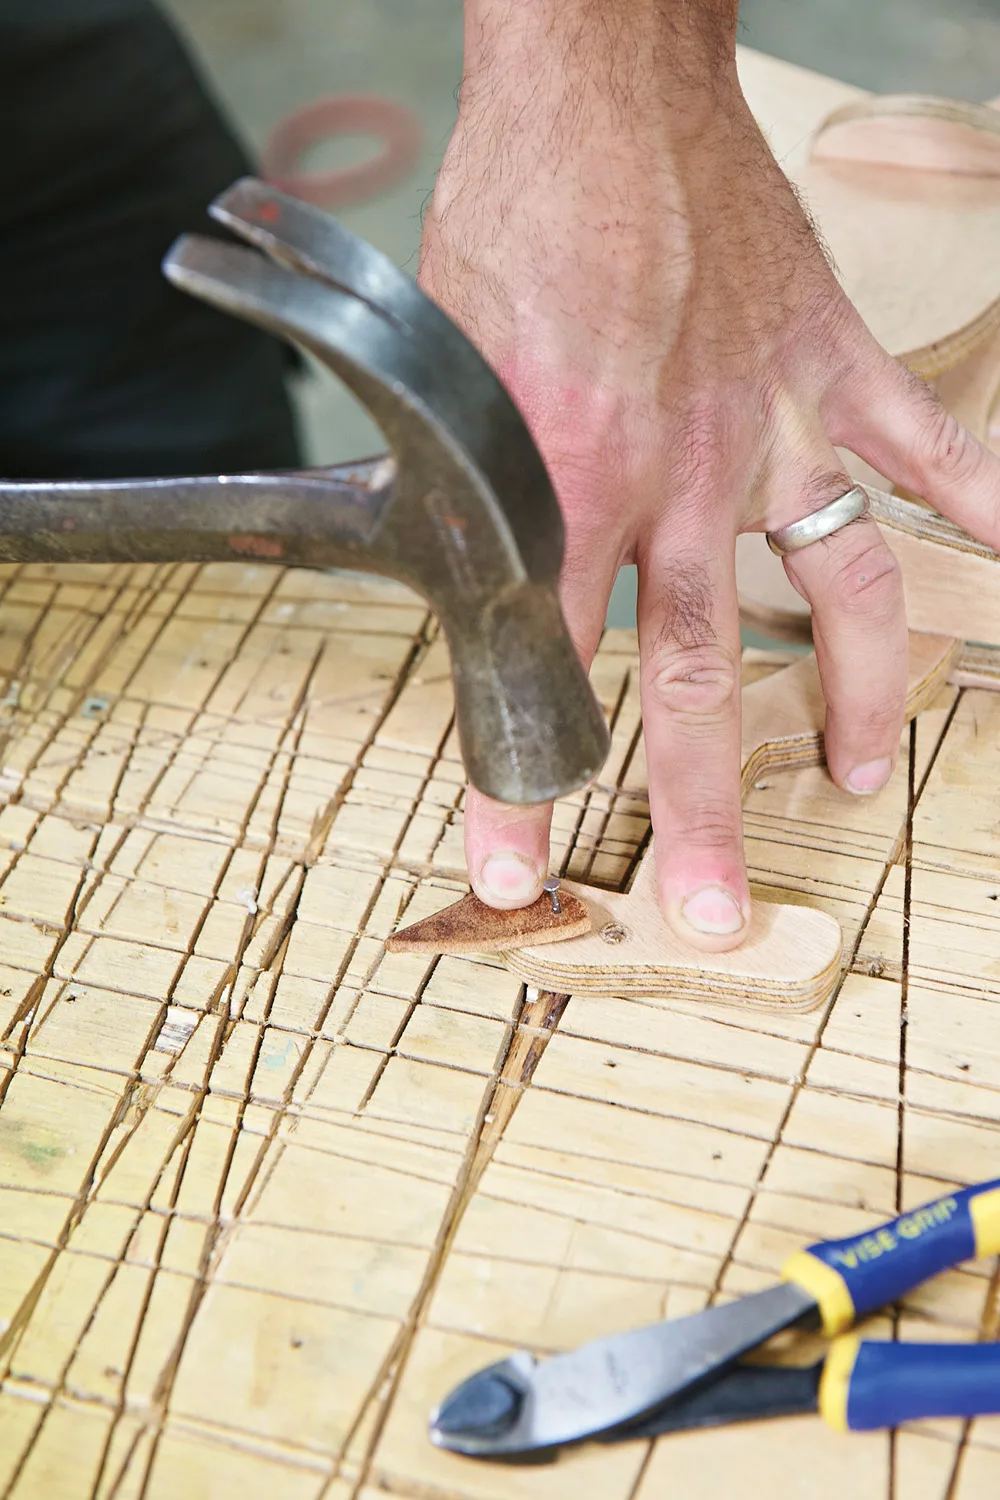
Step 9 Cut the kangaroo’s ears out of leather scraps. You could use an old belt in your wardrobe. To fix the ears to the kangaroo, you’ll need to cut 2 nails in half using cutting pliers.
Step 10 Using the cutting pliers to hold it, hammer the nail through the ear, then place it on the head and nail the ear to the head. Repeat for the second ear on the other side of the head.
Kangaroo wine rack template
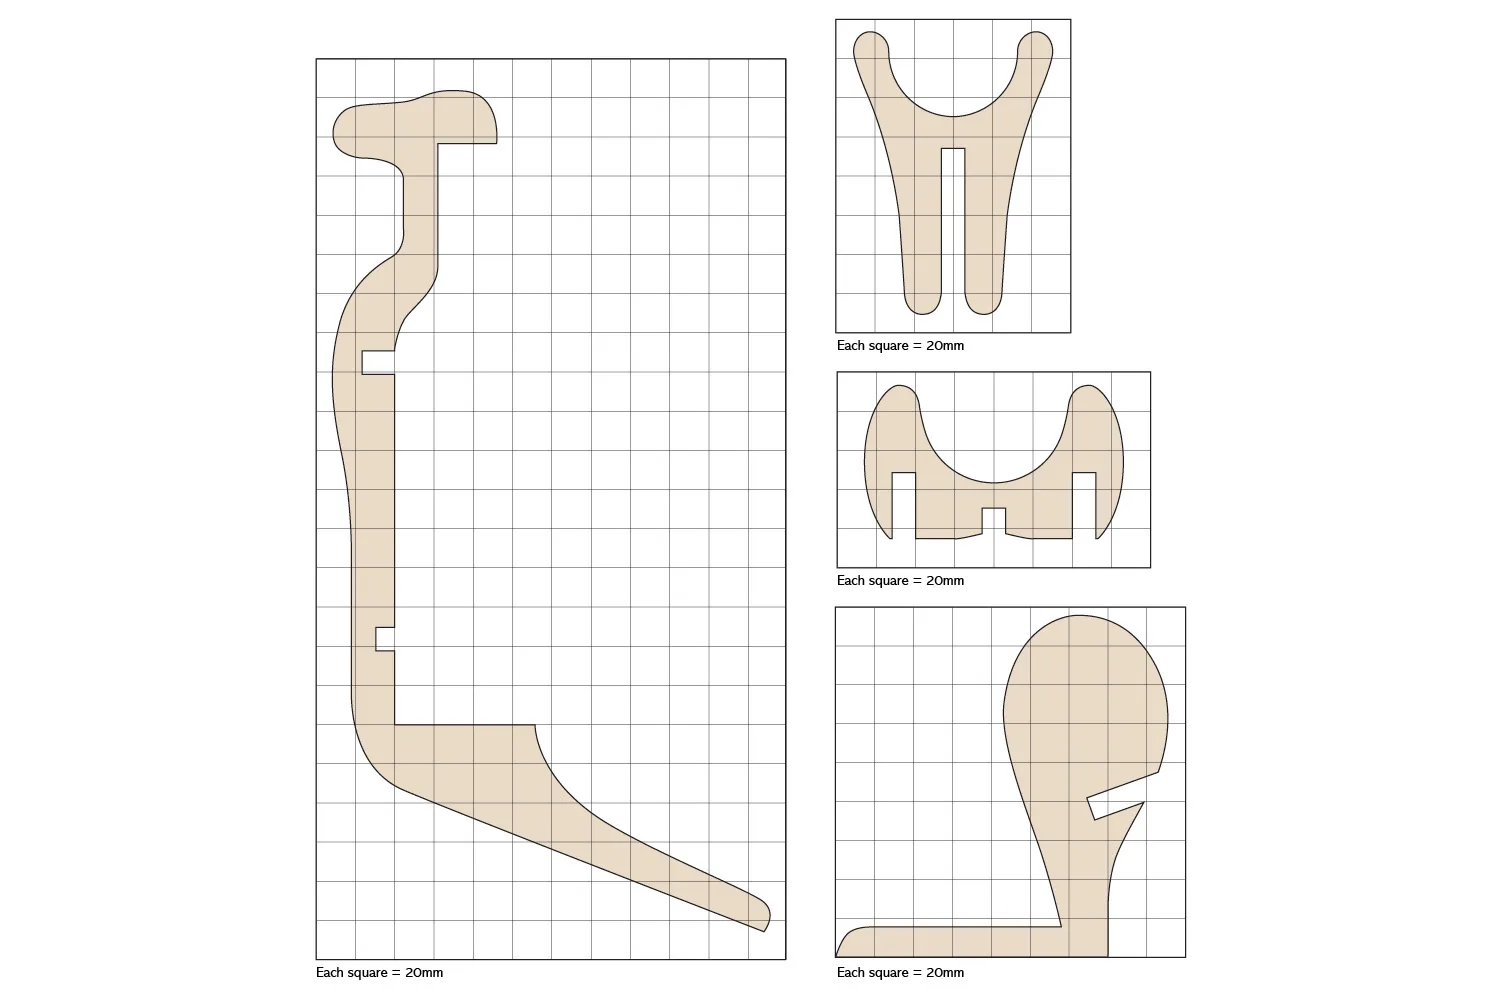
Reindeer wine rack template

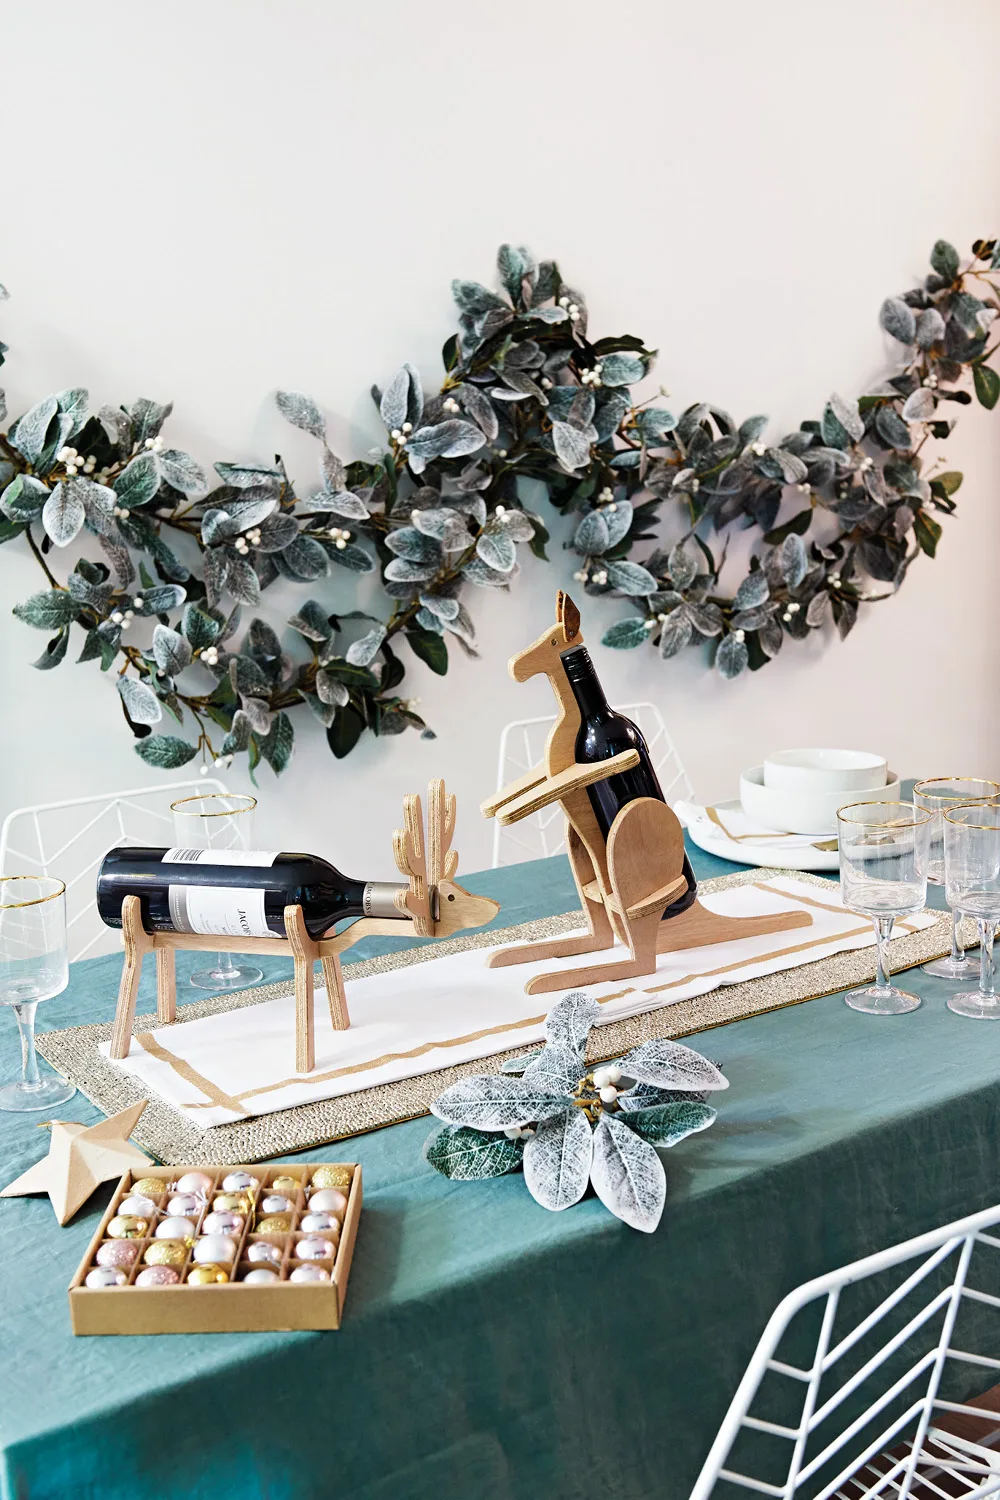
Here are the finished kangaroo and reindeer wine racks
You might also like:
This is one of the best wines in Australia – and it’s only $7
How to pick a good bottle of red, white and sparkling wine
What your star sign says about your wine preferences
Related stories

Native ad body.

Native ad body.


Native ad body.


