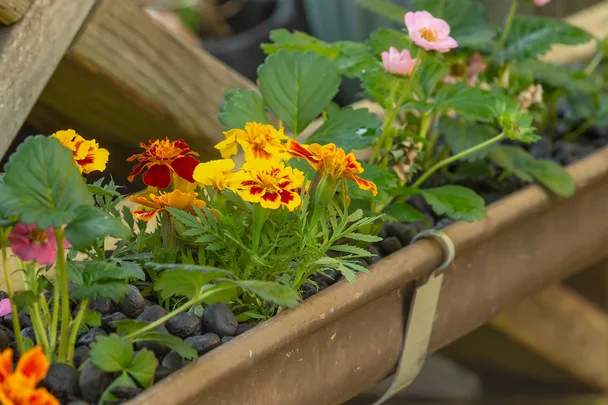
Turn that leftover guttering from a recent reno or that stash you found under the house into a hydroponic garden Charlie makes use of some old scrap he finds under the house to create a length of lush garden bed that will not only brighten up any fence or balustrade, but supply some much needed fresh fruit or vegetables as well.
WATCH: Charlie makes a gorgeous garden with a piece of old gutter
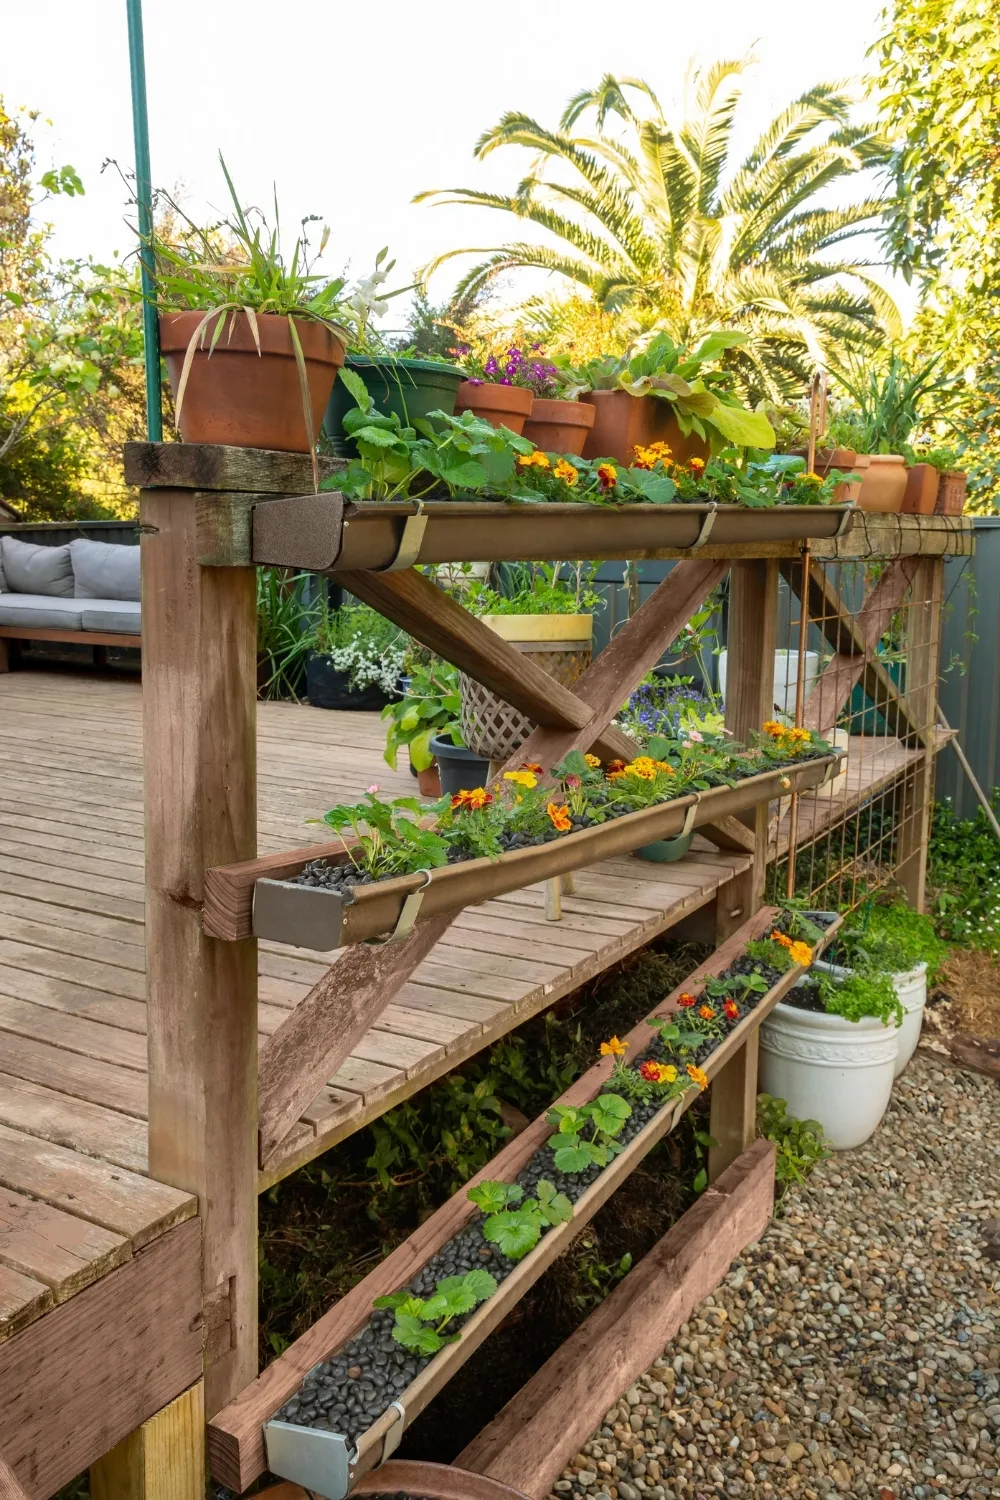
With a couple or three tilted gutters placed vertically, and a concealed pump, you can have a continuous flow of water to irrigate your garden of summer annuals. Just add liquid fertiliser.
Gather your supplies
- Guttering and stop ends
- Brackets to suit guttering
- 90 x 45mm treated pine
- Fired clay pebbles
- Large pot
- Pond pump
- 13mm irrigation pipe and fittings
- 1/2incopperpipe
- 15mm pipe saddles
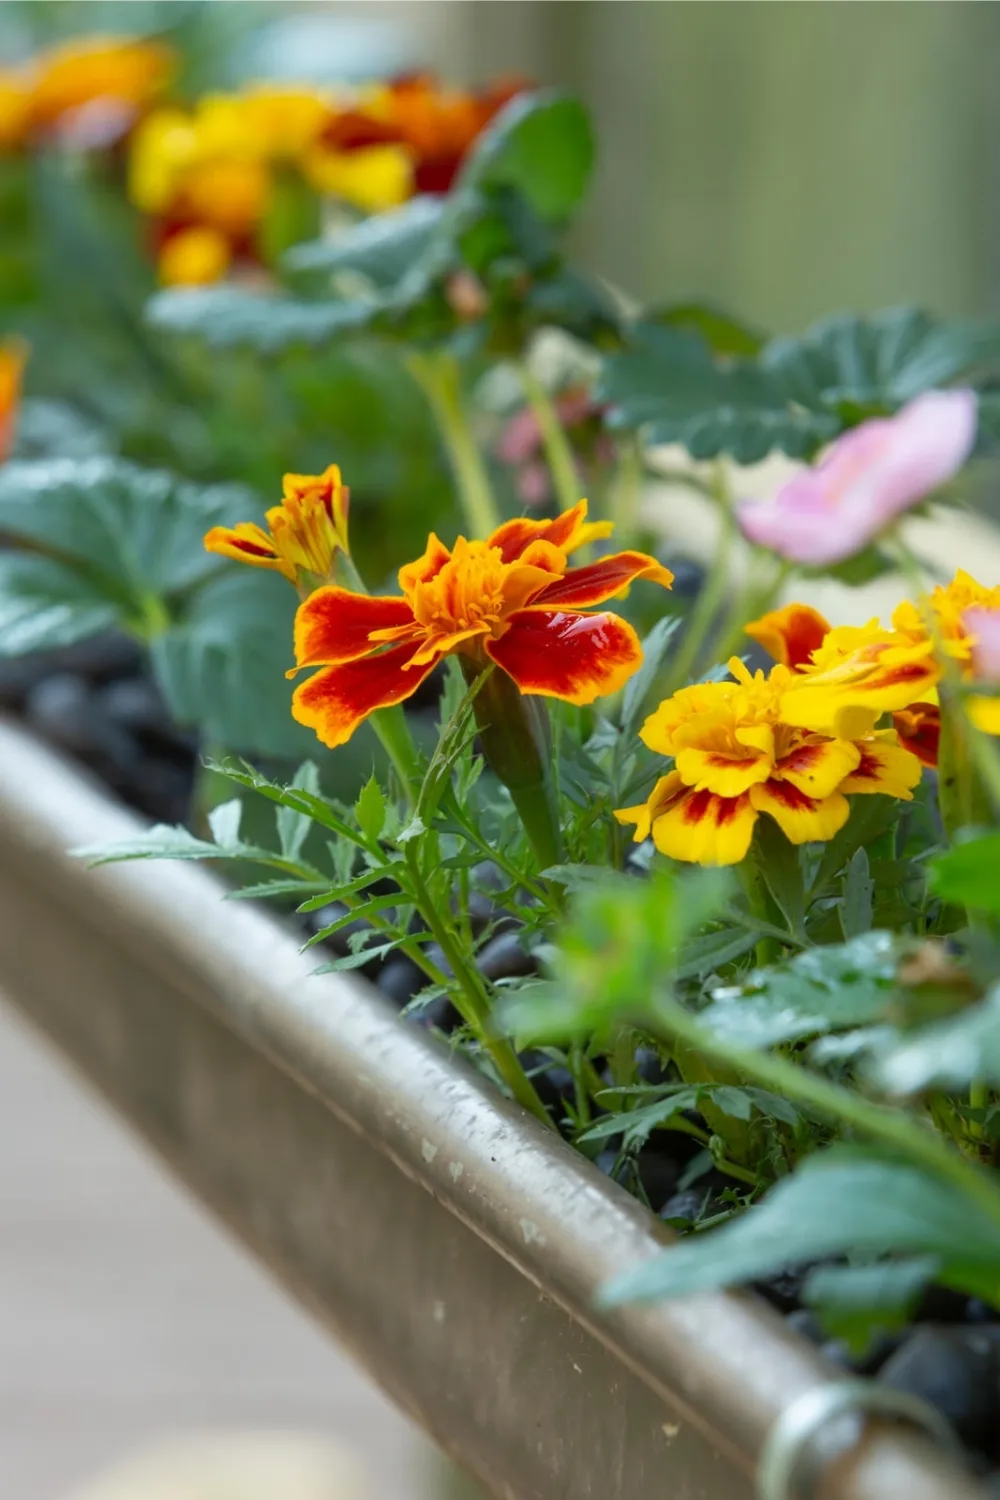
- Plants such as marigolds, strawberries
You’ll also need
- Hacksaw
- Drill
- 3mm drill bit
- Pop rivets
- Pop rivet gun
- Silicone
- Caulking gun
- 30mm screws
- Drill
- Geotextile fabric
- Pond sealer
- Paintbrush
- Aquatic epoxy putty
- Pipe bender
- Liquid fertiliser
Here’s how
Step 1
Cut guttering into 3 equal lengths with a hacksaw.
Step 2
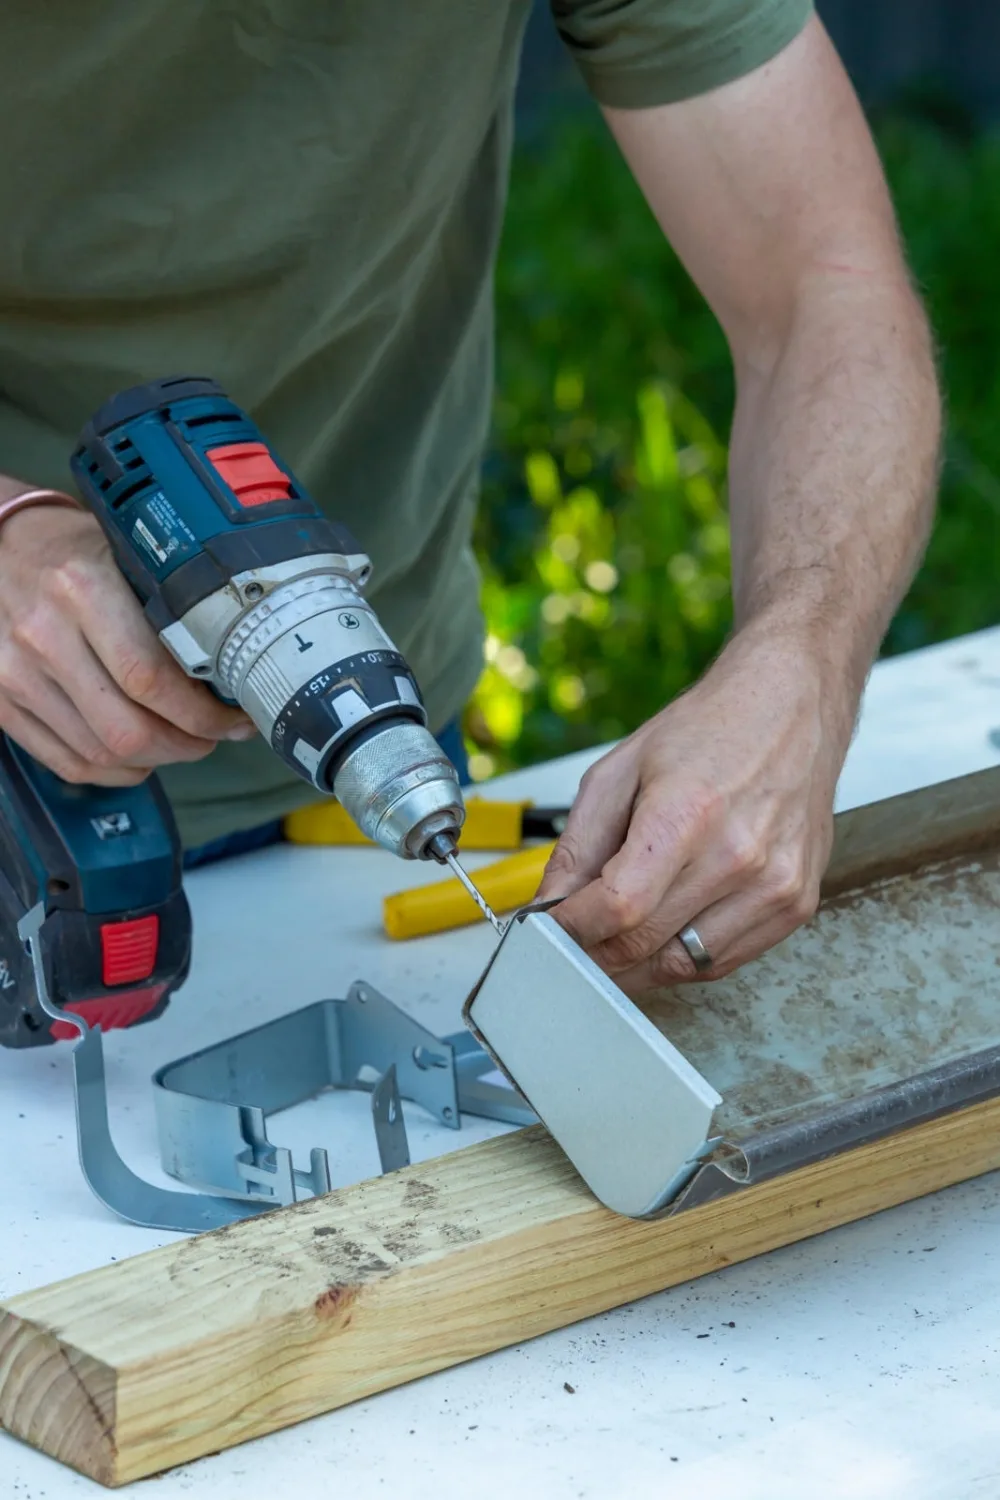
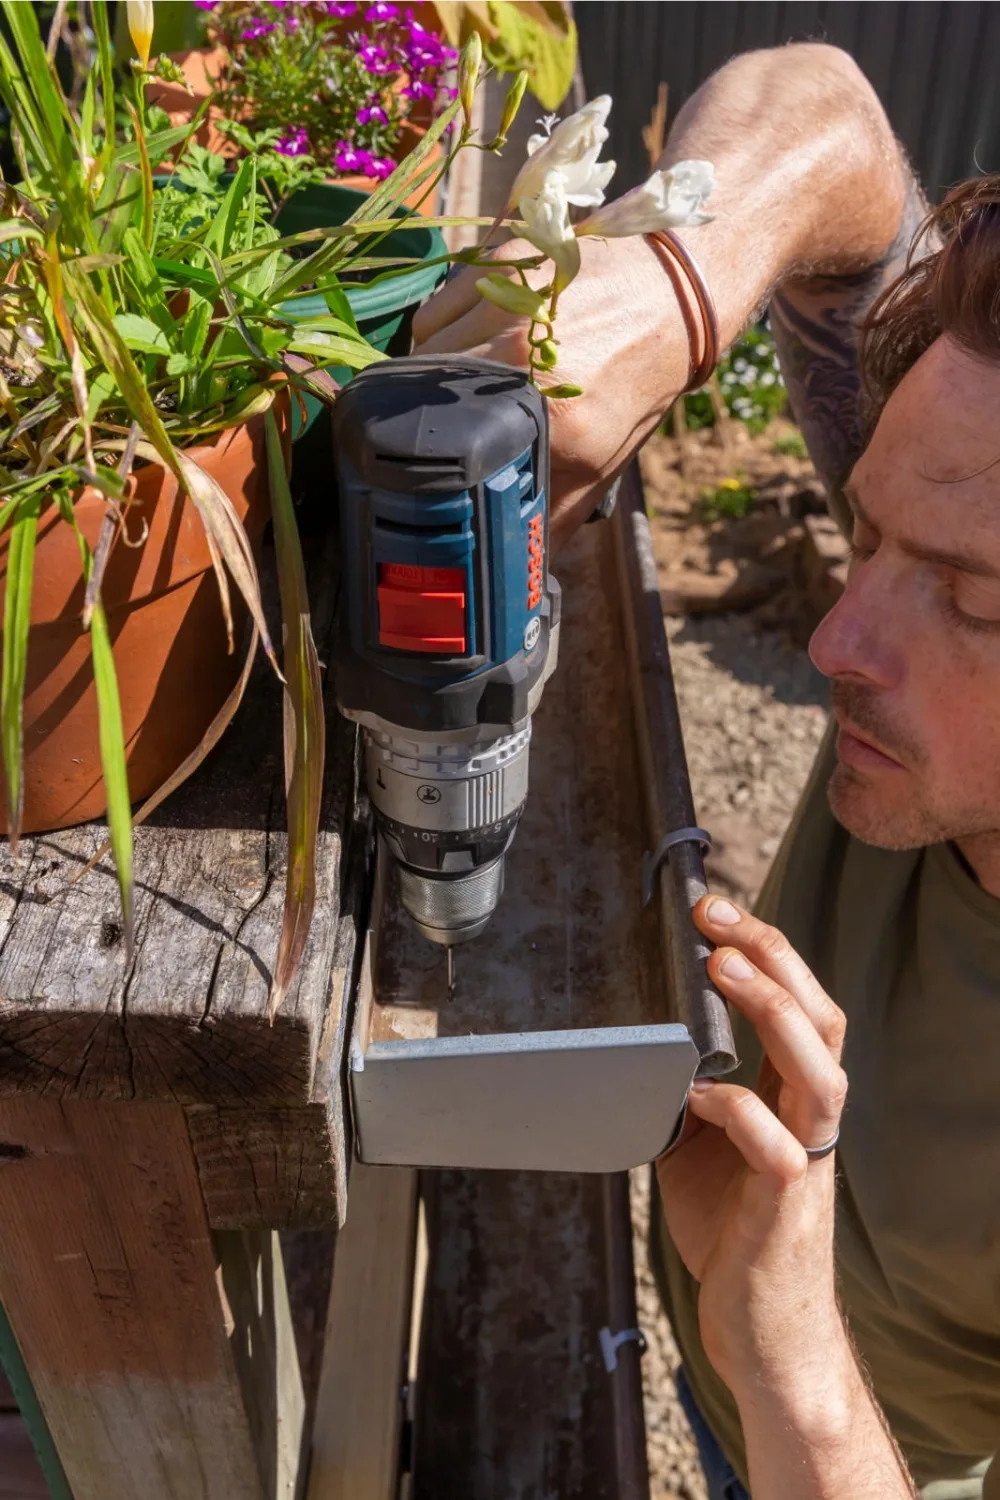
Place stop end in one gutter flush with end. Use 3mm drill bit to drill 2 holes through back of gutter and tab on stop end.
Step 3
Insert pop rivets into gutter and stop end holes.
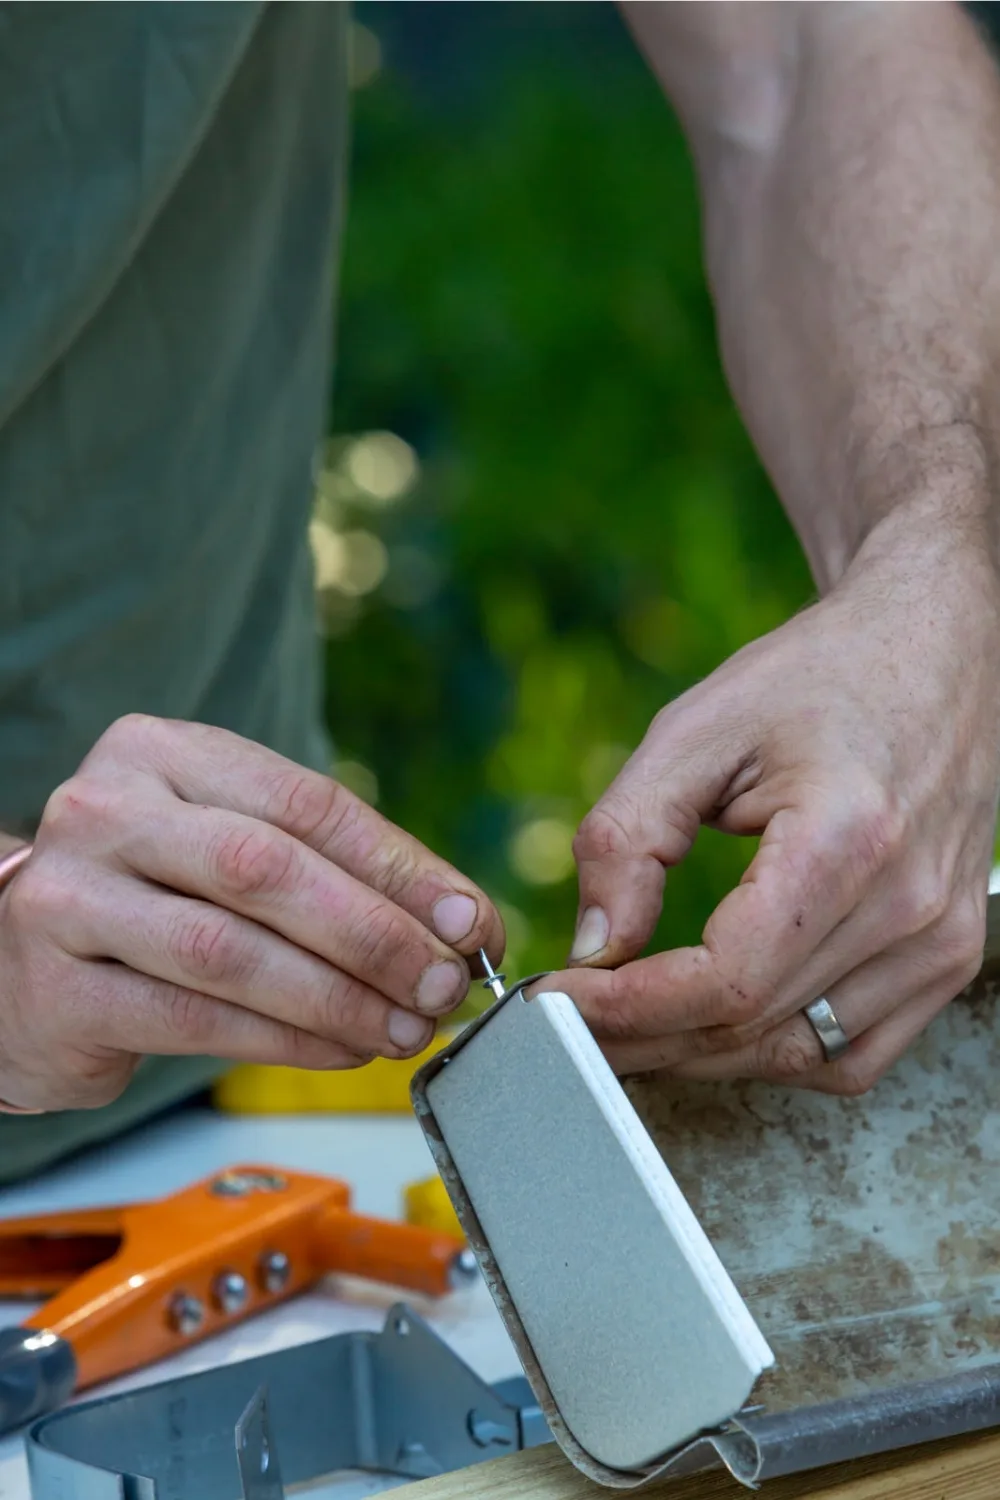
Step 4
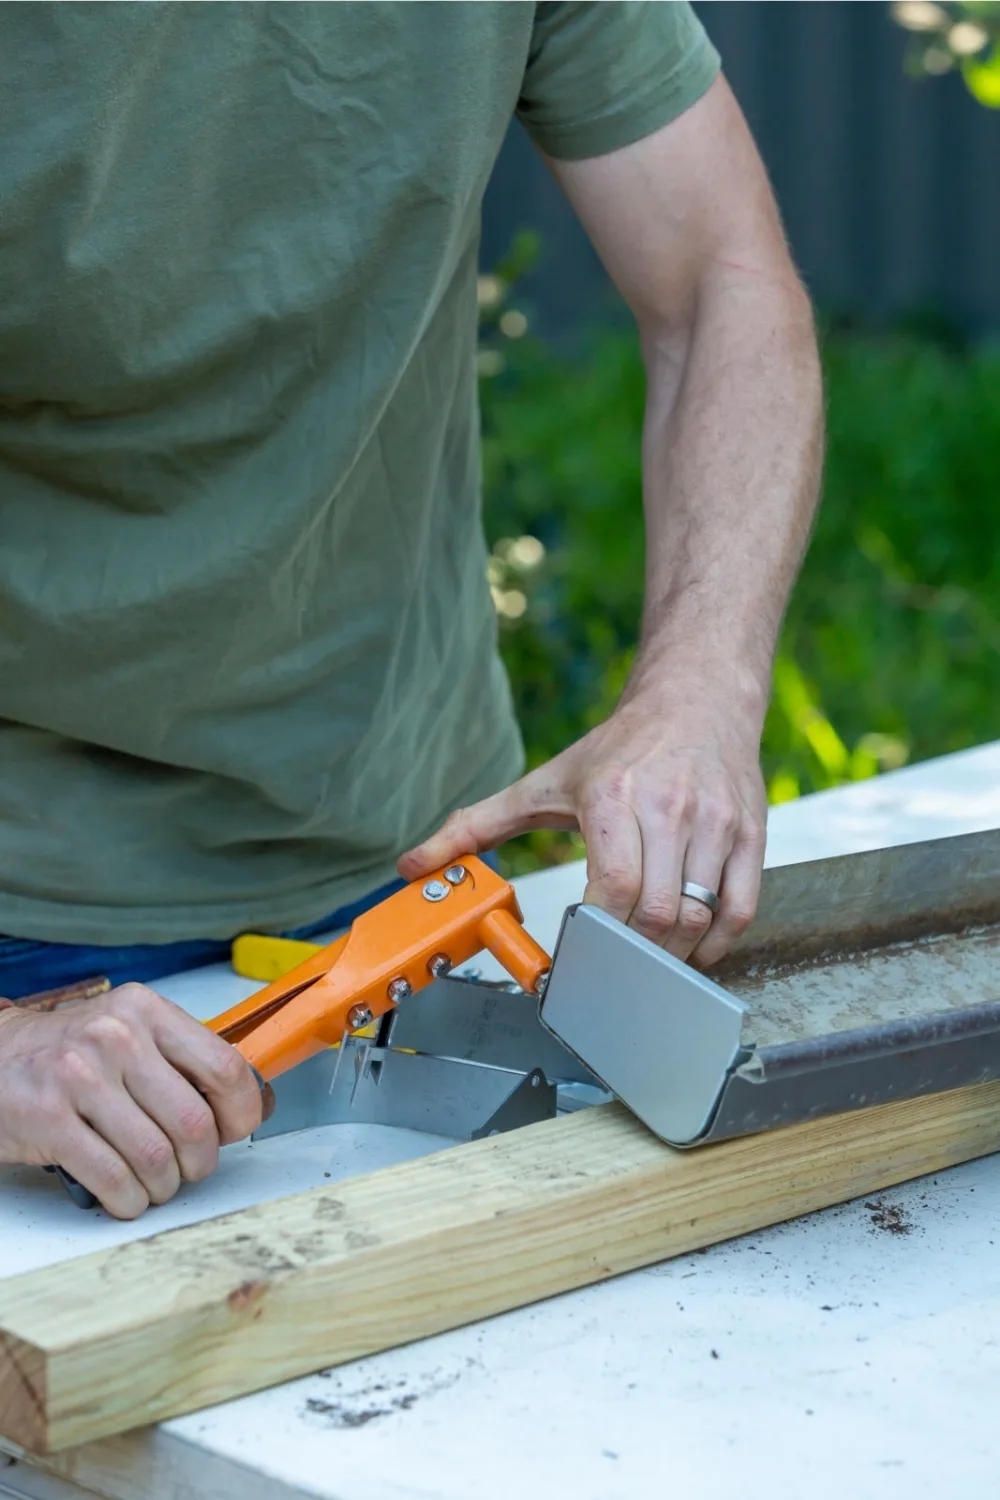
Slide pop rivet gun all the way over pin on first rivet. Pull trigger on gun
a few times to tighten rivet until pin snaps off. Remove pin from gun. Repeat for second rivet.
Step 5
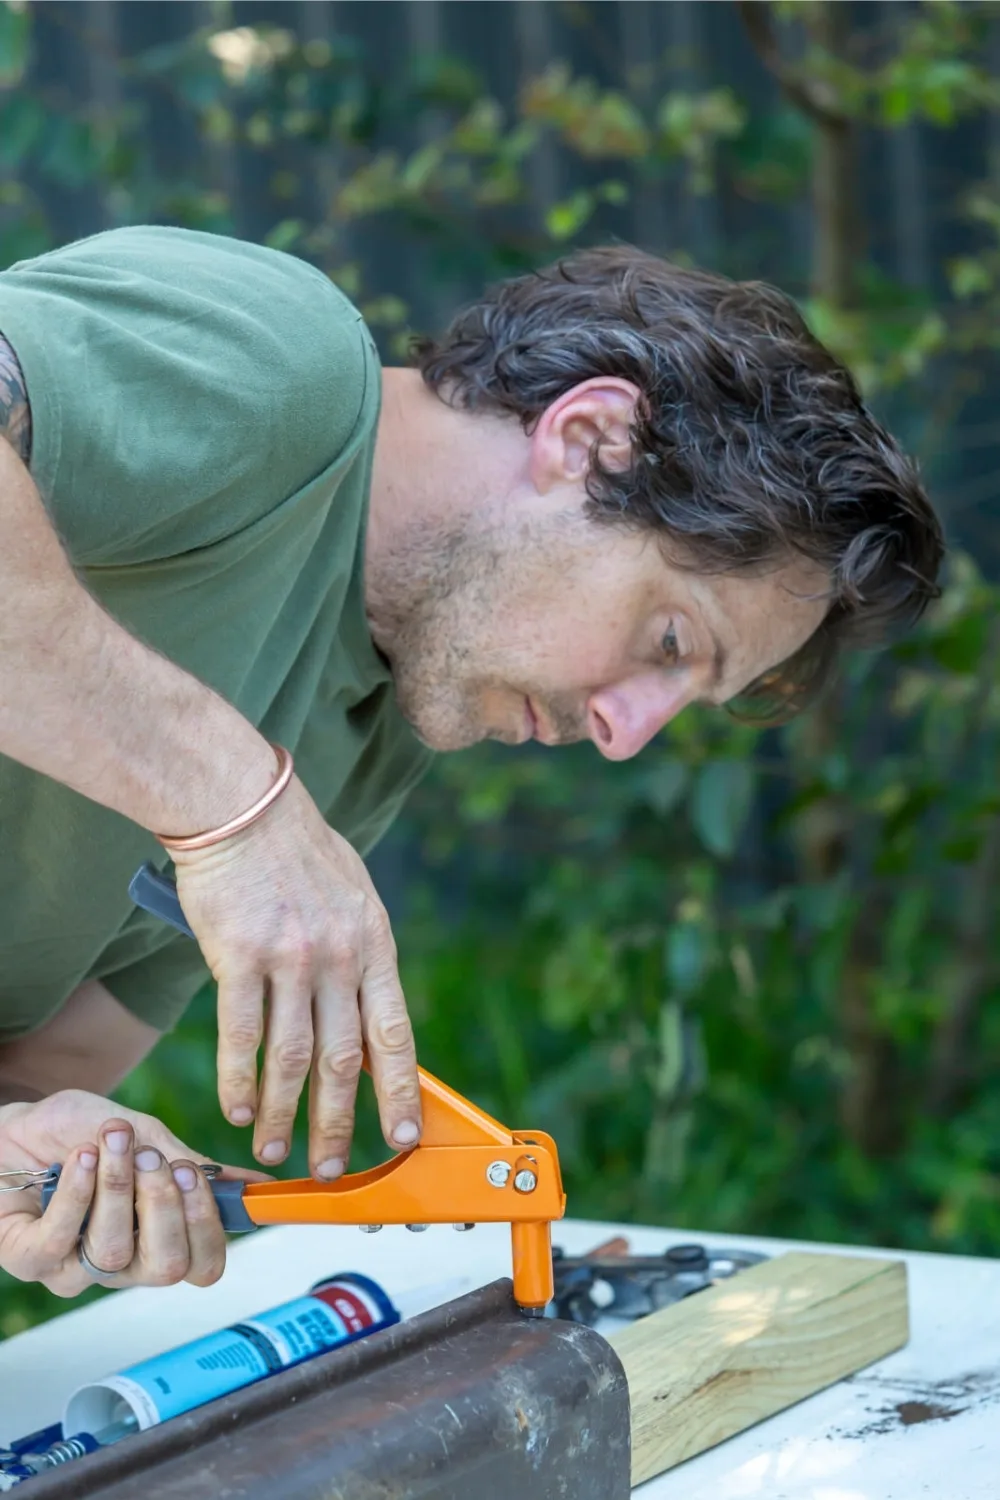
Repeat Steps 2-4 to install pop rivets in the front and bottom of gutter and stop end, then with a stop end on the other end of the gutter. Repeat Steps 2-5 for the other 2 gutter pieces.
Step 6
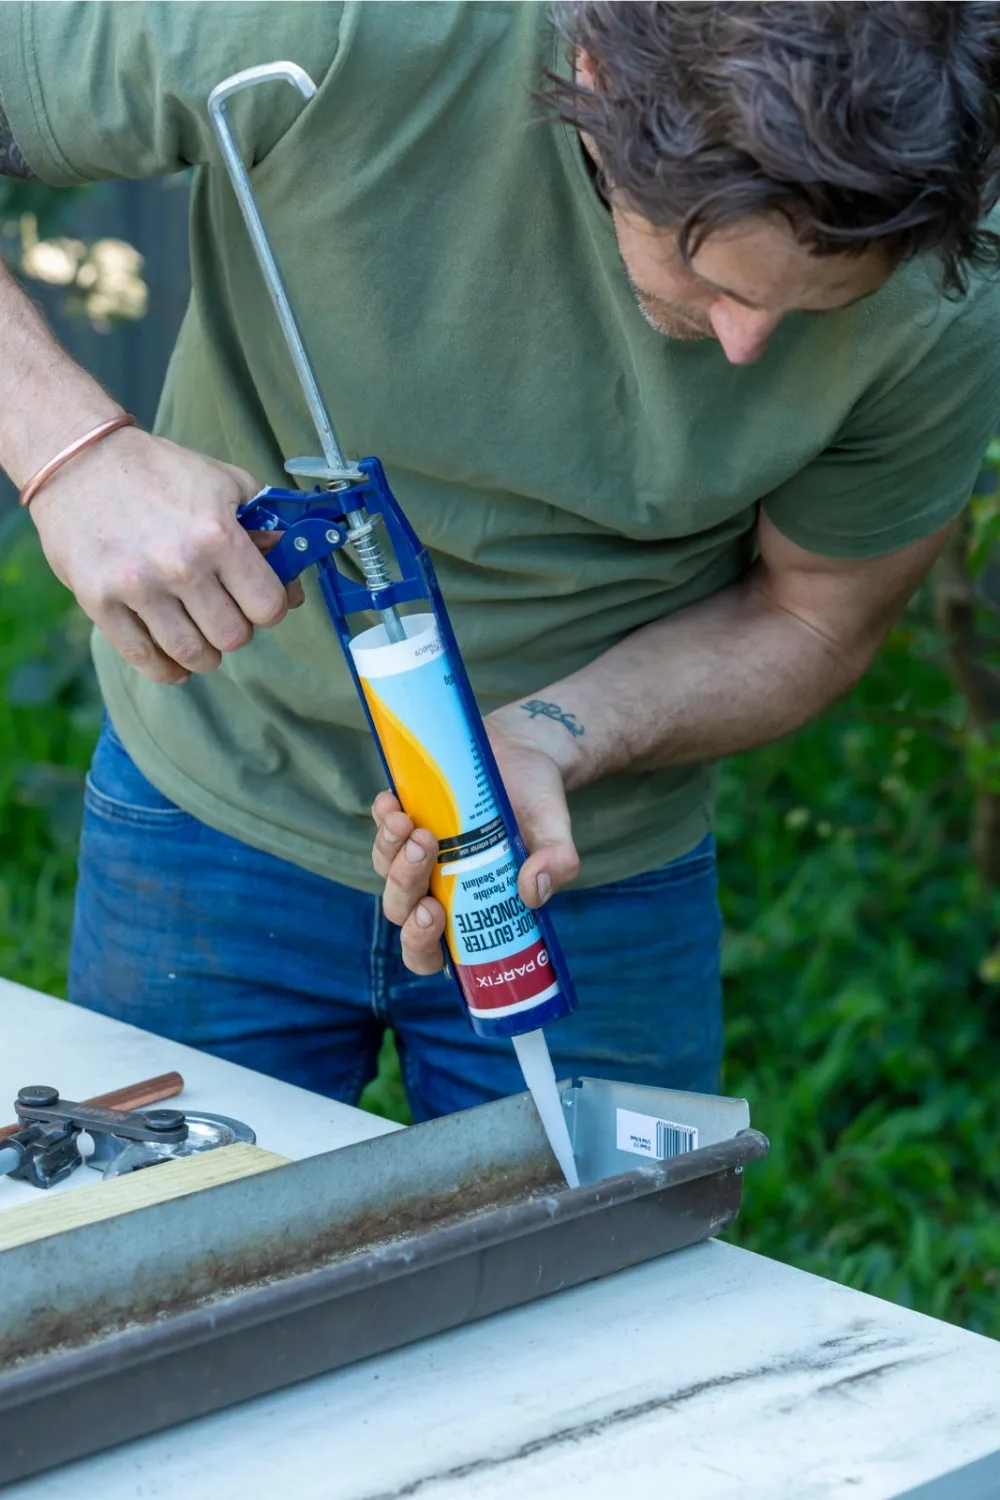
Use a caulking gun to spread generous beads of silicone around inside junction of each gutter and stop end. Use your finger to force silicone into gap between the two and around ends of pop rivets.
Step 7
Place a gutter bracket at the highest end of where the topmost length of guttering will sit. Screw in place through holes in back of bracket.
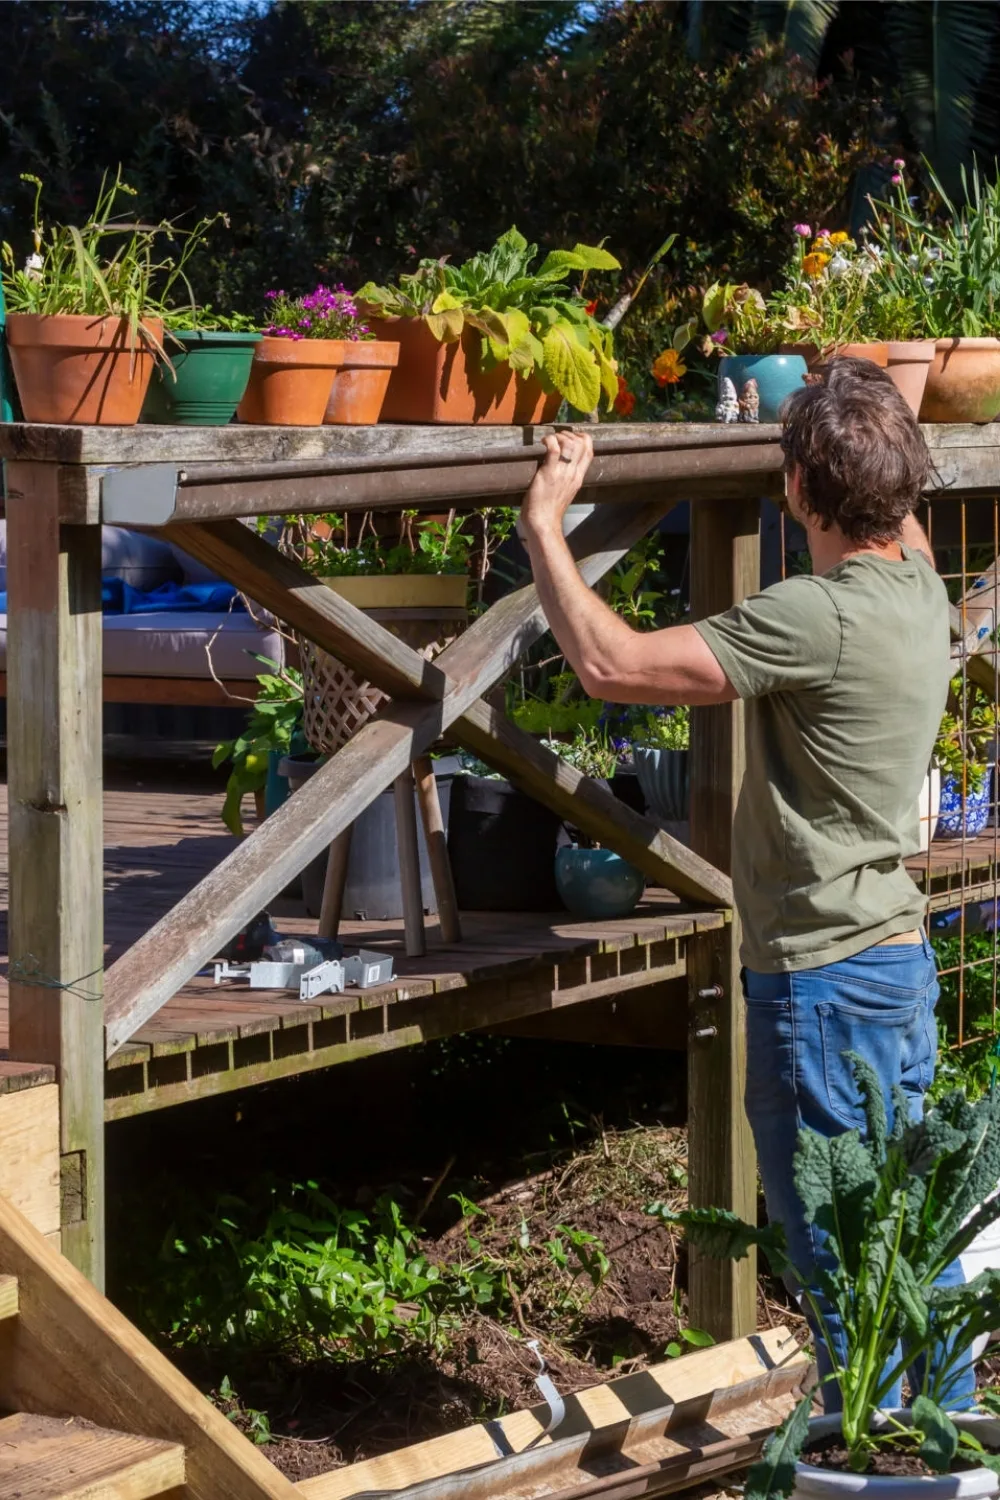
Place a gutter bracket at the highest end of where the topmost length of guttering will sit. Screw in place through holes in back of bracket.
Step 8
Sit length of gutter in bracket and slope it down steeply to exaggerate the design, here by about 50mm. Slip another bracket over bottom end of gutter, hold it in place then remove gutter. Screw bracket in place.
Step 9
Install a bracket halfway between 2 already attached. Make sure this bracket is properly in line with the others so gutter will sit evenly in all 3 brackets.
Step 10
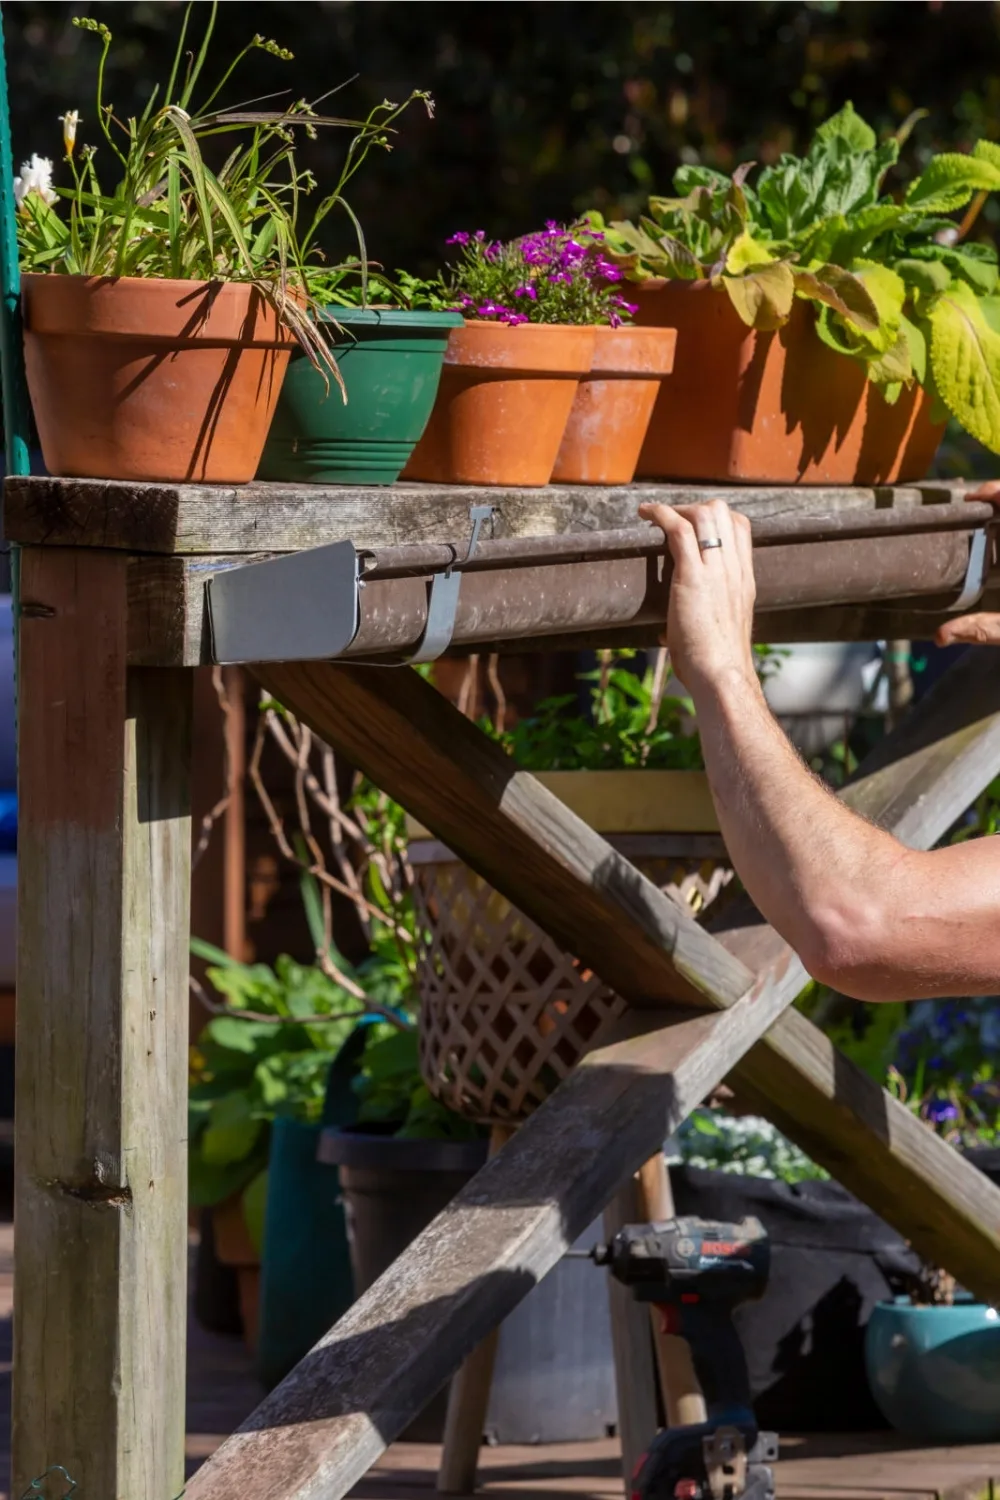
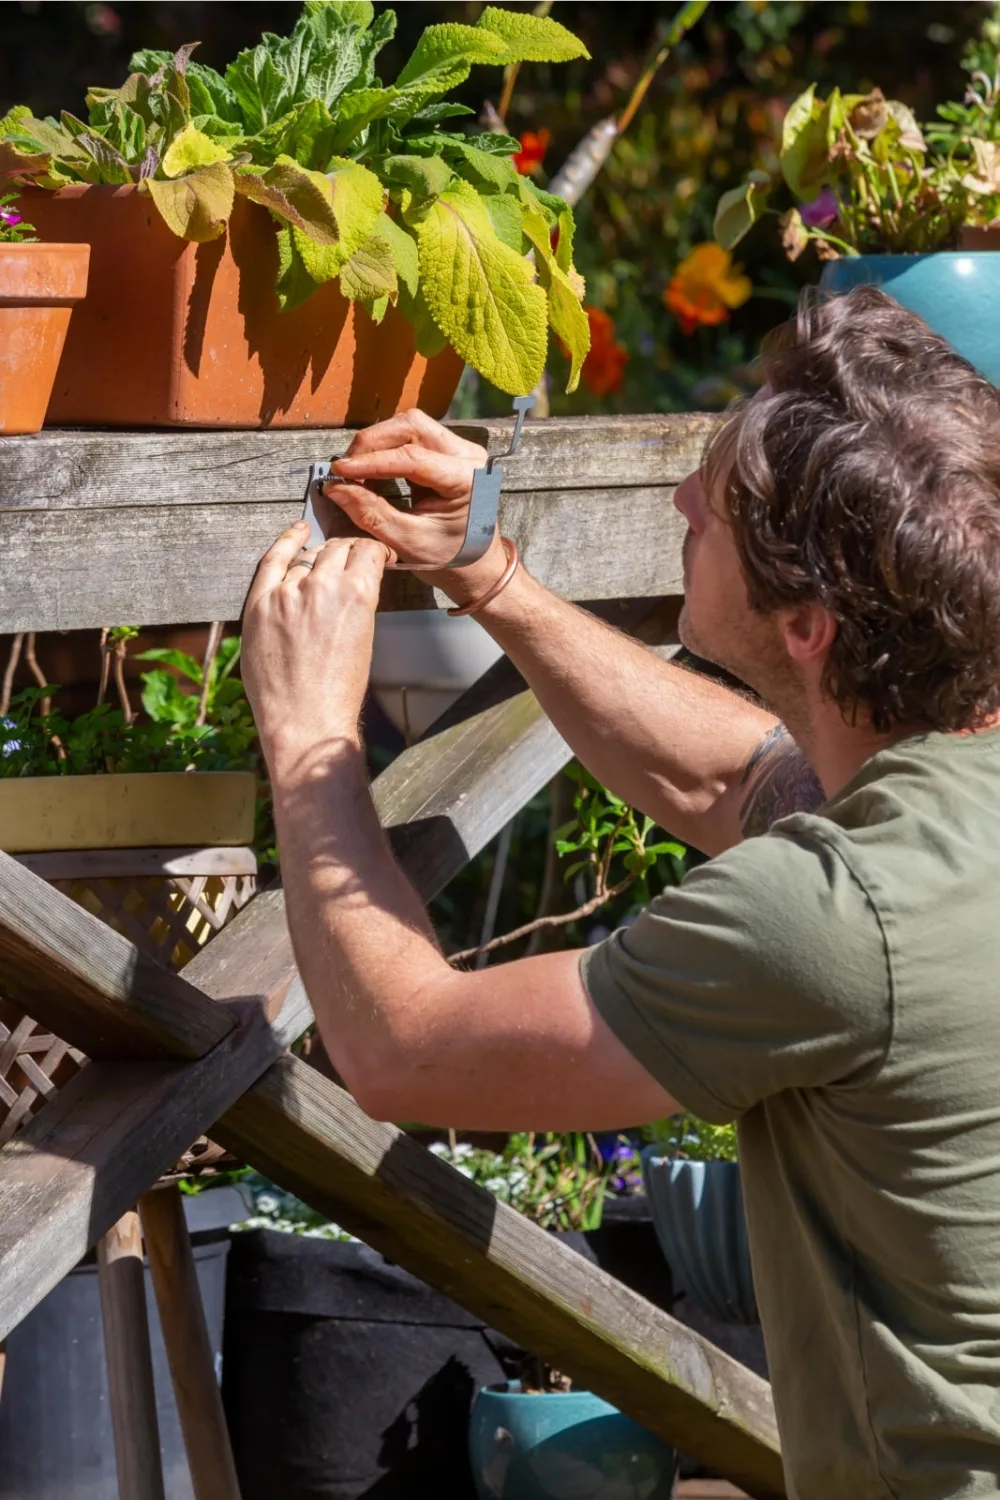
Position gutter in brackets. Bend tabs at front of brackets over gutter to hold it in place.
Step 11
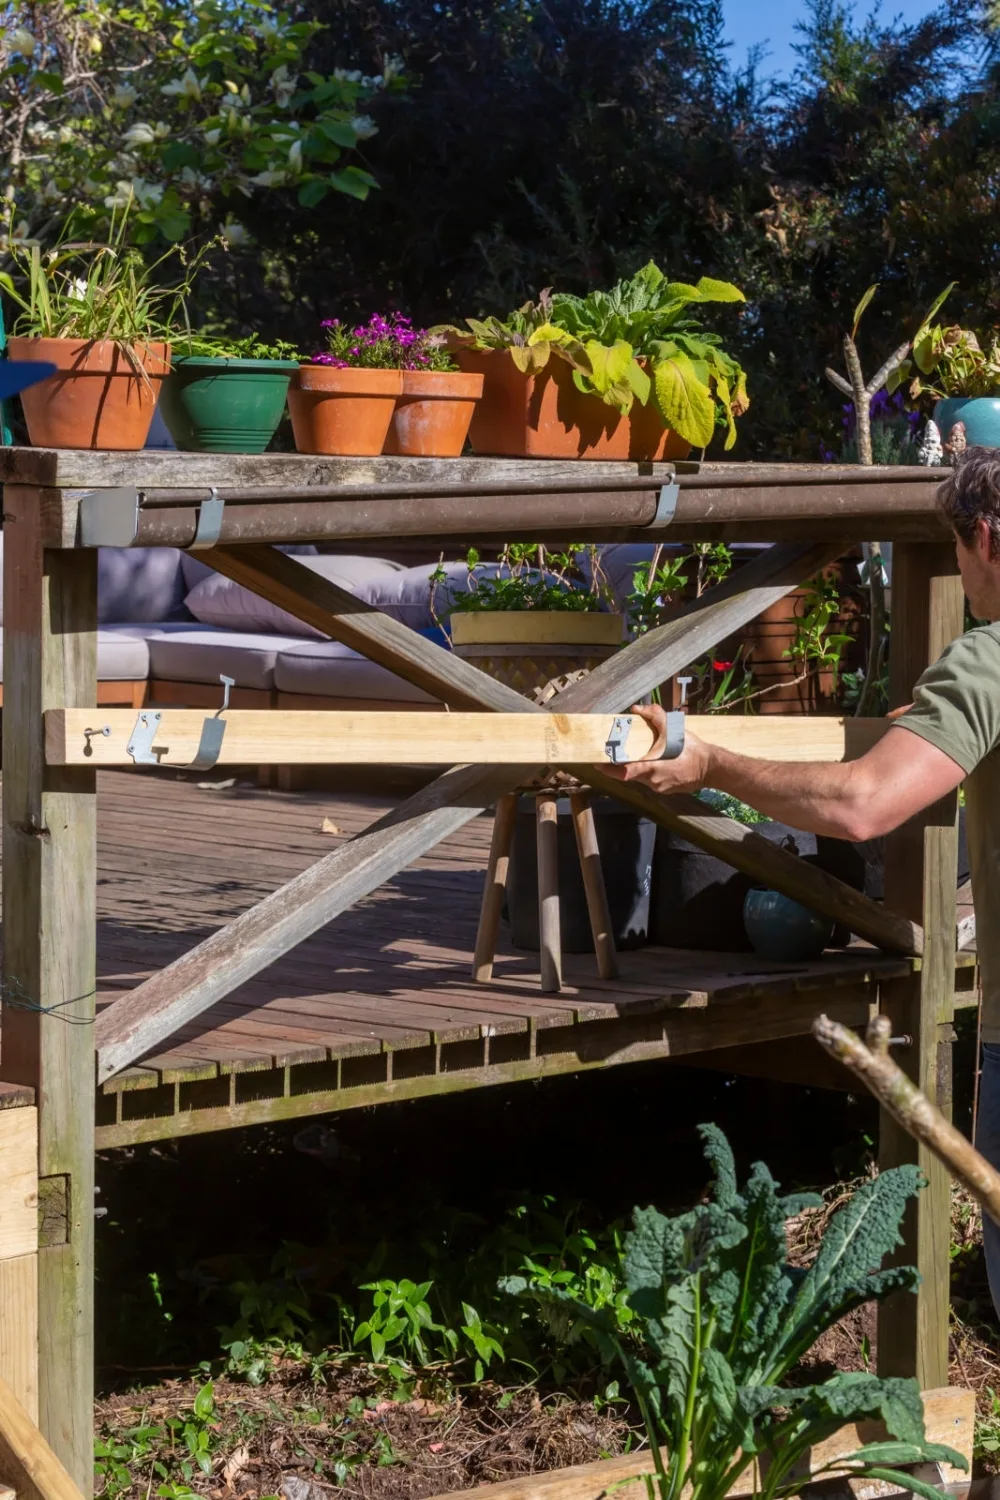
Install brackets for the lower rows of guttering, zig zagging them down on the diagonal. If installing along a balustrade, as here, screw brackets to a length of treated pine, angling the pine to achieve the desired slope. Make thickness of the pine to ensure gutters are all aligned vertically, allowing water to drop from one to the next.
Step 12
Drill drainage holes at the bottom end of each length of gutter to allow water to drain out. Cover each of the areas with small squares of geotextile fabric or old stockings to prevent them getting clogged.
Step 13
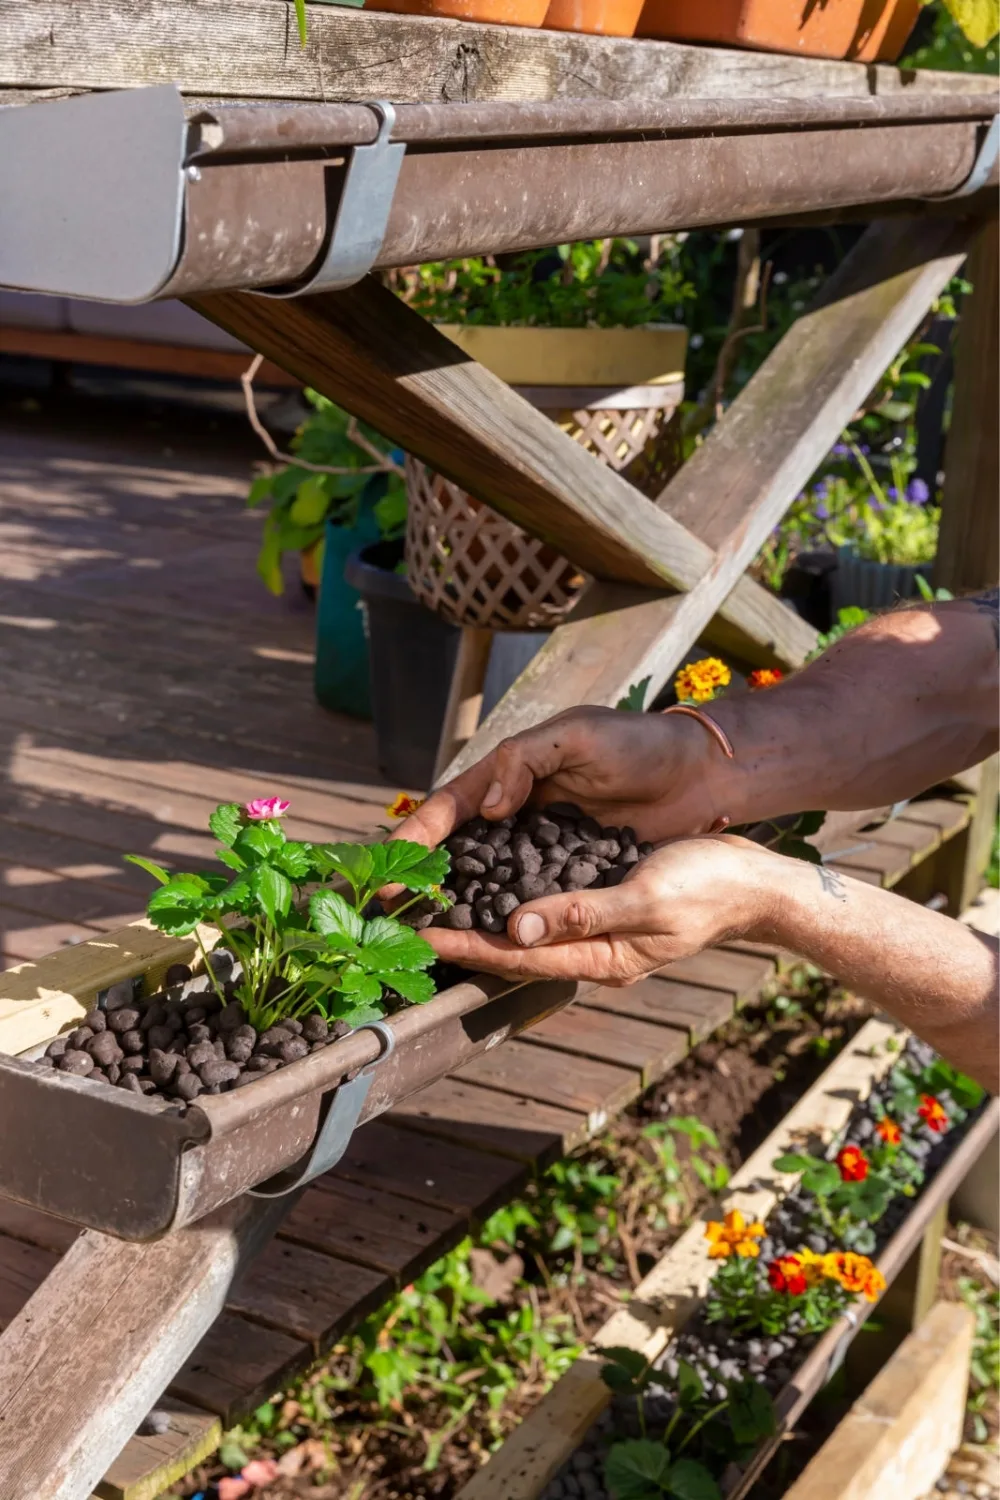
Fill guttering with clay pebbles and plants. Before putting plants in, remove soil from bottom of the roots to expose them.
Step 14
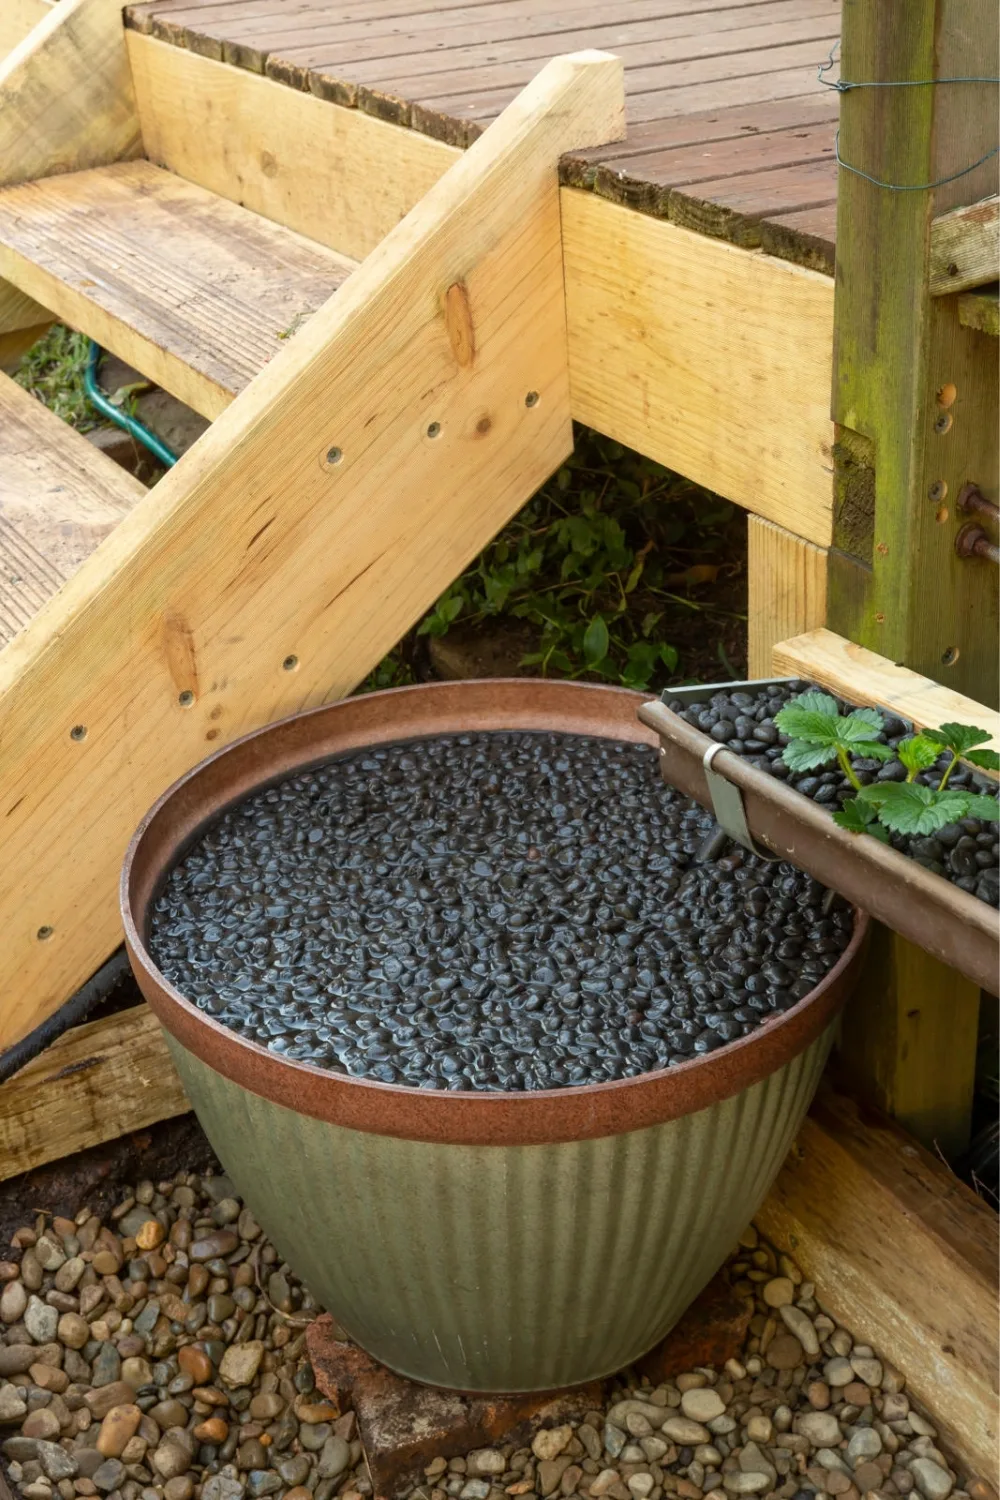
Apply pond sealer to interior of pot with a paintbrush and leave to dry. Plug any drainage holes with putty and leave to cure. Sit pot at the end of the lowest gutter and put a thin layer of pebbles in the bottom. Sit pump on top and run the irrigation pipe and power lead out the top. Use irrigation pipe and fitting to run under the lowest gutter to the other end of it.
Step 15
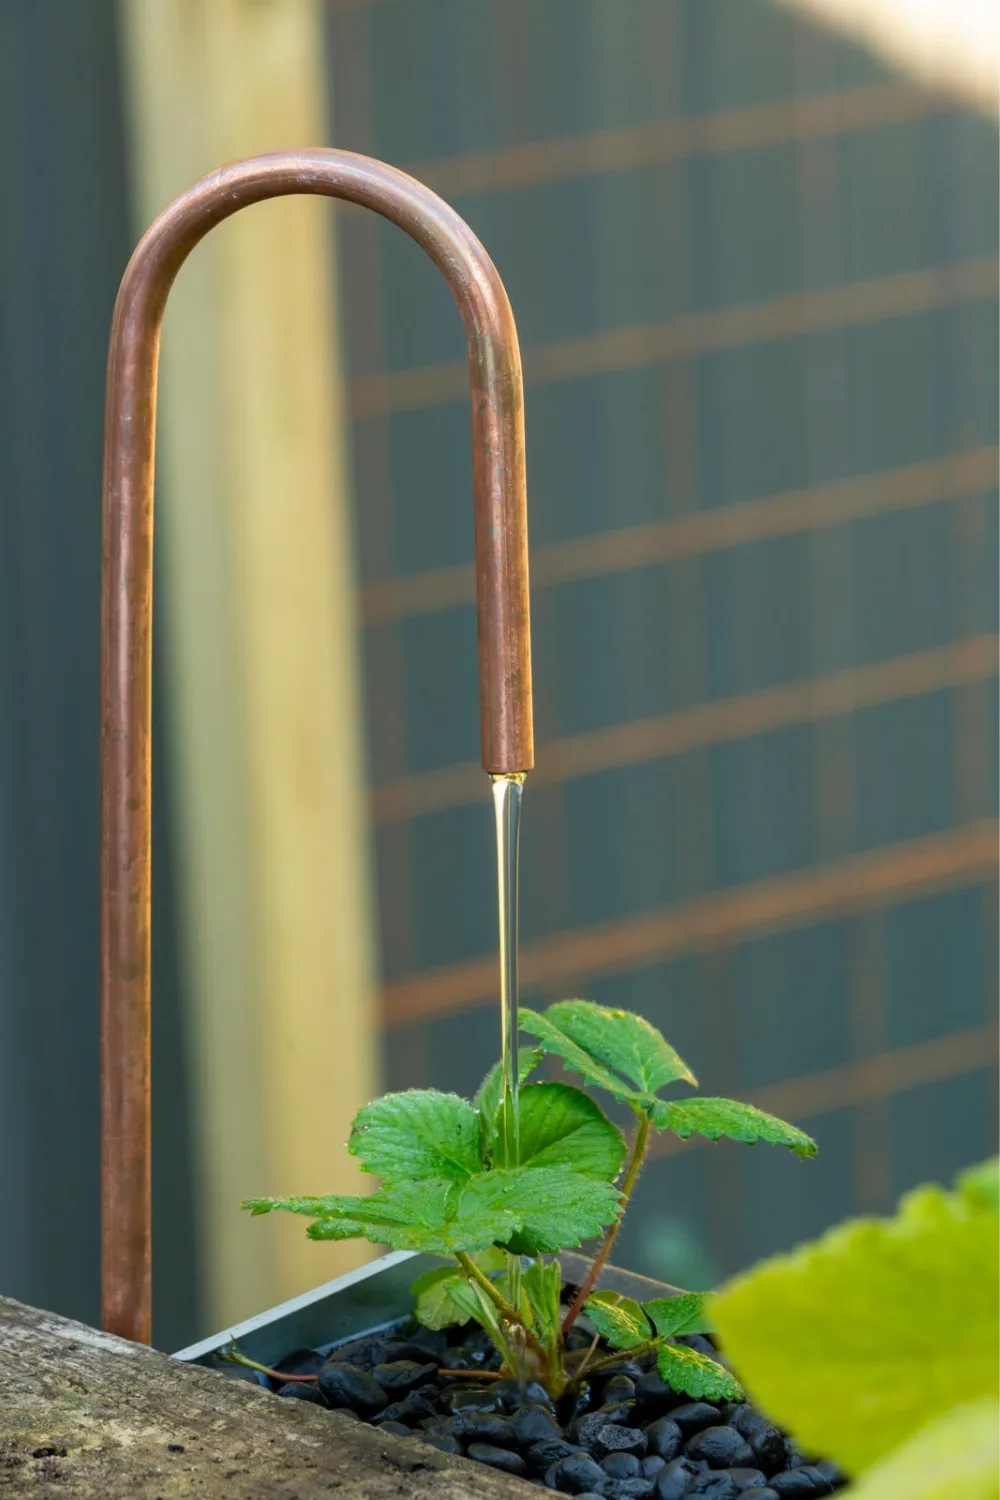
Use a pipe bender to bend one end of the copper pipe to form a spout. Hold against side of gutters so spout sits above top gutter. Mark other end at bottom of lowest gutter and cut to size with hacksaw.
Step 16
Attach spout to side of guttering using pipe saddles. Connect irrigation pipe from pump to bottom of spout.
Step 17
Fill pot with water and turn on pump so it flows out of spout. Add liquid feed according to instructions.
Hydroponic basics
Hydroponics involves growing plants without soil. Plants are put in an inert medium – in this case clay pebbles – and water is pumped through the levels, so there is a continuous flow. Liquid fertiliser is added to the planters for nourishment.
This DIY system uses tilted gutters. Water is pumped from the pot to flow out of the spout into the raised end of the top gutter. The water then slides to the end and drips into the raised end of the middle gutter and on to the third, where the water returns to the pot and the whole process begins again.
You might also like:
How to make a water garden in a bowl
How to make an upside-down tomato planter
A vibrant DIY courtyard makeover
Related stories

Native ad body.

Native ad body.


Native ad body.


