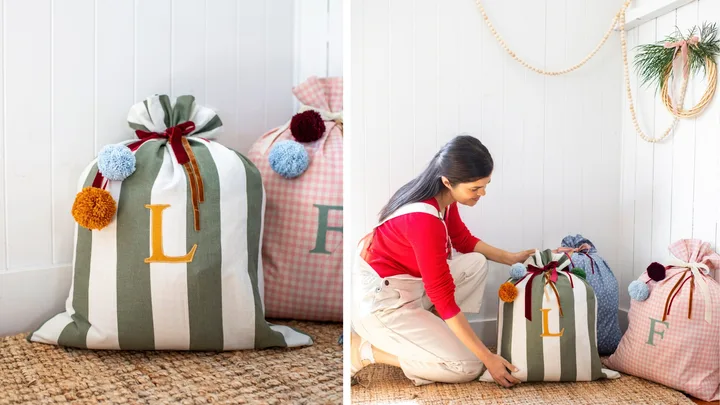
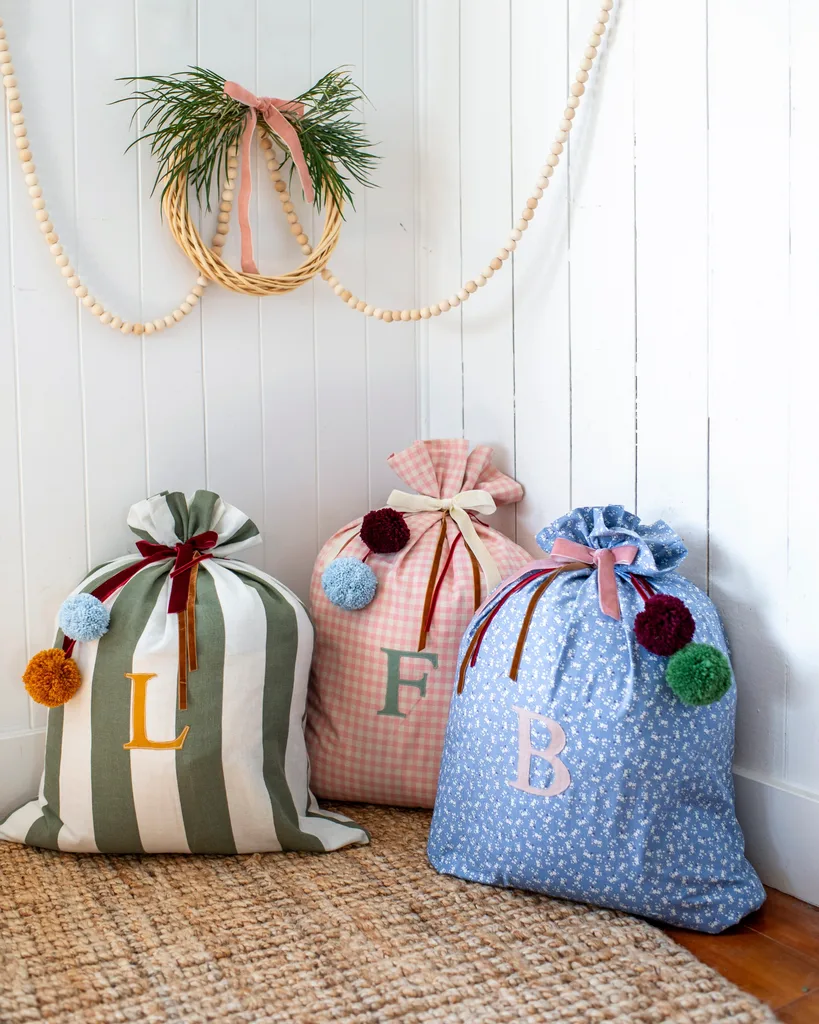
Handmade details make the holidays feel even more special. For these personalised sacks, you can use any type of fabric you like – don’t feel like you have to stick to the traditional palette of red, white and green. We’ve added large pom poms as a fun finishing touch.
Simple to sew, and endlessly customisable, these Santa sacks are sure to become part of your family’s Christmas traditions.
How to make a personalised Santa sack
Gather your supplies
- 1 metre mid-weight fabric (calico, linen, canvas or cotton)
- A small piece of contrasting fabric for the initial
- Printed paper letter template
- Spray adhesive
- Piece of cardboard (to fit letter)
- Thread (to match or contrast)
- Ribbon
- Pom poms (optional)
You’ll also need
- Sewing machine
- Fabric scissors
- Pins or fabric clips
- Ruler
- Fabric marker
Safety notes
- Take your time with small details like sewing around the letter.
- Keep pins and needles in a pin cushion or container so they don’t get lost.
Step 1
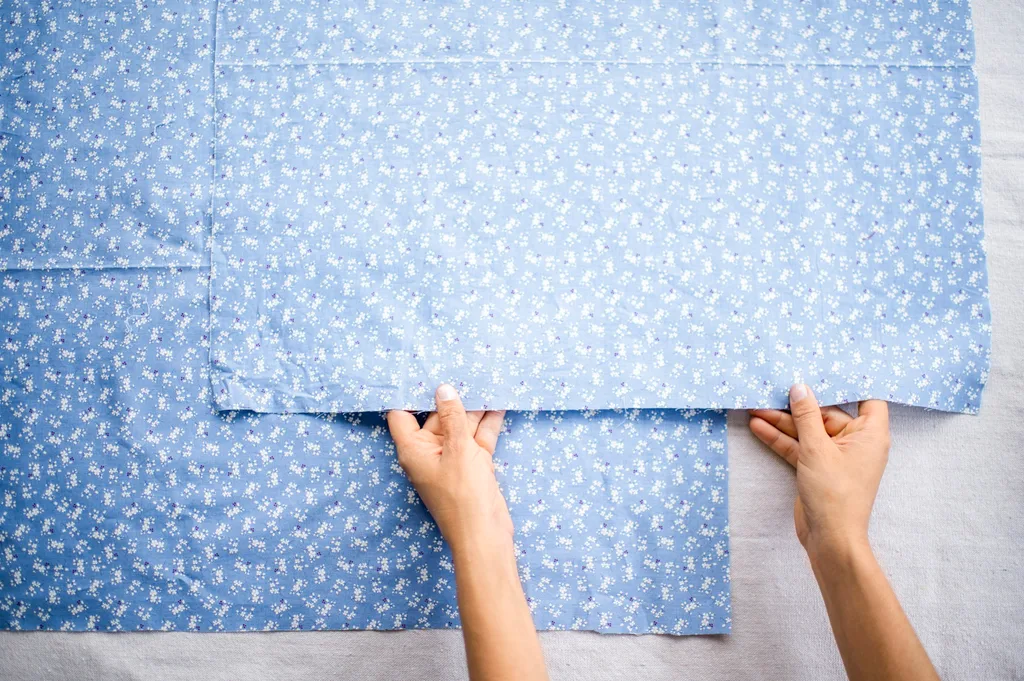
Cut two 60 x 80cm rectangles from your main fabric, then press with an iron to smooth out creases.
Step 2
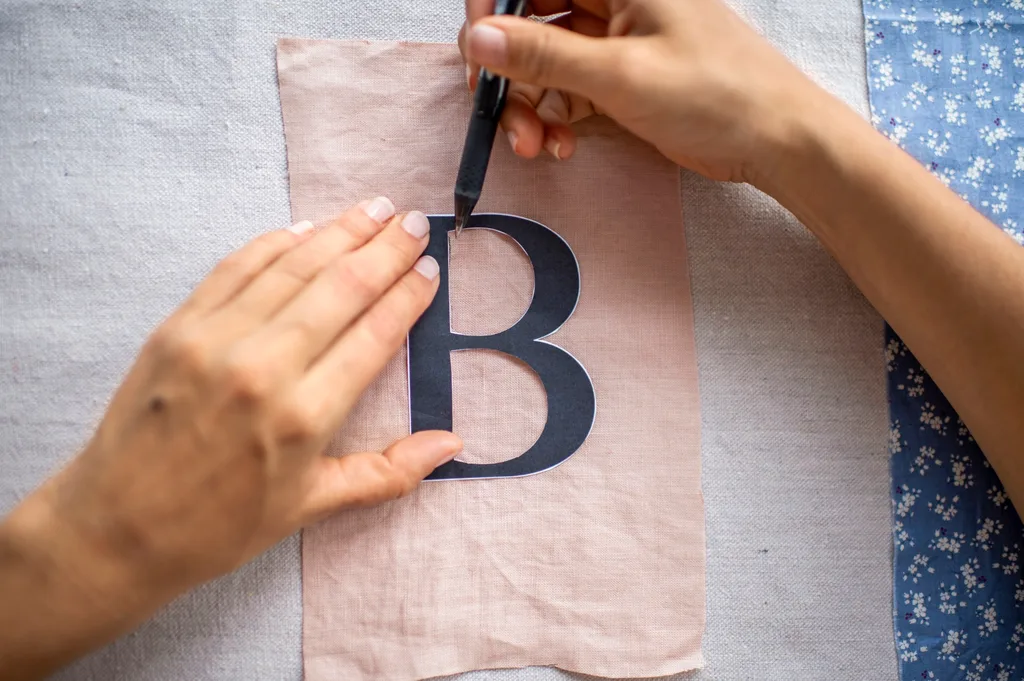
Using Word on a computer, choose font for the initial, print it at your desired size and cut out the paper letter to make your template.
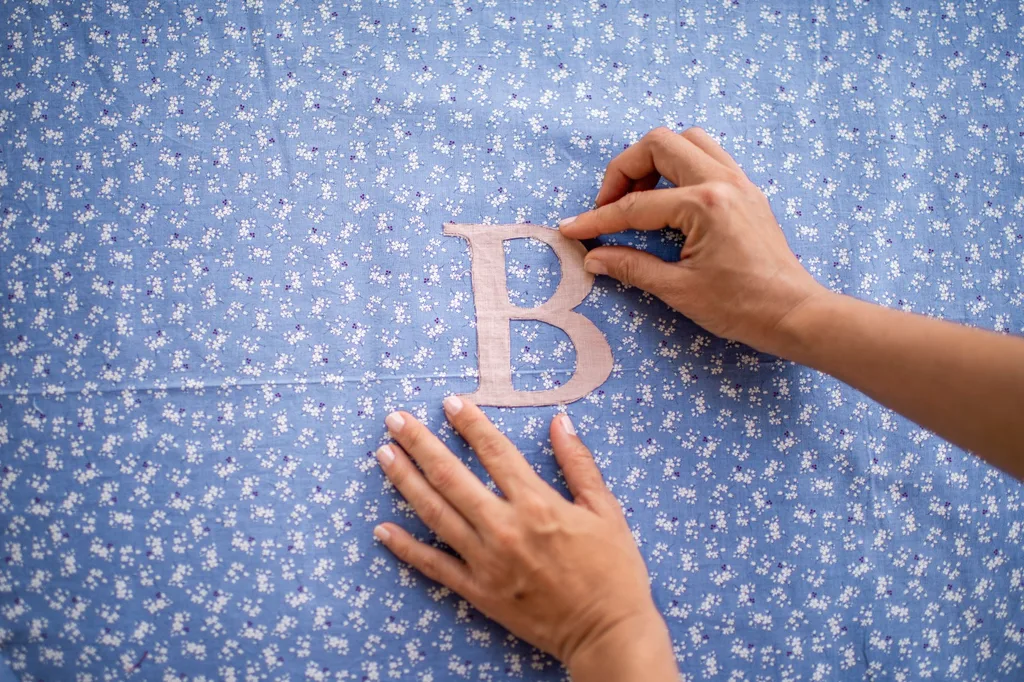
Step 3
Spray the back of the letter with adhesive, then stick to cardboard. Cut out around the letter to make the template. Place template on the contrasting fabric, mark around its shape and cut out using fabric scissors.
Step 4
Position the fabric initial on the front rectangle, then pin in place. Sew around the edge to secure.

Step 5
With right sides together and allowing a generous seam, sew the two rectangles along both sides and the bottom, leaving the top open.
Step 6
Fold the top edge down 8cm to the inside to form a hem and sew all the way around.

Step 7
Tie the sack closed with a ribbon. Add pom poms if you wish.
Quick tips
- Choose a sturdy fabric so the sack holds its shape.
- Mark sewing lines lightly with chalk or a washable fabric pen.
- You can swap the initial for a festive motif (like a star or tree) if you like.
Related stories
Native ad body.

Native ad body.


Native ad body.