

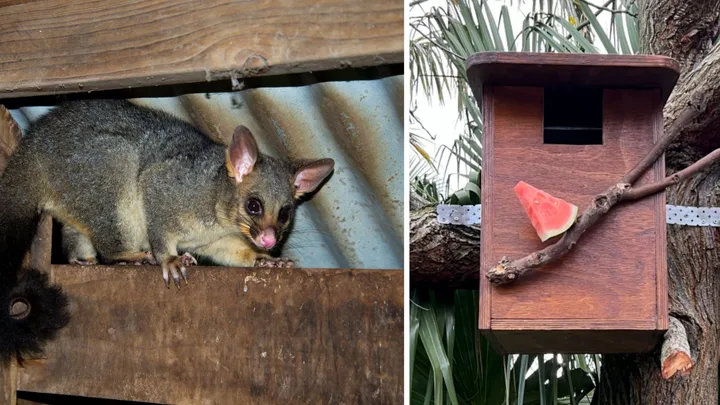
If you have to learn to live with your furry marsupial friend, do it on your terms. Evict them from your attic and build them their very own possum box!
This DIY will give your resident possum their own space and a safe area for them to use, rather than crowding the attic or roof space. Since it’s nearing warmer weather, now is the perfect time to pull out the toolbox and get this job done before summer starts. First, you have to actually remove the possum from the roof.
How to relocate a possum from your attic or roof
To relocate a possum from your attic, first locate the access hole. After dark, access the attic, then locate and remove the possum’s nest. To make your attic less favourable, sprinkle quassia chips or spray possum repellent around the attic, then install a bright light and leave it on for 3 days and 3 nights.
Place the possum’s nest in its new box and install it on an evergreen tree, at least 4m high, in a spot that’s leafy, secure and protected from strong winds. Now watch and wait! Once you are confident that your possum has moved home, block up the access hole to the attic with chicken wire.
Do possum boxes really work?
We asked the BHG community on Facebook if they’ve had a possum move into their home. Unsurprisingly, there were lots of answers. While many have no issues with the furry friends moving in, others had some success using a possum box.
As one commenter wrote, “Installed a possum nest box in a tree in our garden, placed some fruit on top, waited until dark when the possum had left our roof for the night, then blocked up the hole it was using for access.
“Around 3 in the morning, Poss tried to get back in, but we ignored it. After that, no more problems as the possum took up residence in the box we provided.”
Others shared similar advice, with one person saying: “Put up a Possum box in a tree in your yard. Don’t relocate; they are territorial.”
How to build a possum box
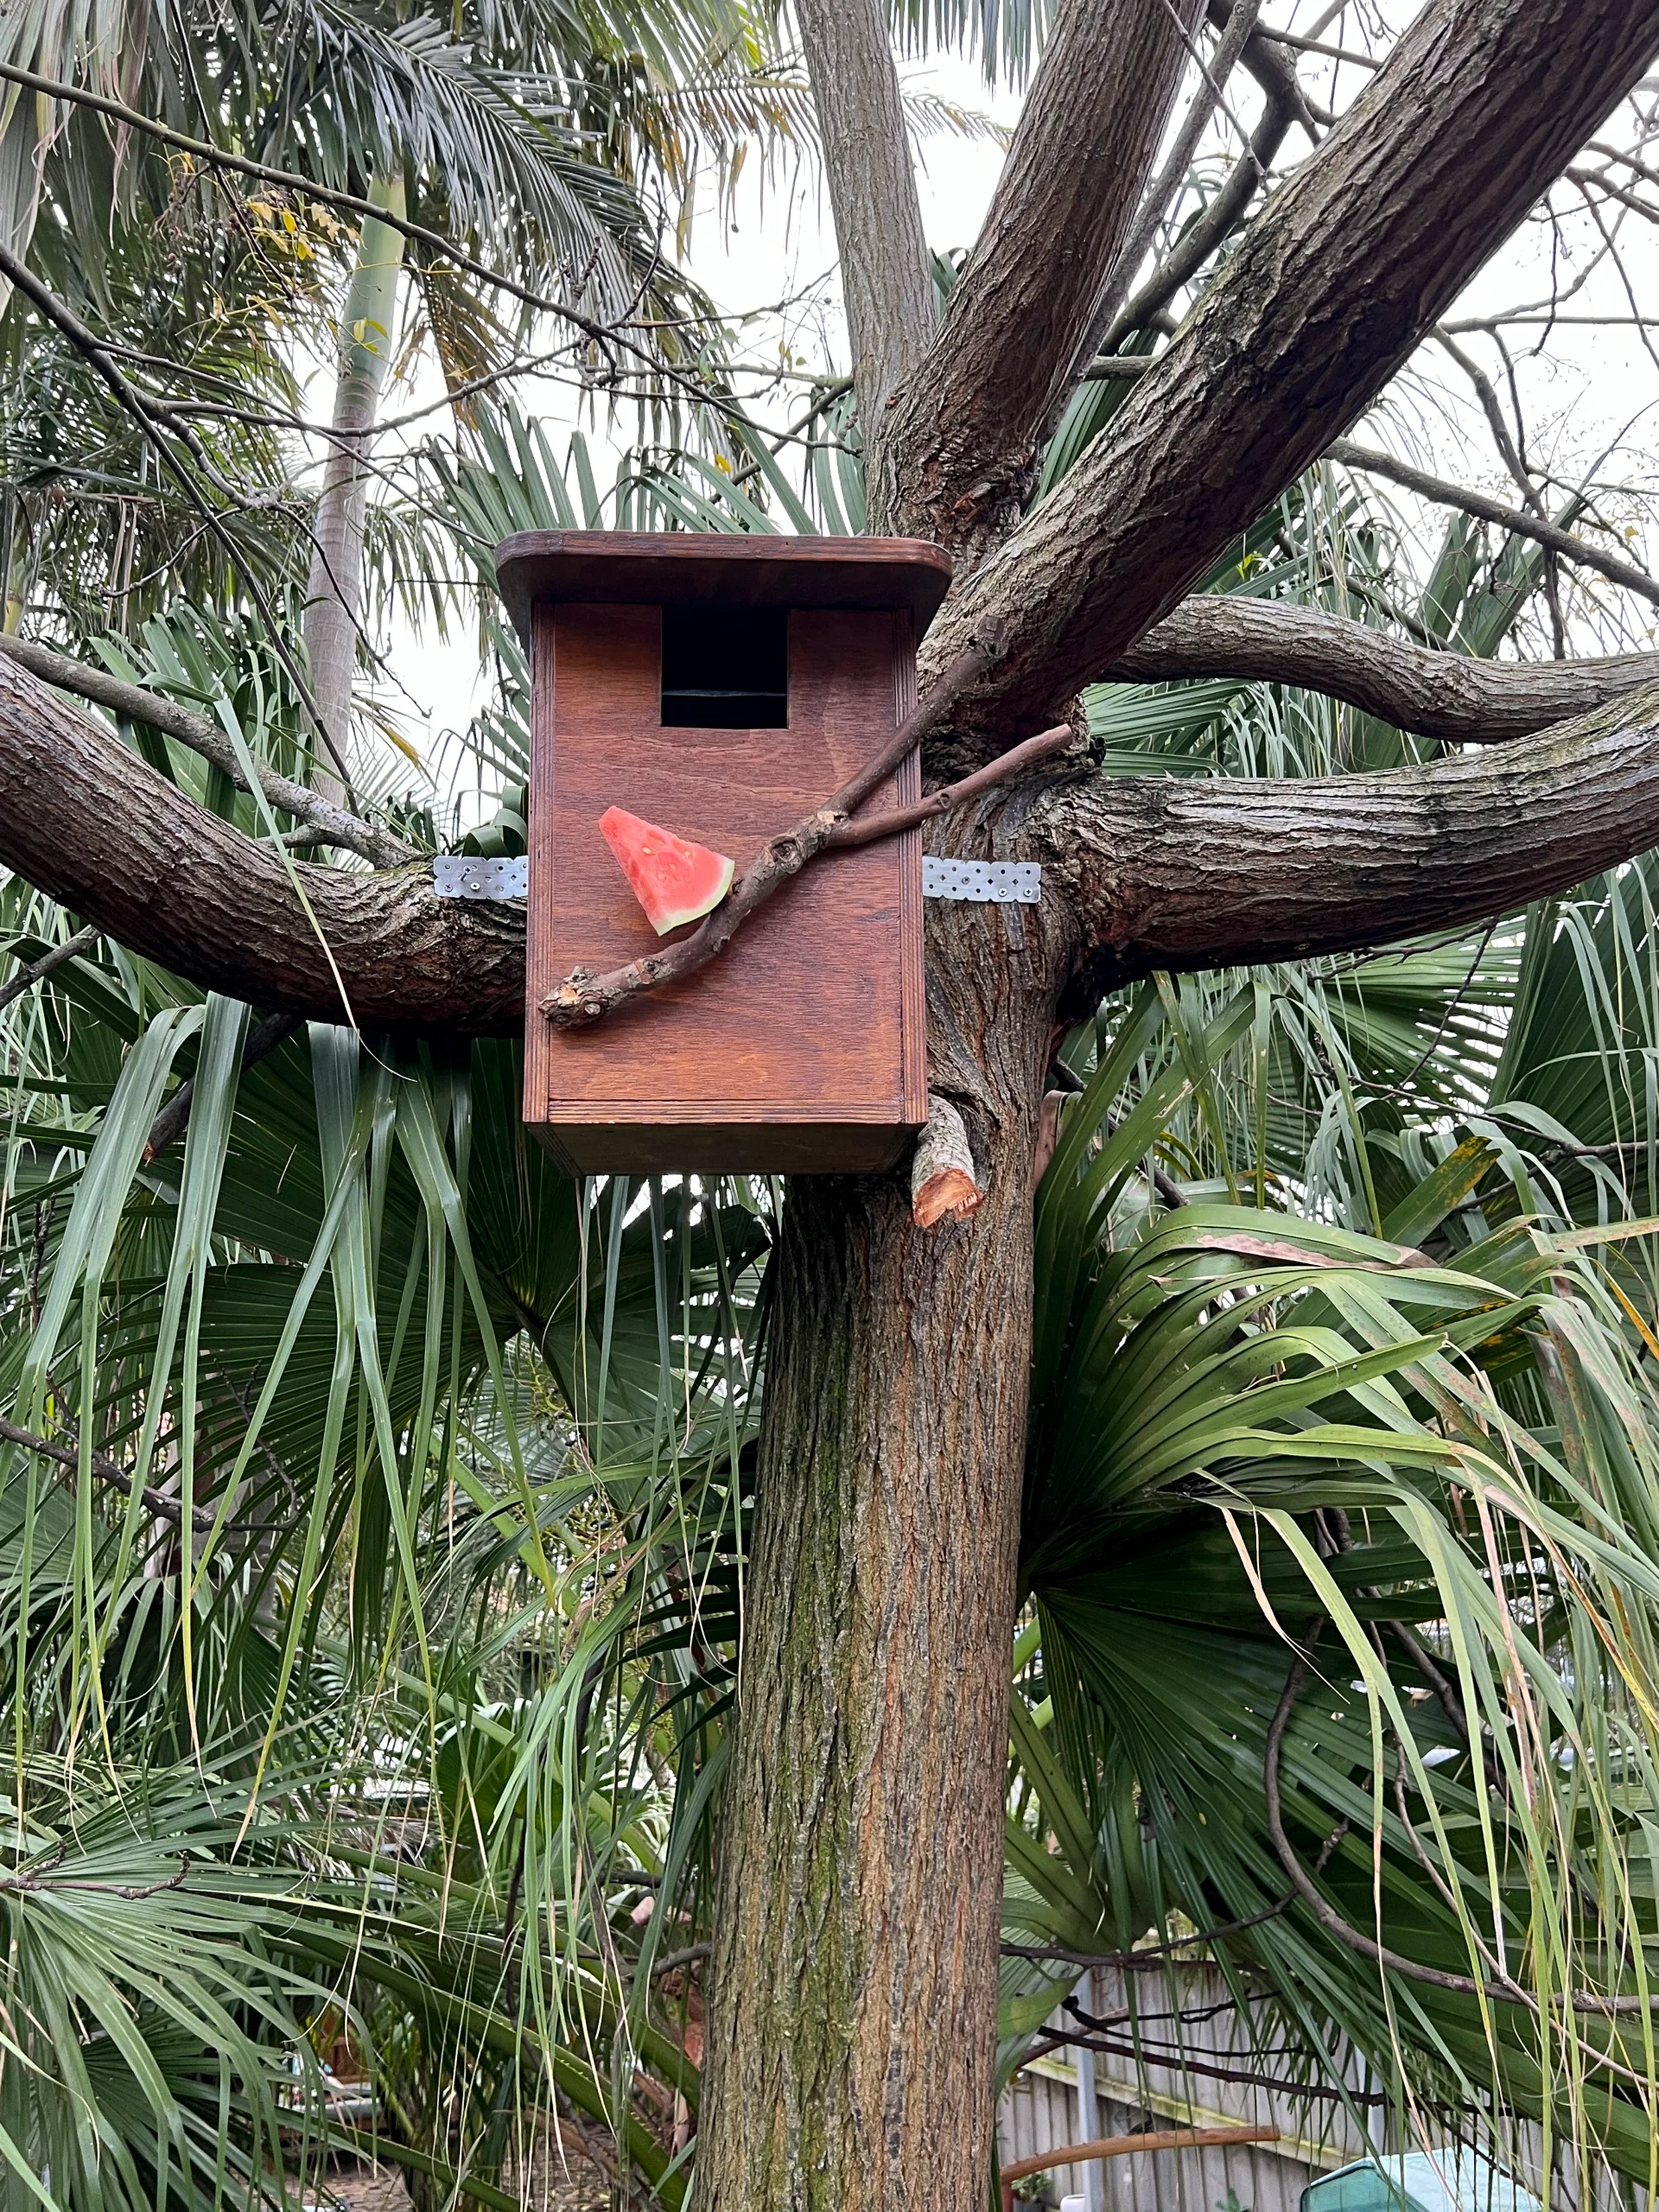
Gather your supplies
- 2440 x 1220 x 18mm marine plywood
- 50mm exterior screws
- Stainless steel hinges (2)
- Small branch
- 40 x 600mm zinc mending bracket (mounting strip)
When operating power tools, wear safety glasses, a mask, earmuffs, and tie your hair back. When appropriate, wear gloves and protective clothing.
Safety notes
You’ll also need
- Tape measure
- Combination square
- Pencil
- Track saw
- Jigsaw
- 80-grit sandpaper
- 1 L paint tin
- Drill
- 10mm drill bit
- 8g countersink drill bit
- PVA glue
- Clamps
- 15mm galvanised screws
- Wood filler
- Scraper
- Leftover water-based decking paint
- Paintbrush
- Wooden dowel
- Fruit slice
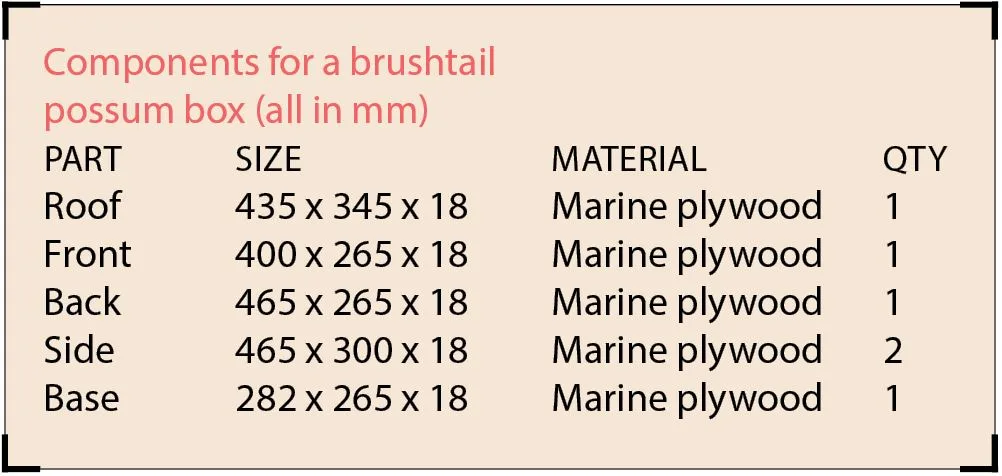
Components for a brushtail possum box (all in mm)
Step 1
Measure, mark and cut all components with a tape measure, combination square, pencil and track saw.
Step 2
To create an entrance hole, use a combination square and pencil to measure and mark a 100mm square at the centre of the short edge of the Front panel. With a drill and a 10 mm bit, drill a hole just within the marked line.
Step 3
Cut along a vertical lines of square entrance hole, then insert jigsaw blade into drilled hole and cut into the square corners. Set aside.
Step 4
To create a sloping roof for water runoff, measure and mark 45mm from one top corner on a Side panel. Then with a combination square, draw a line from the marked point to the opposite top corner. Repeat for the second Side.



Step 5
Draw drill lines on side – 9mm from bottom edge and both side edges. Predrill countersink drill holes every 100mm along the marked drill line. Repeat on second Side so panel holes are mirrored to represent a right and left Side panel.
Step 6
Repeat Step 5 to create drill lines and assembly holes for bottom edge of Back panel, and front edge of Base panel. With the 10mm drill bit, drill 5 holes in Base to allow for drainage.
Step 7
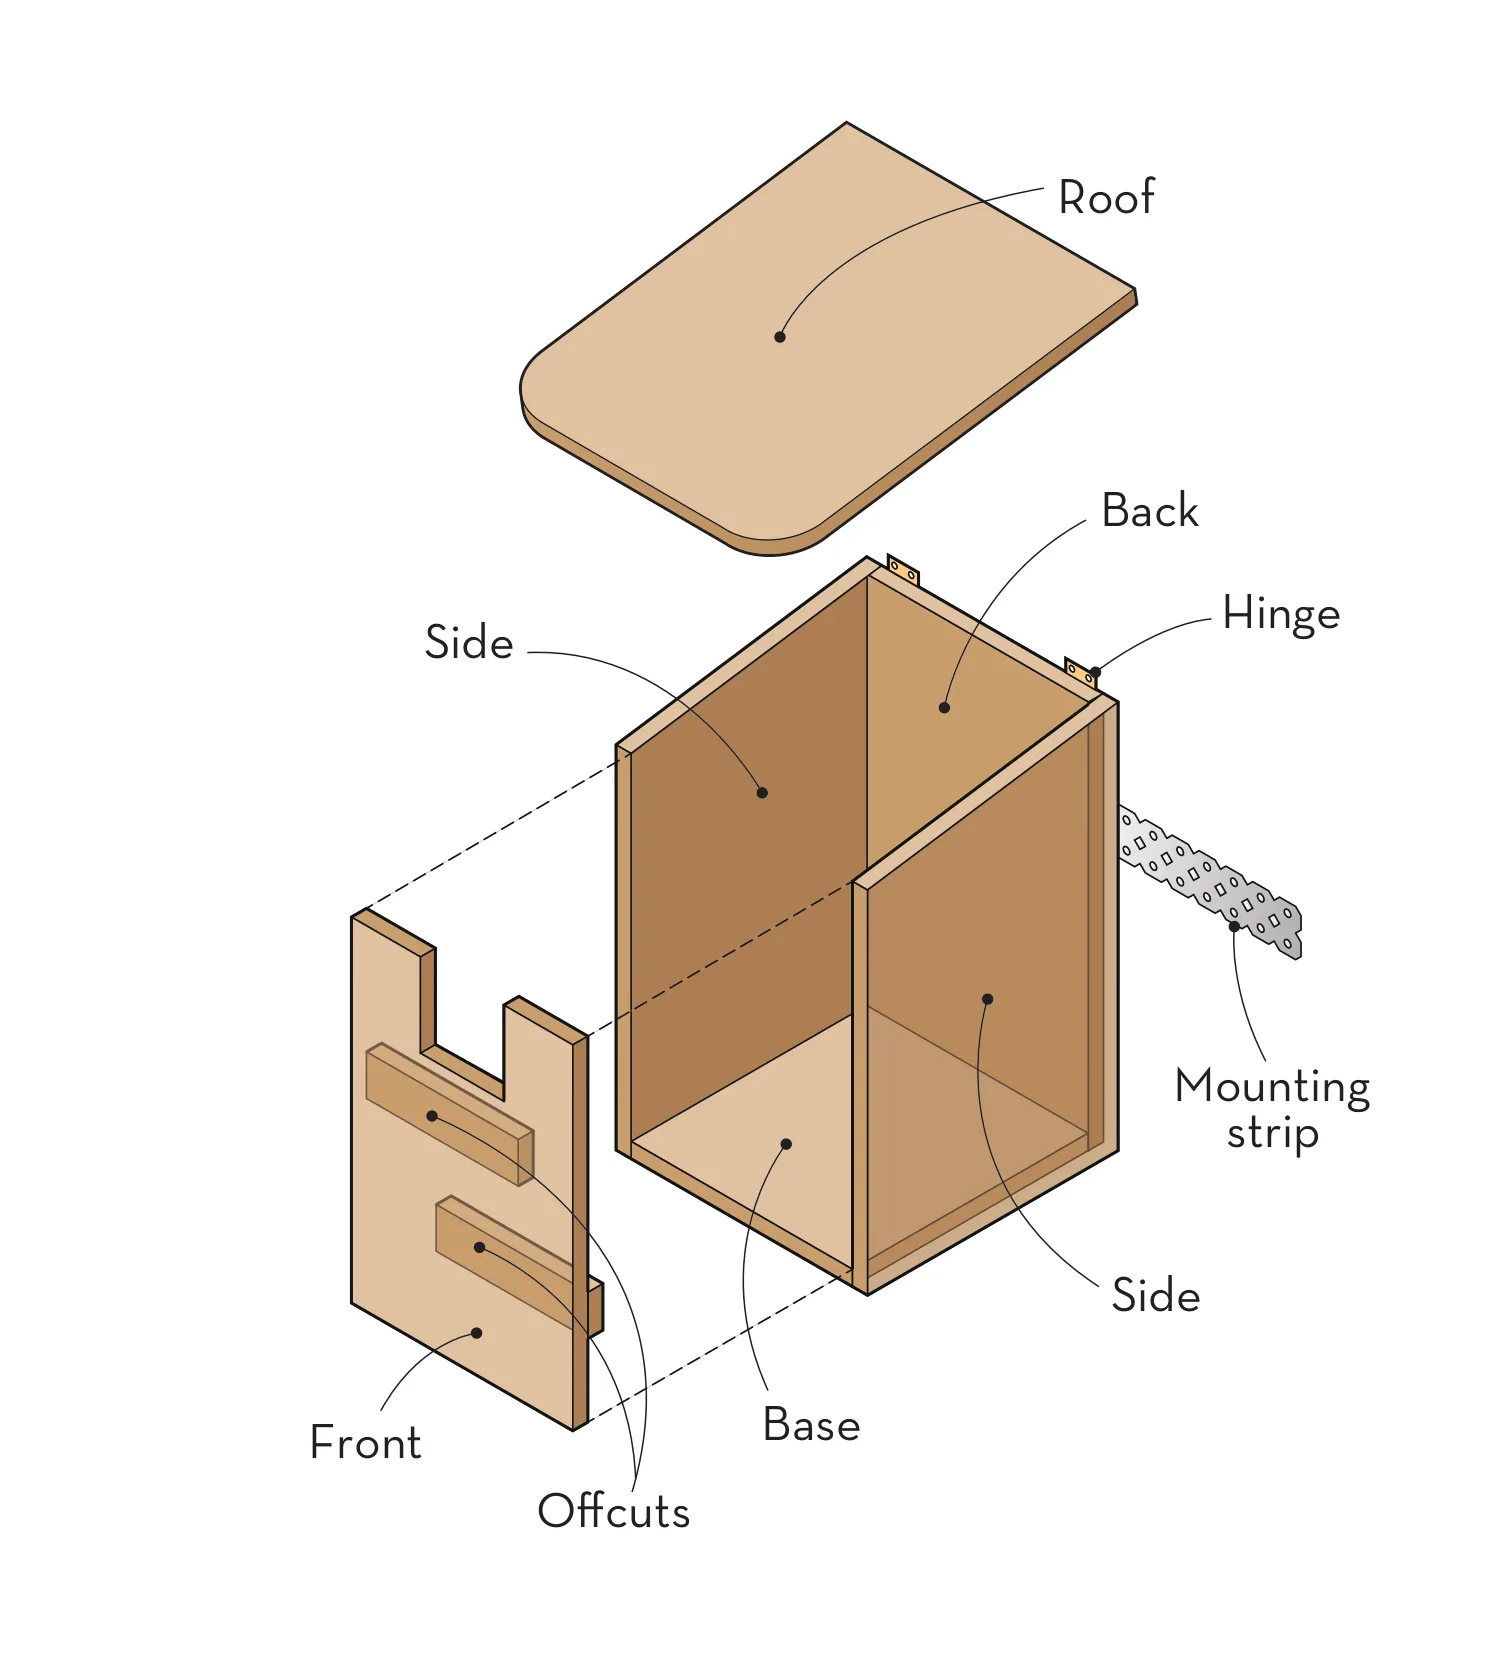
Refer to assembly diagram to attach Side to Back panel. Line up components with a butt joint and predrill through assembly hole and into adjoining panel. Insert and tighten screws with drill. Repeat for opposite side, then repeat to attach Front and Base panels.
Step 8
To curve front edges of Roof, line up 1L paint tin on both front corners, draw around edge of tin with pencil then use jigsaw to cut curves then sand sawn edges.
Step 9
To attach hinges to Back panel, line up hinges 20mm from top edge and mark assembly holes on Back. Predrill assembly holes and attach hinges with 15mm screws. Position Roof on top of box so it equally overlaps Sides and Back edges. Mark hinge holes on underside of roof, then predrill, insert and tighten screws.
Step 10
Patch all screw holes with wood filler and a scraper then allow to set and sand smooth. Wipe away dust. Apply 2 coats decking stain to exterior of box only. Do not paint around the entrance hole or the inside of the box.
Step 11
To attach the mending bracket (Mounting strip) to the back of the box, centre bracket across box and about one-third of the way down from top edge. Predrill through bracket holes and into end of Sides, insert 50mm screws and tighten to secure.
Step 12
Drill 2 holes through branch, insert and tighten screws to attach to the front panel. Use a dowel as a ‘hook’ for fruit to coax your possum friend.
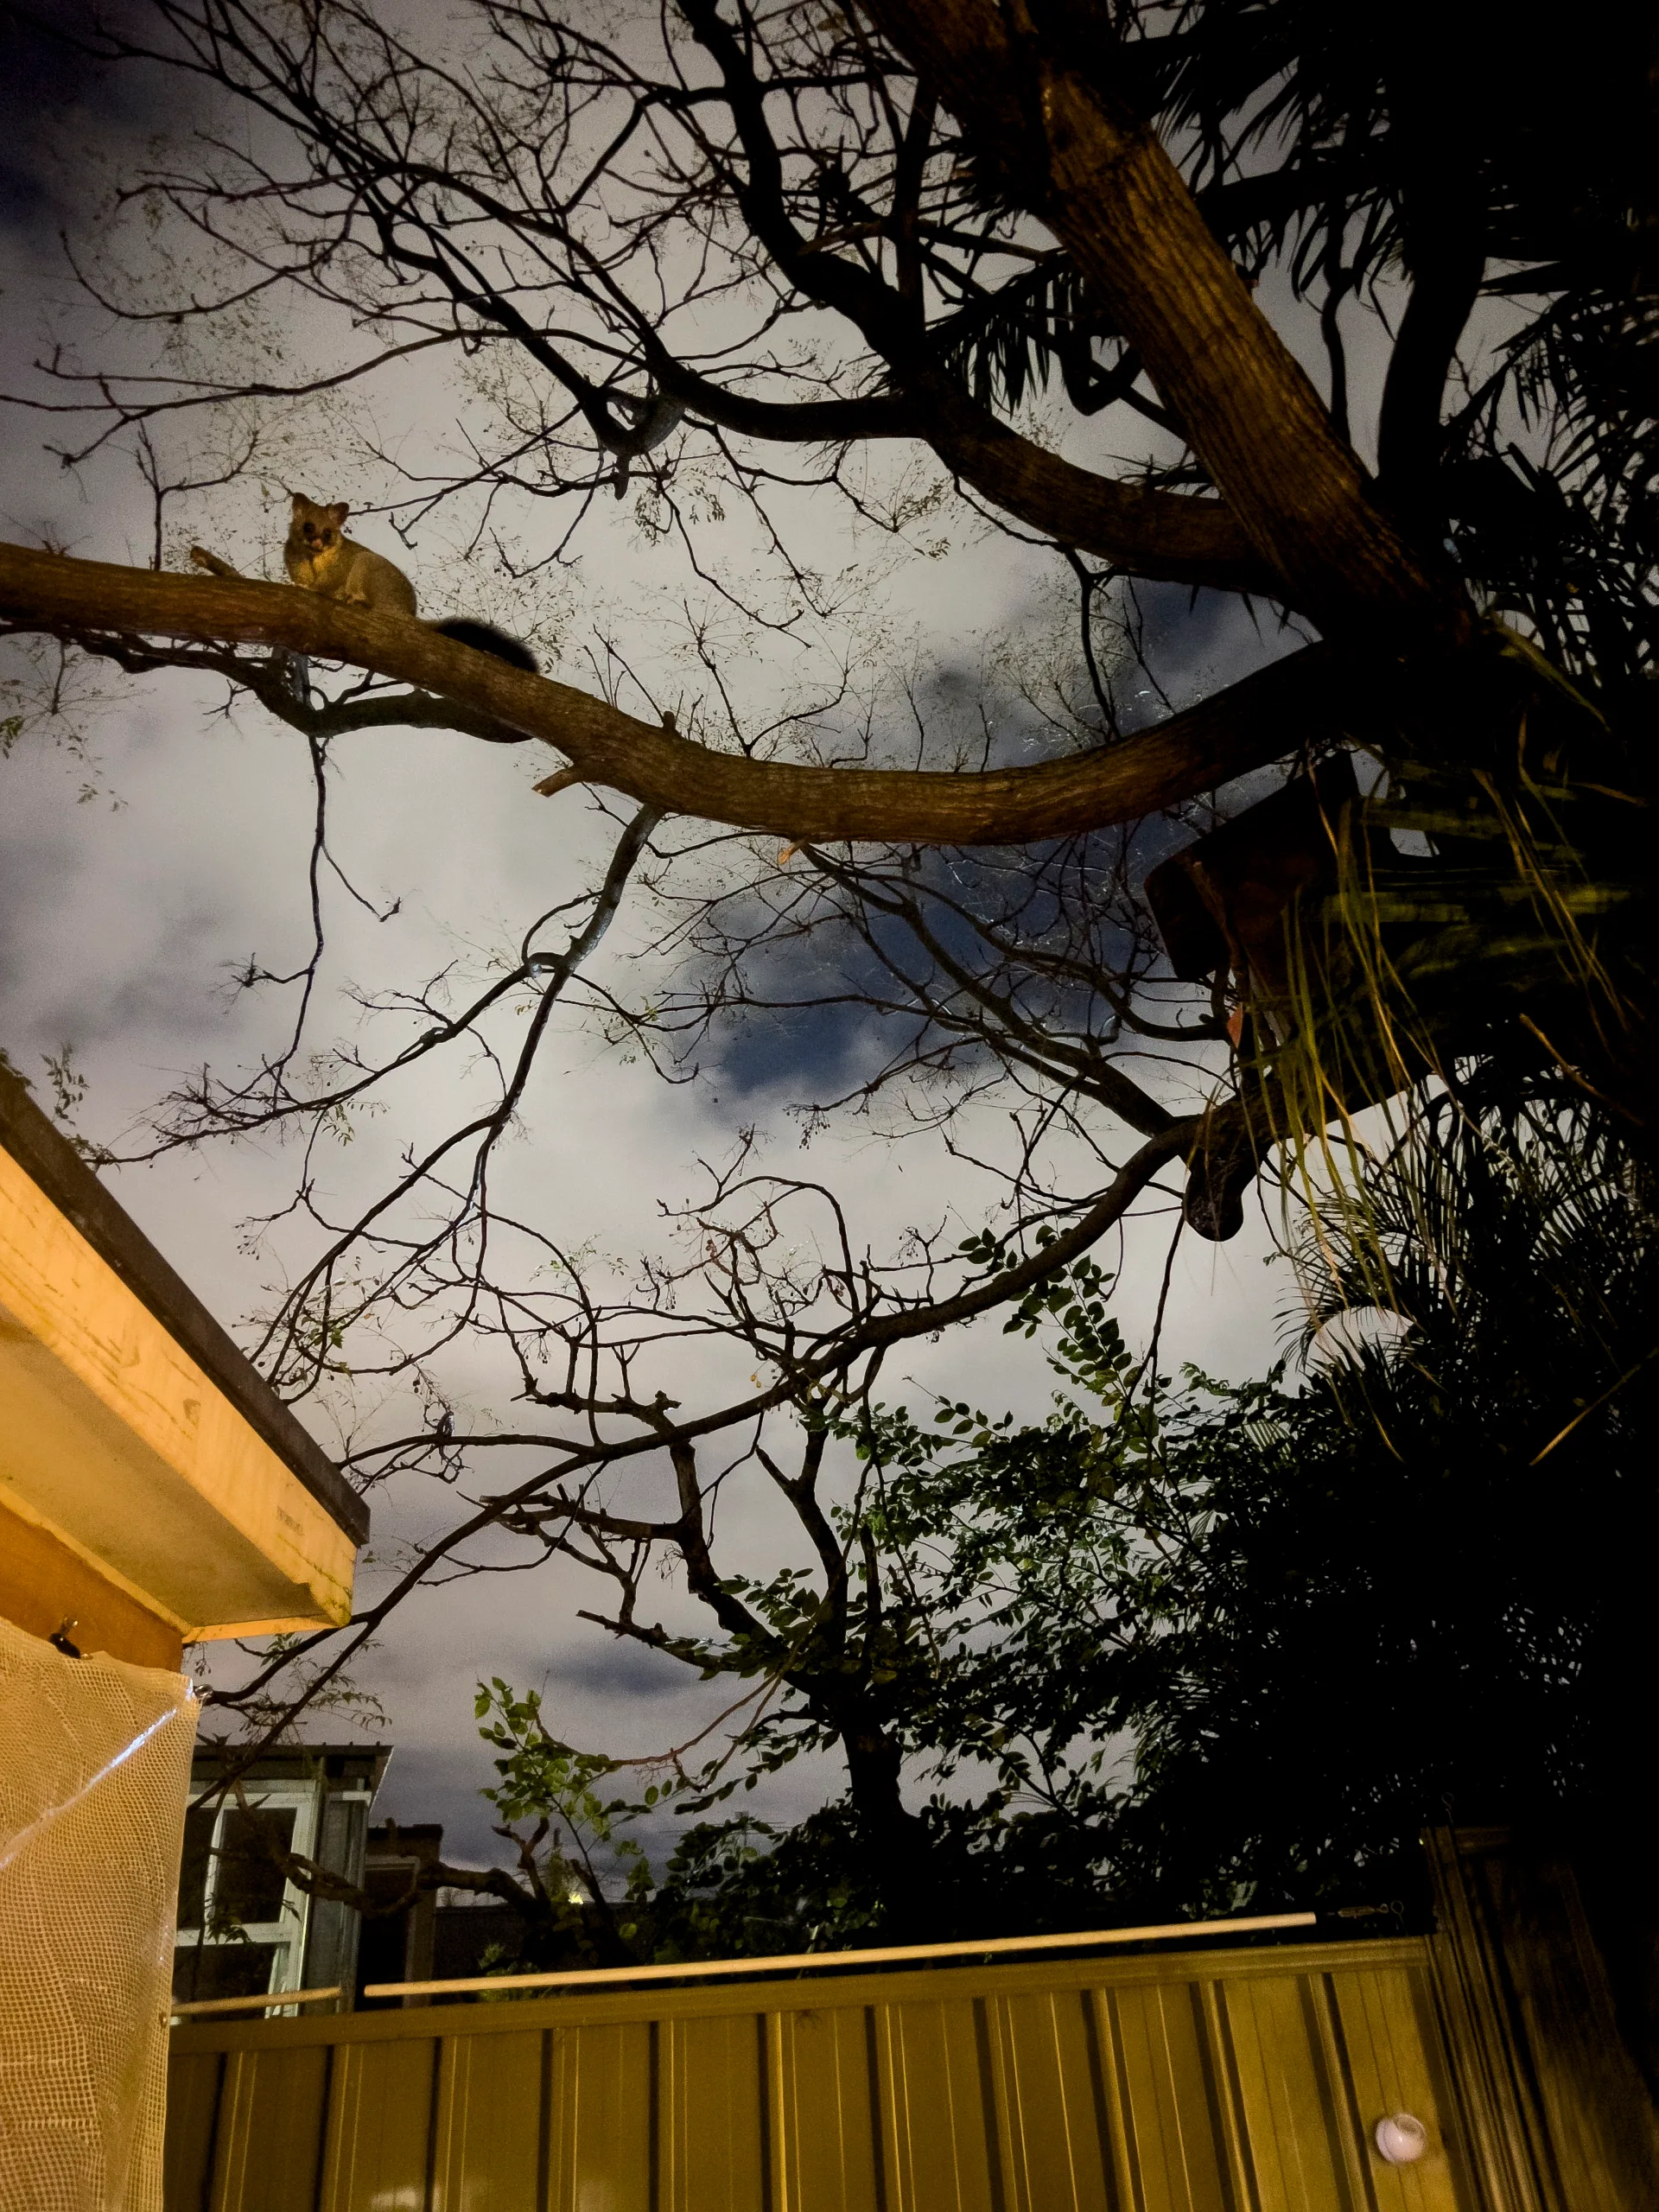
Where should a possum box be placed?
A possum box should be placed above the ground, ideally 4 metres up. This provides protection and privacy from pests. The box should not be directed towards windy areas or face the afternoon sun.
How to attract a possum into a possum box?
The best way to attract a possum to a possum box is by making it inviting and cosy for them. Having natural materials like twigs and leaves at the bottom of the box can help them stay comfortable. A piece of fruit or native flower outside of the box may entice them to check it out as well.

To make the possum box feel comforting and inviting, leave some natural materials like sticks and leaves, as well as anything else they had in their nest.
For a common brushtail possum, boxes should be installed 3–5 metres above the ground.

